Top Page: Action Group, Go to Sub Page
In the previous section, we created a table that displays the details of each customer in a separate table row. When the end user clicks on any customer detail (say name or city), we want to display that customer's current orders. We plan to do this by creating a sub page that will filter all current orders to display only those of the selected customer. When the end user selects a customer in the top page, the selection will be conveyed to the sub page via the shared $XML1 page source. In the sub page, the selected-customer data is used in the Visible property of the table row group to filter the orders. We need therefore to do the following when the end user makes a selection by clicking a customer-detail label:
•Convey customer details of the clicked label to the $XML1 tree (which is shared between top page and sub page).
•Go to the sub page, which will show the orders of the selected customer.
These are the actions that will need to be performed when any of the labels in a customer row is clicked. Since the same sequence of actions must be executed for each label, we can save the sequence of actions in a common action group, and then assign this action group to each label's OnLabelClicked event. Before we define the sequence of actions we need to create the sub page that the Go to Subpage action will target.
Create the sub page
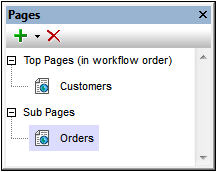
Click any item in the Pages Pane and select Add Sub Page. Rename the added sub page to Orders (see screenshot below). You can double-click the name of the sub page to edit it.
Create the action group
We will create an action group consisting of the following actions:
•Two Update Node actions to update the two nodes of the $XML1 page source.
•A Go to Subpage action to go to the Orders sub page.
After we create the action group, we can assign it to the OnLabelClicked event of each of the four table-body-row labels. At runtime, the action sequence will be executed when the end user clicks the label of any customer detail.
Create the action group as follows:
1.Right-click any of the four table-body-row labels and select Control Actions for OnLabelClicked.
2.In the Actions dialog that appears, in the right-hand Action Groups pane, click the Add a Group button.
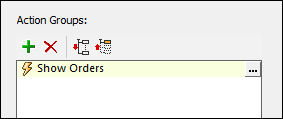
3.Rename the added group to Show Orders (screenshot below; you can double-click the name to edit it in the Action Groups dialog).
4.Click the Additional Dialog button of Show Orders to display the Action Groups dialog (screenshot below).
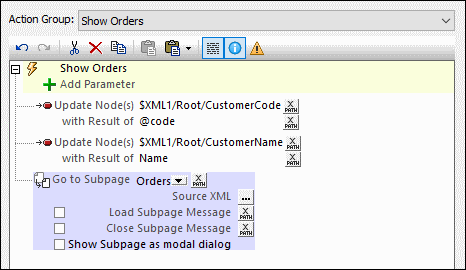
5.Define the two Update Node actions and the Go to Subpage action as shown in the screenshot below, taking care to enter the XPath expressions exactly as shown. For the Go to Subpage action, select the Orders sub page from the dropdown list of the combo box.
6.Click OK when done.
We have set the following updates: (i) the $XML1//CustomerCode element will be updated with the Customer/@code value of the selected customer (from Customers.xml), and (ii) the $XML1//CustomerName element will be updated with the Customer/Name value of the selected customer (from Customers.xml).
Assign the action group to events
We now need to specify that the Show Orders action group is executed when a label is clicked. Do this as follows.
1.Right-click the Name label of the first column of the table-body row, and select Control Actions for OnLabelClicked.
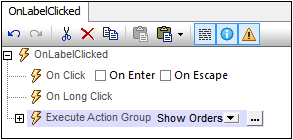
2.In the Actions dialog that appears, drag the Show Orders action group and drop it below the On Long Click event as shown in the screenshot below. Click OK to finish.
3.Repeat Step 2 for each of the three other labels of the table-body row. This ensures that the Show Orders sequence of actions will be executed when any of the four labels of a row is clicked.