Toolbars
Application toolbars contain icons for the most frequently used menu commands. Information about each icon is displayed in a tooltip and in the Status Bar when the cursor is placed over the icon. You can drag a toolbar to any location on the screen, where it will appear as a floating window.
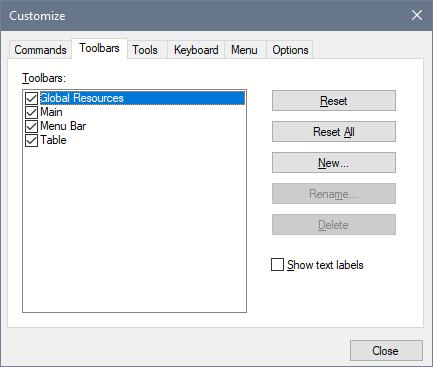
The Toolbars tab enables you to do the following:
•Activate or deactivate specific toolbars (that is, to decide which ones to display in the interface)
•Set what icons are displayed in each toolbar
•Create your own specialized toolbars
The following functionality is available:
•To activate or deactivate a toolbar: Click its check box in the Toolbars list box.
•To add a new toolbar: Click the New button and give the toolbar a name in the Toolbar Name dialog that pops up. From the Commands tab drag commands into the new toolbar.
•To change the name of an added toolbar: Select the added toolbar in the Toolbars pane, click the Rename button, and edit the name in the Toolbar Name dialog that pops up.
•To reset the Menu bar: Select the Menu Bar item in the Toolbars pane, and then click Reset. This resets the Menu bar to the state it was in when the application was installed.
•To reset all toolbar and menu commands: Click the Reset All button. This resets all toolbars and menus to the states they were in when the application was installed.
•To delete a toolbar: Select the toolbar you wish to delete in the Toolbars pane and click Delete.
•To show text labels of commands in a particular toolbar: Select that toolbar and click the Show Text Labels check box. Note that text labels have to be activated for each toolbar separately.
Note: To add a command to a toolbar, drag the command you want from the Commands list box in the Commands tab to the toolbar. To delete a command from a toolbar, open the Customize dialog, and with any tab selected, drag the command out of the toolbar (see Commands for more details).