Run a Simulation
You can run a simulation of the project workflow directly within MobileTogether Designer. The simulation device will be the device currently selected in the preview device combo box of the Main toolbar. You can change the preview device to see the simulation on different devices. To run the simulation, select Run | Simulate Workflow or F5. This opens the simulator and starts the simulation.

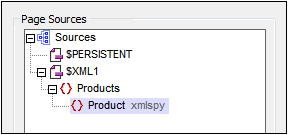
The XMLSpy splash screen is displayed because the default value of Product was set to xmlspy. You can see this in the Page Sources pane on the right if you expand the $XML1 node (screenshot below).
Now, in the simulation, click the combo box to display its dropdown list (screenshot below).
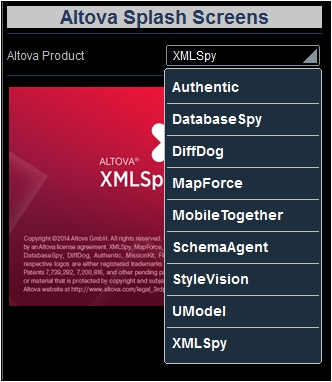
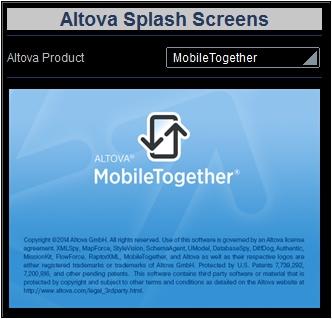
Select a product from the list and notice how the image and value of the Product node changes. (Note that, for iOS devices, you will need to press Set to confirm selections.)
After you have finished, click Close or press Esc to close the simulator.
Running a server simulation
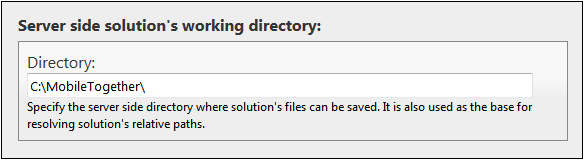
A server simulation uses MobileTogether Server to run the simulation (Run | Use Server for Workflow Simulation). In the Web UI of MobileTogether Server, you must set the solution's working directory (Settings | Server Side Solution's Working Directory, see screenshot below). All relative paths in the design will be resolved relative to the directory specified in this setting. In order for server simulation to work correctly, enter the path of the directory where your referenced files are saved. The directory setting shown in the screenshot (C:\MobileTogether\) means that both the design and image files must be in the folder C:\MobileTogether\ (since the relative image URLs in the design indicate that the image files are to be found in the same directory as the design).