XULE Window
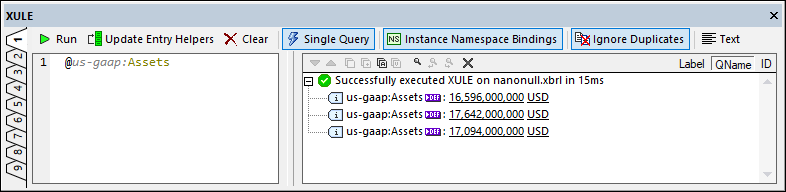
The XULE Window (screenshot below) is an Output Window. It enables you to interactively query the active XBRL instance document, and see the results of your query.
The XULE Window is located by default below the Main Window at the bottom of the XMLSpy GUI. It has nine tabs, each of which is divided into two panes: (i) a XULE expression pane, where you enter the XULE expression (or XULE rule) that you want to execute on the active document; and (ii) a Results pane, which displays the result of the execution.
To interactively execute a XULE expression on the active XBRL instance document, do the following:
1.Make the XBRL instance document that you want to query the active document in the Main Window.
2.Enter the XULE expression in the XULE expression pane (left pane). Editing features of the expression pane include syntax-coloring and auto-completion.
3.Click Run in the window's toolbar to execute the expression
4.The results of the execution are displayed in the Results pane (right pane). You can click a link in the results to go to the respective node in the XBRL instance document.
Note: Syntax coloring for XULE can be customized in the Options dialog (in the Fonts and Colors | Text View section). For information about auto-completion, see the description of the Update Entry Helpers toolbar command below.
Toolbar: commands and options
The toolbar of the XULE Window provides commands and useful options for creating and executing XULE expressions. They are described below.
Run
Click Run to execute the XULE expression.
Update entry helpers
The XULE expression pane provides two types of auto-completion as you type: (i) that related to XULE syntax, and (ii) that related to the structure of the active XBRL instance document. However, in order to be aware of the structure of the XBRL instance, the XULE Window must read the XBRL taxonomy that is referenced by the XBRL instance. Click Update Entry Helpers in order to silently load the taxonomy that is associated with the XBRL instance. After the taxonomy has been loaded, auto-completion related to document structure will be available, and this toolbar button (which is no longer needed for this XBRL instance document) will be disabled. Note that the taxonomy is also read every time you click Run.
Clear
Click Clear to clear the expression.
Single query
Single Query mode is a feature that is specific to the XMLSpy's XULE Window. It enables you: (i) to enter an expression without the output keyword and as a single query, and (ii) to generate the result as a single output. Valid XULE syntax requires the output keyword, but if you want to interactively and quickly query the XBRL document, it is advantageous to be able to type a single query without the output keyword.
The two screenshots below show how to use single queries and multiple queries.
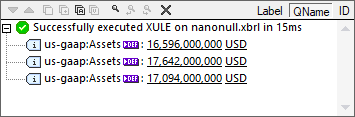
Single Query mode enabled: no 'output' keyword required.
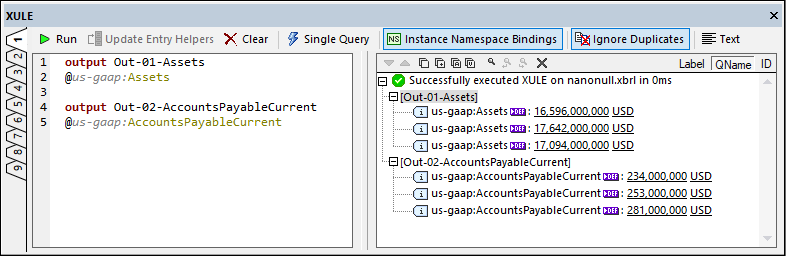
Single Query mode disabled: multiple queries with the 'output' keyword, produces multiple outputs.
Instance namespace bindings
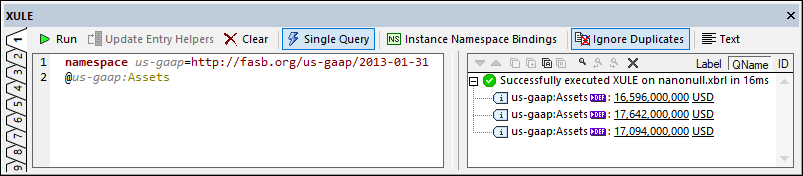
If the Instance Namespace Bindings option is selected, then you do not need to declare namespaces in the XULE query; namespace prefixes will be bound to the namespace URIs declared for them in the XBRL instance. For example, in the screenshots above, the us-gaap namespace prefix is bound to the namespace defined for it in the instance document. On the other hand, if the Instance Namespace Bindings option is deselected, then you must declare namespaces in the XULE query (with the namespaces keyword, as shown in the screenshot below).
This option is useful because it saves you having to fill the XULE query with namespace declarations.
Ignore duplicates
A duplicate fact occurs—most commonly in Inline XBRL—when the same fact is noted more than once in the HTML code. The Ignore Duplicates option specifies that the duplicated fact is output only once.
Text
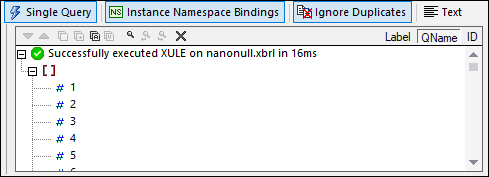
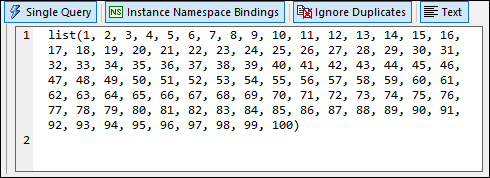
The Text option toggles the output in the Results pane between text and tree outputs. For example, the screenshots below show the outputs in tree form (left) and text form (right). The query is: list(for $i in range(100) $i).
The Results pane
Results can be shown with their labels, QNames, or IDs. Select the option you want in the toolbar of the Results pane, either before or after executing the query. The screenshot below shows the results with labels (left) and QNames (right).

The toolbar of the Results pane contains icons that provide navigation, search, and copy functionality. These icons, starting from the left, are described in the table below. The corresponding commands are also available in the context menu of result list items.
Icon | What it does |
Next, Previous | Selects, respectively, the next and previous item in the result list |
Copy selected message | Copies the selected result item to the clipboard. |
Copy selected message including children | Copies the selected result item to the clipboard, as well as children items. Each item is copied as a separate line |
Copy all messages | Copies all result items to the clipboard. |
Copy value of selected line to the clipboard | Copies only the value of the selected result item to the clipboard. |
Find | Opens a Find dialog to search for any string in the results |
Find previous | Finds the previous occurrence of the term that was last entered in the Find dialog |
Find next | Finds the next occurrence of the term that was last entered in the Find dialog |
Clear | Clears the result list |