Add External Web Folder to Project
This command adds a new external web folder to the current project. You can also access this command from the context-menu when you right-click a folder in the project window. Note that files contained in external folders cannot be placed under source control.
Adding an external web folder to the project
To add an external web folder to the project, do the following:
1.Select the menu option Project | Add External Web Folder to Project. This opens the Add Web Folder to Project dialog box (screenshot below).

2.Click in the Server URL field and enter the URL of the server URL. If the server is a Microsoft® SharePoint® Server, check this option. See the Folders on a Microsoft® SharePoint® Server section below for further information about working with files on this type of server.
3.If the server is password-protected, enter your User ID and password in the User and Password fields.
4.Click Browse to connect to the server and view the available folders.

5.Click the folder you want to add to the project view. The Open button only becomes active once you do this. The URL of the folder now appears in the File URL field.
6.Click Open to add the folder to the project.
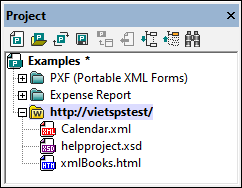
7.Click the plus icon to view the folder contents.
Filtering folder contents
To filter the contents of a folder, right-click the folder and select Properties from the context menu. In the Properties dialog that pops up, click in the File Extensions field and enter the file extensions of the file types you want to see (for example, XML and XSD files). Separate each file type with a semicolon (for example: xml; xsd; sps). The Project window will now show that folder only with files having the specified extension.
Validating and checking a folder for well-formedness
To check the files in a folder for well-formedness or to validate them, select the folder and then click the menu command XML | Check well-formedness or XML | Validate XML icon (hotkey F7 or F8, respectively). All the files that are visible in the folder are checked. If a file is malformed or invalid, then this file is opened in the main window, allowing you to edit it. Correct the error and restart the process to recheck the rest of the folder. Note that you can select discontinuous files in the folder by holding Ctrl and clicking the files singly. Only these files are then checked when you press F7 or F8.
Updating the contents of the project folder
Files may be added or deleted from the web folder at any time. To update the folder view, right-click the external folder and select the context menu option Refresh.
Deleting folders and files
Since it is the Web folder that has been added to the project, it is only the Web folder (and not files within it) that can be deleted from the project. You can delete a Web folder from a project, by either (i) right-clicking the folder and selecting Delete, or (ii) selecting the folder and pressing the Delete key. This only deletes the folder from the Project view; it does not delete anything on the web server.
Note: Right-clicking a single file and pressing the Delete key does not delete a file from the Project window. You have to delete it physically on the server and then refresh the contents of the external folder.
Folders on a Microsoft® SharePoint® Server
When a folder on a Microsoft® SharePoint® Server has been added to a project, files in the folder can be checked out and checked in via commands in the context menu of the file listing in the Project window (see screenshot below). To access these commands, right-click the file you wish to work with and select the command you want (Check Out, Check In, Undo Check Out).
The User ID and password can be saved in the properties of individual folders in the project, thereby enabling you to skip the verification process each time the server is accessed.
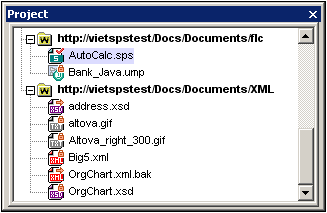
In the Project window (screenshot below), file icons have symbols that indicate the check-in/check-out of files. The various file icons are shown below:
 | Checked in. Available for check-out. |
 | Checked out by another user. Not available for check-out. |
 | Checked out locally. Can be edited and checked-in. |
The following points should be noted:
•After you check out a file, you can edit it in your Altova application and save it using File | Save (Ctrl+S).
•You can check-in the edited file via the context menu in the Project window (see screenshot above), or via the context menu that pops up when you right-click the file tab in the Main Window of your application (screenshot below).
•When a file is checked out by another user, it is not available for check out.
•When a file is checked out locally by you, you can undo the check-out with the Undo Check-Out command in the context menu. This has the effect of returning the file unchanged to the server.
•If you check out a file in one Altova application, you cannot check it out in another Altova application. The file is considered to be already checked out to you. The available commands at this point in any Altova application supporting Microsoft® SharePoint® Server will be: Check In and Undo Check Out.