Starting a Debugger Session
A SOAP Debugger session can be started when any file is active in XMLSpy; neither a SOAP file nor a SOAP-request entry-point file need to be active when the SOAP Debugger is started. On starting a SOAP Debugger session, you will be prompted for:
1.the location of the WSDL file that will be used to provide SOAP information, and
2.the connection settings.
These steps are described below.
WSDL file location
When a debugger session is started, you will be prompted for the URL of the WSDL file that will be used to provide the SOAP information. Our example file, DebuggerClient.html, uses the following WSDL file url:
http://www.nanonull.com/TimeService/TimeService.asmx?WSDL
Start the SOAP Debugger by selecting the menu command SOAP | SOAP Debugger Session. This opens the WSDL File Location dialog box (screenshot below).
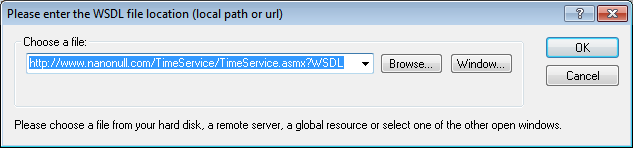
Enter the URL of the WSDL file and click OK. The Source and Target Ports dialog (screenshot below) is displayed.
Connection settings
The Connection Settings for Source and Target dialog (screenshot below) provides the settings listed below.
•Source Port: The port on a proxy server (which can be your computer) that will be used for communication. The default is 8080. This setting can be changed every time the SOAP Debugger is started.
•Target Port and Address: These settings are supplied by the WSDL file selected in the previous step; they are entered automatically in the dialog. The default port is the standard HTTP port 80. You can set a timeout for the connection or check the Infinite option for no timeout. To define HTTP security settings, click the Edit button of the HTTP Security Settings pane, and enter the security settings. For information about these settings, see the section SOAP Request Settings.

After you have checked these settings—and edited them if necessary—click OK to start the SOAP Debugger session. The SOAP Debugger starts but the proxy server is inactive (indicated by the proxy server icon ![]() in the SOAP Debugger toolbar being grayed out). To start the proxy server (the debugging), click the Go icon in the XMLSpy toolbar, or select the menu command SOAP | Go. See the section, Debugging, for more information about the actual debugging.
in the SOAP Debugger toolbar being grayed out). To start the proxy server (the debugging), click the Go icon in the XMLSpy toolbar, or select the menu command SOAP | Go. See the section, Debugging, for more information about the actual debugging.
SOAP Debugger layout
The SOAP Debugger has three windows (see screenshot below):
•a SOAP Request window,
•a SOAP Response window, and
•a SOAP Debugger Breakpoint-Settings window.
By default, the Request and Response windows are opened in the top part of the XMLSpy interface with the Breakpoint-Settings window spanned along the bottom. The screenshot below shows the default layout.

The SOAP Debugger windows can be given more screen space by hiding the XMLSpy sidebar windows (Project, Info, and Entry Helper windows). The settings for hiding/showing these windows are available in the SOAP Debugger Options dialog (accessed via the SOAP | SOAP Debugger Options menu command).
About trusted certificates
Altova products use Internet Explorer (IE) to access and manage trusted certificates of secure Web servers. Installing the certificate of a Web server in IE allows IE to access the Web server without issuing a warning or aborting the process. The basic steps to install the certificate of a secure Web server is as listed below. The steps could be more involved depending on the browser version being used.
1.In Internet Explorer 9 (or higher version), open the secure website.
2.Select File | Properties, and click the Certificates button.
3.Click Install Certificate and start the Import Certificate Wizard. (This Wizard can also be accessed via Tools | Internet Options| Content | Certificates | Import.)
4.The certificate should be placed in the Trusted Root Certification Authorities store, for which you can browse manually.
5.Finish the Wizard steps, close the Certificates and Properties dialogs respectively by clicking OK. You might need to restart Internet Explorer.