Java
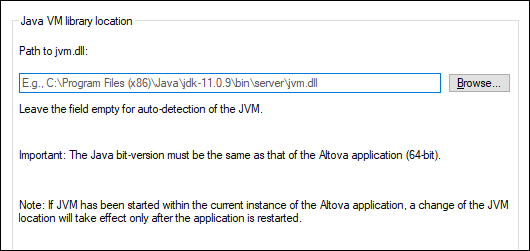
In the Java section (see screenshot below), you can optionally enter the path to a Java VM (Virtual Machine) on your file system. Note that adding a custom Java VM path is not always necessary. By default, XMLSpy attempts to detect the Java VM path automatically by reading (in this order) the Windows registry and the JAVA_HOME environment variable. The custom path added in this dialog box will take priority over any other Java VM path detected automatically.
You may need to add a custom Java VM path, for example, if you are using a Java virtual machine which does not have an installer and does not create registry entries (e.g., Oracle's OpenJDK). You might also want to set this path if you need to override, for whatever reason, any Java VM path detected automatically by XMLSpy.
Note the following:
•The Java VM path is shared between Altova desktop (not server) applications. Consequently, if you change it in one application, it will automatically apply to all other Altova applications.
•The path must point to the jvm.dll file from the \bin\server or \bin\client directory, relative to the directory where the JDK was installed.
•The XMLSpy platform (32-bit, 64-bit) must be the same as that of the JDK.
•After changing the Java VM path, you may need to restart XMLSpy for the new settings to take effect.
Changing the Java VM path affects the following areas:
•JDBC connectivity
•Java extension functions for XSLT/XPath