SchemaAgent Validation
XMLSpy, in conjunction with SchemaAgent, allows you to validate not only the currently active schema but also schemas related to the currently active schema. We call this SchemaAgent validation. There are two types of related schemas that SchemaAgent distinguishes for extended validation: (i) directly dependent schemas (directly referenced and directly referencing schemas), and (ii) all dependent schemas (in addition to direct dependencies, these include indirect dependencies,which is the set of schemas that are related to another schema via an intermediary schema.
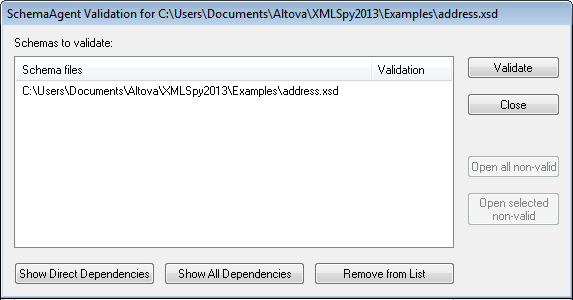
How to carry out SchemaAgent validation is demonstrated below by means of an example. This example assumes that the schema file address.xsd is the active schema in Schema View of XMLSpy. For the SchemaAgent Validation command to be enabled, make sure that the search paths on SchemaAgent Server contain the active file and some dependent files. Then do the following:
| 1. | Click the SchemaAgent Validation icon |
| 2. | To insert schemas into the list, click the Show Direct Dependencies or Show All Dependencies button as required. In this example, we have clicked the Show All Dependencies button, and this inserts all files that are directly referenced or indirectly referenced into the list. |
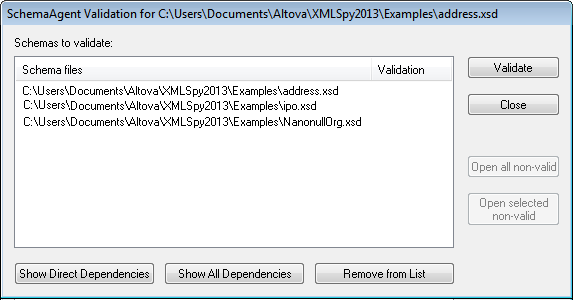
At this point, you can remove a schema from the list (Remove from List) if you wish to.
| 3. | Click the Validate button to validate all the schemas in the list box. |
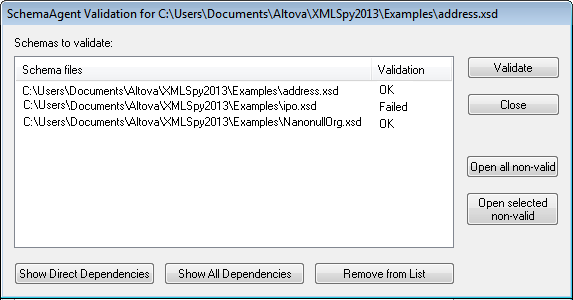
The Validate column displays whether the validation was successful or whether it failed.
You can now open all the non-valid schemas or a set of selected non-valid schemas in XMLSpy.