Add Elements to a Taxonomy
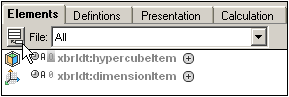
To add an element (concept) to the taxonomy, click the Add New Element icon in the Main Window (screenshot below).
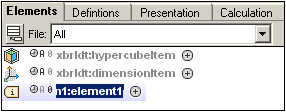
The new element with a substitution group of xbrli:item and with a default name is added to the list of elements in the display (screenshot below).
For a description of the element box, see Main Window: Elements Tab. You can now edit the properties of the element in the main window in the following ways.
•The name of the element can be changed by double-clicking the default name and entering the correct name. Note that you must also enter the correct namespace prefix for the name.
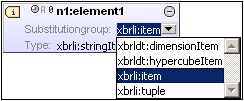
•The substitution group of the element can be changed by expanding the element box—click the arrow icon to do this—and then selecting the required substitution group from this field's dropdown list (screenshot below).
•To change the Balance, Period, Abstract, or Nillable property, click the corresponding icon to the left of the element name and select one of the options from the box that pops up.
•To add a label linkrole for the element, right-click anywhere in the element box and select the Add Label Linkrole command. A row for the label linkrole is added; in this row you can enter the label linkrole or select an option from the combo box. Note that if no label linkbase file is associated with the taxonomy, one will be created now and will be displayed in the Overview entry helper.
•A label can be added for a label linkrole by right-clicking the label linkrole and selecting the Add Label command. To enter the details of the label, either double-click in the field to be edited and enter the new value, or select the new value from the respective combo boxes. The changes you make to labels will be saved to the label linkbase when the main taxonomy file is saved.
•References are added to the reference linkbase in the same way that labels are added to the label linkbase. First, a reference linkrole is added for the element, then a reference is added for a specific reference linkrole.
Element properties can also be edited in the Details entry helper. See Entry Helpers in XBRL View for a description of how to do this.
Example file: Step 4
In this section, we will extend the US-GAAP taxonomy by creating new elements.
The first element we will create is the item nanonull:OnboardAndOther, which represents revenues from the sale of items on board Nanonull's cruise ships. This specific revenue head is not available in the US-GAAP taxonomy, which is why it must now be created as an extension of US-GAAP. As a new element created specially for the Nanonull taxonomy, it must be created in the Nanonull namespace (https://www.altova.com/nanonull), which has been declared with a prefix of nanonull. Creating the element with this prefix will put this element in the Nanonull namespace.
To create the element, do the following:
1.Click the Add New Element icon in the Main Window (screenshot below).
A new element with a substitution group of xbrli:item and with a default name is added to the list of elements in the display (screenshot below).
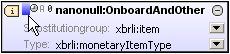
2.Double-click the element name and enter the name nanonull:OnboardAndOther (screenshot below). This creates the element OnboardAndOther in the Nanonull namespace.
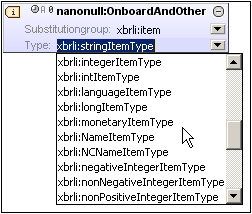
3.Expand the element box and, since the element will contain a monetary amount, change the Type attribute to xbrli:monetaryItemType (screenshot below).
4.Now click to the left of the clock icon and, from the popup that appears, select credit (screenshot below).
This sets the value of the xbrli:balance attribute to credit.
5.Click on the clock, A, and 0 icons, and set the values of the xbrli:duration, xs:abstract, and xs:nillable attributes to duration, NOT Abstract, Nillable, respectively. (In the .xsd file, the actual attribute values will be: credit, duration, false, and true, respectively.)
6.Right-click the element box and, from the menu that pops up, select Add Label Linkrole. This creates a label linkrole row at the bottom of the element box (screenshot below).
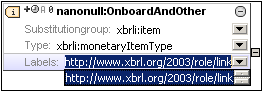
7.Select the XBRL link URI.
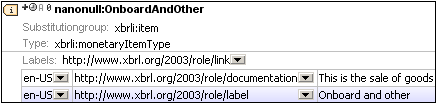
8.Right-click the label linkrole row and from the menu that pops up select Add Label. This creates a label row within the label linkrole.
9.Double-click in the language field of the newly created label row (screenshot below) and enter en-us; in the next field which is the linkrole field, select the documentation role from the dropdown list; in the label field, enter the text that should appear in documentation. Then create another label row for the label linkrole by repeating Step 9. When the display of an element has been expanded (by clicking the arrowhead to its left), the display of the label role can be switched on/off by clicking the plus/minus symbol to the right of the label (Show/Hide Labels).
The element nanonull:OnboardAndOther has now been successfully created.
Notice that OnboardAndOther had an xbrli:balance value of credit. This is because it is a revenue item: money is coming in. Since the items being sold on board will have costs attached to them, i.e. cost the company to procure, we will also create a debit-side element called nanonull:CostOfOnboardAndOther. Create this element the same way as nanonull:OnboardAndOther was created, with one difference, however: set the value of xbrli:balance to debit instead of credit.
Another cost to be included is for commissions to agents. This should be taken care of with a debit element called nanonull:CruiseCommissionsTransportationAndOther. Create this element exactly as you did nanonull:CostOfOnboardAndOther.
Finally, we add three abstract elements, Asia, Europe, and US, so that concepts can be grouped by region. Since the elements are used only for grouping purposes and will not themselves have values, they are known as abstract elements. What type such an element has is therefore immaterial. It is best to give an abstract element a type that matches its semantics. For example, we have given the abstract elements Asia, Europe, and US, a type of stringItemType. Create the nanonull:Asia, nanonull:Europe, and nanonull:USA elements just as you created the previous elements. The only difference this time will be that the value of the Abstract attribute must be set to Abstract (actual attribute value in the XSD file will be true) and there will be no xbrli:balance attribute.
Note: If an xbrli:balance attribute is present on an abstract element, this abstract element must be of type monetaryItemType, otherwise the taxonomy will be invalid. It is best to omit the optional xbrli:balance attribute from all abstract elements.
In the next step we will specify linkroles for the new taxonomy. These linkroles will be needed when we create new relationships.