Sending the Request
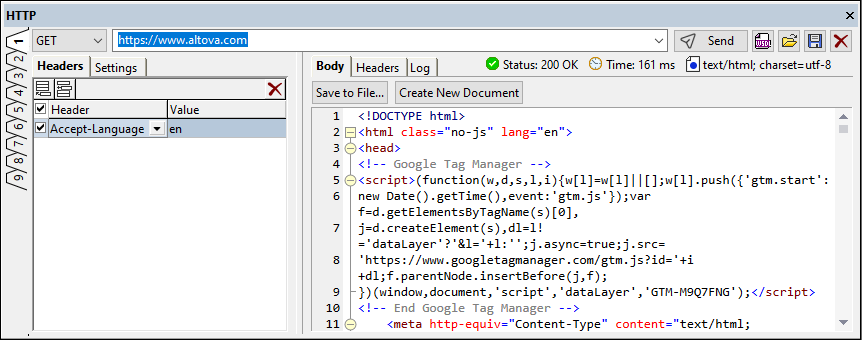
You can send an HTTP request in the HTTP output window (screenshot below). A request is defined in the left-hand pane of the window. For each of the nine tabs of the window you can define a different request, with each request consisting of: (i) the HTTP method of the request and the target URL (defined in the top part of the dialog); (ii) the HTTP headers of the request (in the Headers tab); (iii) connection settings (in the Settings tab); and (iv) in the case of the POST and PUT methods, the HTTP message body (in the Body tab; not shown in the screenshot below). You can revert a request to the empty state by clicking Reset (located at the top right of the window).
To send an HTTP request, do the following:
1.In the combo box at top left (see screenshot) select an HTTP method (GET, POST, PUT, DELETE, HEAD, or OPTIONS).
2.Enter the URL of the target web page (for example, https://www.altova.com. You can also enter just altova.com; the https:// part of the URL will be completed for you).
3.In the Headers tab, you can specify HTTP header values (see screenshot above). You can select or enter an header, and then enter its value. (For a list of HTTP 1.1 headers, see here.) Use the Insert, Append, and Delete icons in the tab's toolbar to add or delete headers. Instead of deleting a header, you can deactivate a header by unchecking the Activate check box to the left of the header's name; this will save you the trouble of having to re-enter a deleted header if you ever want to use it later. Also see the section The Accept Header. (If you set a value for any header that would be added automatically at send-time, then the value you enter will be used instead of the value that would have have been automatically added.)
4.If you are sending a POST or PUT request, a Body tab will become available in addition to the Headers and Settings tabs. How to create the body of a POST or PUT request is described in the section The body of POST and PUT requests below.
5.You can specify timeouts and security settings in the Settings tab. For a description of this tab, see Settings for the HTTP request below.
6.Click Send (located at the top right side of the window) to send the request.
7.If you wish to revert to the tab's empty state, click Reset. The following happens: (i) The method to use is reset to the first method in the dropdown list of the combo box (which is GET); (ii) the current URL entry is removed; (iii) All header, setting, and body definitions are removed.
8.You can save an HTTP request as a .http_request file. The request can subsequently loaded from this file.
| Note: | You can also (i) import a request from a WSDL or WADL file into the HTTP output window via the window's Create HTTP Request button, or (ii) load an HTTP request directly from a .http_request file. |
| Note: | The request is sent in UTF-8 encoding. Any other encoding is converted to UTF-8, and the UTF-8 data is sent. |
HTTP methods
The following HTTP methods are supported:
GET
The GET method requests the resource located at the specified URL. You can also add a query to the URL; for example: https://www.altova.com?name1=value1&name2=value2. The resource is returned in a message that contains a header and a body.
HEAD
The HEAD method is identical to the GET request, but returns no message body, only a message header containing meta information about the resource located at the specified URL.
POST
The POST method is used to update an existing resource located at the specified URL, or to create a new resource at the specified URL. The data to be submitted to the resource is placed in the body of the HTTP request; see The body of POST and PUT requests for information about how to do this.
PUT
The PUT method is used to create a new resource at the specified URL. The data to be submitted to the resource is placed in the body of the HTTP request; see The body of POST and PUT requests for information about how to do this.
DELETE
The DELETE method deletes the resource located at the specified URL.
OPTIONS
The OPTIONS method returns a list of the HTTP methods that the server supports.
The body of POST and PUT requests
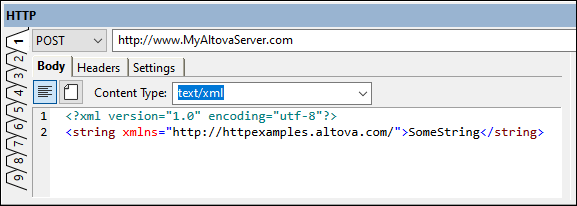
For POST and PUT requests, an additional Body tab becomes available, in which the body of the POST or PUT request can be specified (see screenshot below). The Body tab has two modes: Editor mode and File mode. You can switch between these two modes via toolbar buttons at the top left of the Body tab (see screenshot). In Editor mode (shown selected in the screenshot below), you can edit the HTTP request directly in the pane, whereas in File mode you can select a file that contains the body of the HTTP request.
The Content Type field enables you to specify the Content-Type header of the request. The combo box options of this field are different for each mode (Editor and File). You can select from the available combo box options or enter a MIME type. Note that the value specified in this field overrides any Content-Type header that might be specified in the Headers tab or Body tab.
Editor mode
The style of the editor depends on the selected content type:
•For the text/plain, text/xml, application/xml, and application/json content types: A text editor that provides intelligent editing features such as syntax coloring for XML and JSON documents and line-numbering. The screenshot above shows the editor for the text/xml content type. The body of the request is entered in the editor. The content-type of the request is specified in the Content Type field and cannot be overridden by entries elsewhere in the request.
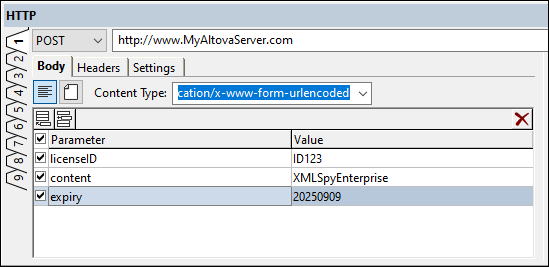
•For the application/x-www-form-urlencoded content type: The editor is a grid view (screenshot below) in which each new line represents a name–value pair in the body of the request.
File mode
In File mode (screenshot below), the body of the request will be the contents of the selected file. This file can be either the file that is currently active in the Main Window (Current file option) or an external file that can be browsed for.
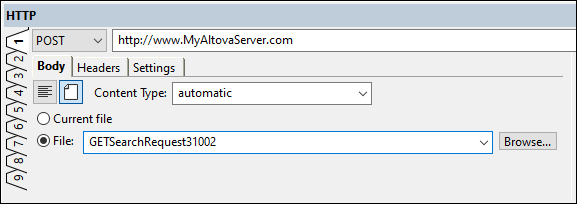
To switch to File mode, select the File icon near the top left of the Body tab (see screenshot above). To enable the content type of the body to be determined automatically, select automatic in the Content Type field. Automatic determination of the the content type is based on the file's extension. If you enter a content type, the request will be sent with the content type you enter; in this case, you must ensure that the content type is the correct one.
The headers and settings of the request can be specified in the same way as for other requests (that is, in the Headers tab and Settings tab, respectively).
Settings for the HTTP request
In the Settings tab of the HTTP output window (screenshot below) you can define (i) connection settings, (ii) proxy settings, and (iii) the security settings of a request. Note that you can define settings separately for each of the window's nine tabs. The screenshot below shows the settings for an HTTPS URL.
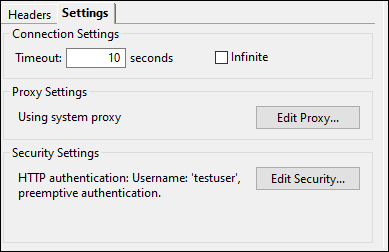
Connection Settings
You can specify the amount of time in seconds that XMLSpy will try to make a connection with the web server. If this amount of time is reached without a connection being made, then you will get I/O Error 28: Timeout was reached. If you wish to not specify a timeout period, then check the Infinite check box.
Proxy Settings
Provides a summary of the current proxy settings and a button to open the Proxy Settings section of the Options dialog.
Security Settings
Click Edit to edit the security settings of a request. The HTTP Security Settings dialog (screenshot below) will be displayed. Here you can specify HTTPS security settings and set the HTTP authentication credentials for the request being made via that tab. If the request's target web server does not use SSL, then only the HTTP authentication credentials will be used. If the target web server uses SSL, then both the HTTPS security settings as well as the HTTP authentication credentials will be used.

•HTTPS security settings: By default, the Check server certificate option will be checked, and you can specify whether the host name in the request may be different than the host name in the certificate. If you are targeting an Intranet URL (say, in your company network), then a client certificate (typically located in your local certificate store) can be used to verify a certificate on the Intranet server.
•HTTP authentication: Some requests to a server might require user authentication. For such cases, you can enter a user name and password here. Now, when authentication is required by the server, it will be supplied automatically. Otherwise, you might be prompted for it after the connection to the server is made. When the initial request to the server contains the authentication information, this process is referred to as preemptive authentication. If this is required by the server, select the Preemptive authentication option.