Macros
The Macros tab allows you to create application commands for macros that were created using XMLSpy's Scripting Editor. These application commands (which run the macros associated with them) can subsequently be made available in menus and toolbars, either from the Macros tab directly or by using the mechanisms available in the Commands tab of the Customize dialog. As application commands, they can also be assigned shortcuts in the Keyboard tab of the Customize dialog.
How macros work in XMLSpy
Macros in XMLSpy work as follows:
•Altova scripting projects (.asprj files) are created in XMLSpy's Scripting Editor. It is these scripting projects that can contain the macros used in XMLSpy.
•Two scripting projects can be active at a time in XMLSpy: (i) An application scripting project, which is specified in the Scripting section of the Options dialog, and (ii) The scripting project of the active XMLSpy project, which is specified in the Script Settings dialog (Project | Script Settings).
•The macros in these two scripting projects are available in the application: in the Tools | Macros menu (from where the macros can be run), and in the Macros tab of the Customize dialog (screenshot below), in which they can be set as application commands. After a macro has been set as an application command, the command can be placed in a menu and/or toolbar.
Creating an application command for a macro
In Scripting Editor (Tools | Scripting Editor) create the macro you wish and save it to a scripting project. Specify this file to be either the application scripting project (via the Scripting section of the Options dialog) or the active application project's scripting project (via the application project's Script Settings dialog (Project | Script Settings)). The macros in the scripting project will now appear in the Macros pane of the Macros tab (see screenshot below).
To create an application command for a macro, select the macro in the Macros pane, set the text of the command in the Display Text text box, and click Add Command (see screenshot below). A command associated with the selected macro will be added to the Associated Commands list box.
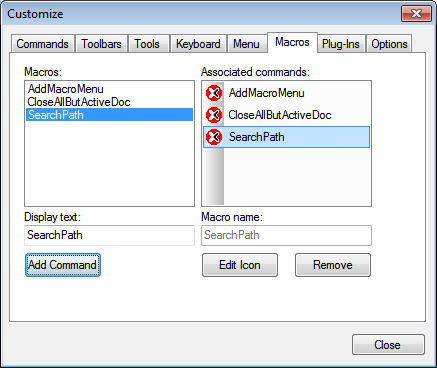
To edit the icon of an associated command, select the command and click Edit Icon. To delete an associated command, click Remove.
Placing a macro-associated command in a menu or toolbar
There are two ways to place a macro-associated command in a menu or toolbar:
•Drag the command from the Associated Commands list box to the desired location in the menu or toolbar.
•Use the mechanisms available in the Commands tab of the Customize dialog.
In either case, the command will be created at the desired location. Clicking on the command in the menu or toolbar will execute the macro.
Note: If a macro has been set as an associated command, you can set a keyboard shortcut for it. In the Keyboard tab of the Customize dialog, select Macros in the Category combo box, then select the required macro, and set the shortcut. You must set a macro as an associated command in order for it to be available to be created as a keyboard shortcut.