Entering Data in Text View
Text View presents the actual data and markup of XML files in an easy-to-follow structural layout, as well as schema-related intelligent editing features.
Document layout
The document layout of Text View is defined in two locations:
Pretty-printing options
These settings are in the Pretty-printing section of the Options dialog (screenshot below). When you set an option, its effect can be immediately seen in the preview pane at bottom. Set up the pretty-printing options as you like. While you are editing in Text View, you might find that the document's layout becomes unstructured, especially after you copy-paste blocks of text. Whenever you want to obtain a neat and hierarchical layout, simply click the Edit | Pretty Print command.

Text View settings
The Text View Settings dialog (screenshot below) not only provides additional layout options but also switches on/off useful Text View features such as line numbering and folding margins. Access the Text View Settings dialog with the View | Text View Settings command.
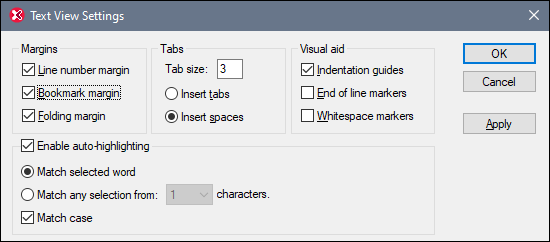
The screenshot below shows the current XML file in Text View with features switched on according to the settings in the dialog above.
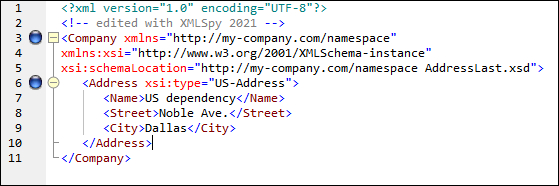
On the left are the three margins: (i) the line number margin, (ii) the bookmark margin (containing two blue bookmarks), and (iii) the source folding margin (which allows you to expand and collapse the display of XML elements). Indentation guides are the light gray vertical lines that show the indentation of tags at the same hierarchical level. Additionally visual aids are end-of-line markers and whitespace markers, which can be switched on or off in the Visual Aid pane (see screenshot above).
Note: The Text View-related pretty-printing and bookmark features were covered in the earlier Text View Settings section of this tutorial.
Editing in Text View
In this section, you will enter and edit data in Text View in order to become familiar with the features of Text View.
Note: Since the Validate on Edit feature is switched on by default, any validation error created during editing will be immediately flagged, with the error message/s being displayed in the Messages Window. Ignore these errors and messages for now. If you do not want background validation, you can switch off Validate on Edit in the Validation settings of the Options dialog. In the event you do this, note that you can always validate your document at any time (described in the next section of this tutorial).
Do the following:
1.Select the menu item View | Text View, or click on the Text tab. You now see the XML document in its text form, with syntax coloring.
2.Place the text cursor after the end tag of the Address element, and press Enter to add a new line.
3.Enter the less-than angular bracket < at this position. A dropdown list of all elements allowed at that point (according to the schema) is displayed. Since only the Person element is allowed at this point, it will be the only element displayed in the list.
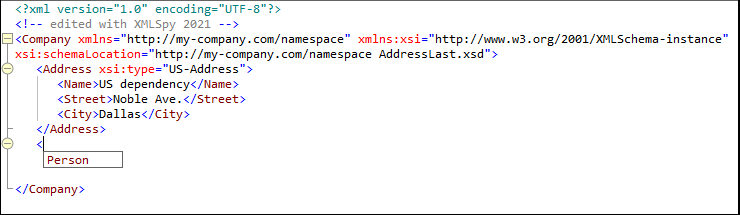
4.Select the Person entry. The Person element, as well as its attribute Manager, are inserted, with the cursor inside the value-field of the Manager attribute.
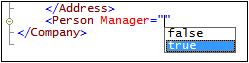
5.From the dropdown list that pops up for the Manager attribute, select true.
6.Move the cursor to the end of the line (using the End key if you like), and press the space bar. This opens a dropdown list containing a list of attributes allowed at that point. Also, in the Attributes Entry Helper, the available attributes are listed in red. The Manager attribute is grayed out because it has already been used.

7.Select Degree with the Down arrow key, and press Enter. This opens another list box, from which you can select one of the predefined enumerations (BA, MA, or PhD). (Enumerations are values that are allowed by the XML Schema.)
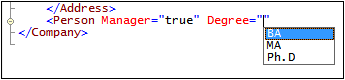
8.Select BA with the Down arrow key and confirm with Enter. Then move the cursor to the end of the line (with the End key), and press the space bar. Manager and Degree are now grayed out in the Attributes Entry Helper.

9.Select Programmer with the Down arrow key and press Enter.

10.Enter the letter "f" and press Enter.
11.Move the cursor to the end of the line (with the End key), and enter the greater-than angular bracket >. XMLSpy automatically inserts all the required child elements of Person. (Note that the optional Title element is not inserted.) Each element has start and end tags but no content.
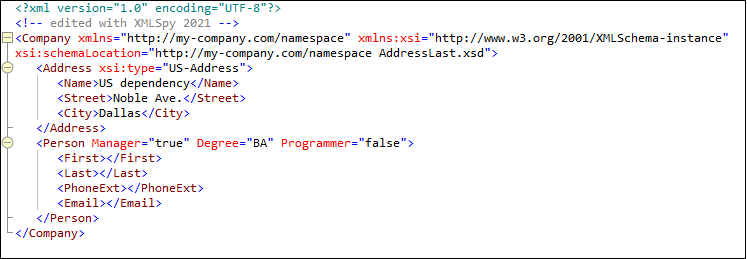
You could now enter the Person data in Text View, but let's move to Grid View to see the flexibility of moving between views when editing a document.
Switching to Grid View
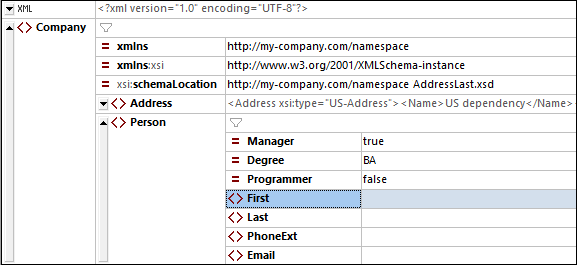
To switch to Grid View, select the menu item View | Grid View, or click the Grid tab. See how the newly added child nodes of Person are displayed.
Now let us validate the document and correct any errors that the validation finds.