Import Database Data
The Import Database Data command enables you to import data from any of a variety of databases into an XML file. The import mechanism involves two steps:
1.A connection to the database is established. For instructions, see Connecting to a Database.
2.The data to be imported is selected.
Select the import command
To import database data, do the following:
1.When you click the Import Database Data command, the Import Database Data dialog (screenshot below) appears.
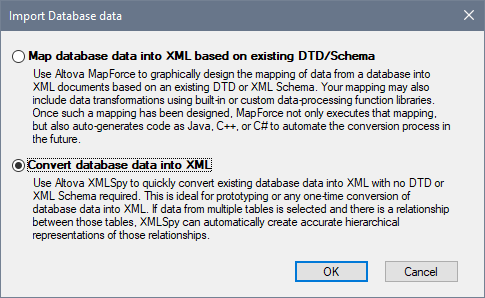
2.Select Convert Database Data into XML and click OK. (For the mapping option to work, Altova MapForce must be installed.)
3.In the Connect to Data Source dialog that appears, you establish a connection to the database. For instructions, see Connecting to a Database.
4.After the connection to the database is established, the Import Database Data dialog displays tabs and windows that enable you to select the database data to import. These options are described below. After finishing, click the Import button to import the database data as an XML document.
Data selection and import options
The Import Database Data dialog for setting the selection and import options consists of two parts (shown separately in the screenshots below):
•an upper part with two tabs: (i) Selection, and (ii) Options.
•a lower part, which is a Preview window showing the data according to the data selection and import options.

Data selection method
In the Selection tab (screenshot above), the Source pane (screenshot below) displays either a representation of the tables of the database or an editable SQL statement for selecting the required tables, each view being selected by clicking the respective radio button.
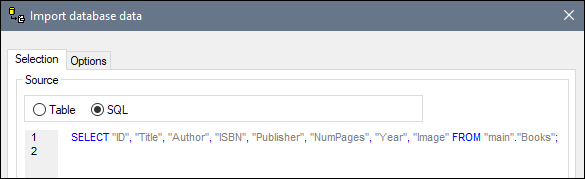
Table selection options
In the Table selection view, you can select the database tables to import by checking the table's check box (see the Table Selection screenshot above). The contents of the table can then be displayed in the Preview pane by clicking the Preview button.
The table selection view provides selection commands via icons in a toolbar (screenshot below).
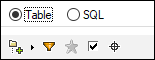
These icons are, from left:
•Folders Layout: which enables you to organize database objects into: (i) folders based on object type; (ii) folders based on object type, but without schema folders; (iii) in a hierarchy, but without folders; and (iv) categories of tables, based on their relationships with other tables.
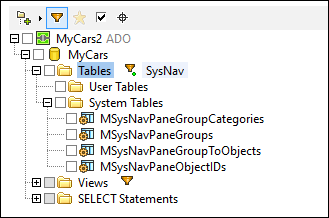
•Filter folder contents: applies a filter to the selected folder, enabling the folder's objects to be filtered. For example, in the screenshot below, a filter has been applied to display tables that contain the text SysNav in its name. Clicking the icon pops up a menu with a list of filter possibilities.
•Show favorites: Filters the objects displayed to favorites.
•Show checked objects only: Filter the objects displayed to checked objects.
•Object Locator: Displays a text field which behaves like a Search entry field. You can enter a text string and the dropdown list will display all the objects with names that contain the text string. Selecting one of these objects from the dropdown list will highlight that object in the tree.
Options tab
In the Options tab (screenshot below), you can specify how number, date, and time values are to be imported; whether data is imported as elements or attributes; and whether comments and NULL fields are to be included in the import.
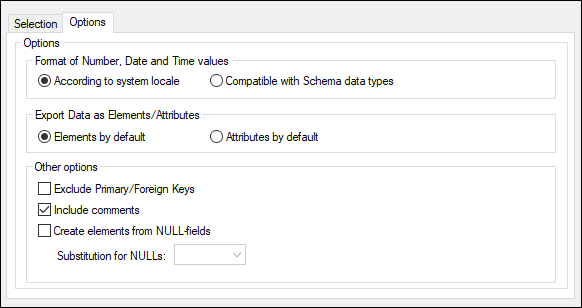
When NULL fields are enabled for import, you can enter a substitution XML value for them.
Preview pane
The Preview pane (screenshot below) displays the structure of the table currently selected in the Selection tab. When a new table is selected in the Selection tab, click the Preview button in the Preview pane to display the table. Click the Reload button to refresh the preview.
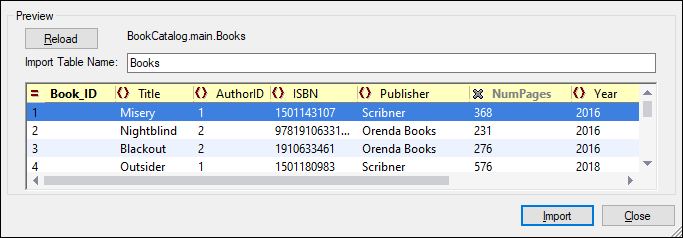
When the records are imported, each field can be imported as either an element or an attribute of the record. Alternatively, you can choose to not import a field. To specify whether a field is to be imported as an element or attribute or not imported at all, click the symbol to the left of the column name. Repeated clicks will cycle you through the three options. In the screenshot above, for example, the Book_ID field has been set to be imported as an attribute, the NumPages field to not be imported, and all other fields to be imported as elements.
Datatype conversions
Information about the conversion of database datatypes to XML Schema datatypes is listed in the Appendices.