Evaluating the Expression
The XPath/XQuery Window enables you to build an XPath or XQuery expression (in a language version that you can select; see screenshot below), and then evaluate the expression within a scope that you specify in the Where option (see screenshot). The expression can be evaluated on the current file, as well as on the following sets of multiple files: (i) all currently open documents; (ii) files of the currently active XMLSpy project; or (iii) files of a selected folder. To simply test the expression, one suitable file as the scope would be appropriate. The XPath/XQuery Window can, however, also be used to find specific data in one or more files and report these in the Results pane; in this case, select an appropriate file-set in the scope.
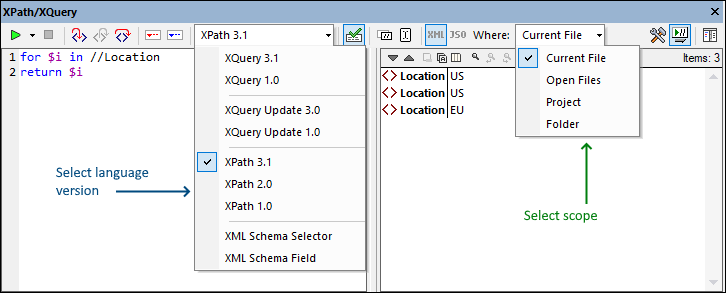
The XPath/XQuery Window comprises a toolbar and two panes—the Expression pane (at left in the screenshot above) and the Results pane (at right in the screenshot).
Evaluation procedure
To evaluate an XPath/XQuery expression, do the following (refer also to the screenshot above):
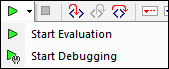
1.Select Evaluation Mode: Select Start Evaluation in the dropdown menu of the Start Evaluation/Debugging (F5) command (located at top left of the toolbar; see screenshot below).
2.Horizontal/Vertical layout: To switch layout, click the Horizontal/Vertical Layout button (located at the top right of the toolbar). Default is vertical layout.
3.Select language version: In the toolbar, select the language version for the expression you want to evaluate; for example, XPath 3.1. Default is XPath 3.1. Also see the note below titled XML Schema Selector and XML Schema Field.
4.Enter expression: In the Expression pane, enter the expression to evaluate. For help with constructing an expression, use the entry helpers of the Expression Builder. For more information about editing features of the Expression pane, also see the note below titled Editing in the Expression pane.
5.Select evaluation scope: In the toolbar's Where option, select the file/s on which the expression is to be evaluated. The options are: Current file; Open files; (XMLSpy) Project; or Folder. Default is Current File.
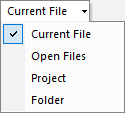
If Current file is selected, the file that is currently active is queried. Selecting Open files causes the expression to be evaluated against all the files currently open in XMLSpy. Project refers to the currently active XMLSpy project. (The external folders in an XMLSpy project can be excluded by checking the Skip external folders icon.) The Folder option enables you to browse for the required folder; the XPath expression will be evaluated against XML or JSON files in this folder.
6.Select XML or JSON evaluation: If the evaluation scope is the current file, the evaluation mode (XML or JSON) is automatically determined by the conformance type of the document's file type (JSON mode for JSON-conformant files, XML mode for non-JSON files). This auto-detected mode cannot be changed, and the buttons are disabled. If the evaluation scope is a multiple-file option, then both buttons are enabled and you can select the evaluation mode you want; the default is whichever of the two options was previously selected.
7.Set the context node: The context node can be set to either: (i) the root node, or (ii) the current selection in the active document. You can toggle between the two settings via the toolbar button Set current selection as origin for XPath/XQuery. The default setting is the root node.
8.XML validation: If the Validate XML toolbar button is toggled on (the default setting), then the XML files being evaluated will be validated. Errors are treated as warnings and are reported in the Results pane (screenshot below), but evaluation continues.

9.Evaluate the expression: If the toolbar's toggle option Evaluate on typing is selected, then the result of the evaluation is displayed in the Results pane as you type the expression. If this option is not selected, then the evaluation must be explicitly started, by clicking the command Start Evaluation/Debugging (F5) (located at top left of the toolbar).

|


XML Schema Selector and XML Schema Field
The XML Schema Selector and XML Schema Field options are used for a narrow subset of specific XPath 1.0 cases and are useful when unique identity constraints have been defined in the XML Schema. When either of these options is selected, only name tests (and the wildcard *) are allowed in the XPath expression, and predicates and XPath functions may not be used. Furthermore, for the XML Schema Selector option, only expressions on the child axis are allowed; for the XML Schema Field option, expressions on the child axis and attribute axis are allowed. For more information, see the W3C's XML Schema: Structures Recommendation.
Editing in the Expression pane
Note the following points about editing expressions in the Expression pane:
•To create the expression over multiple lines (for easier readability), use the Return key.
•To increase/decrease the size of text in the expression field, click in the expression field, then press Ctrl and turn the scroll wheel. Note that this also applies in the Results pane.
•Instead of manually entering the locator path expression of a node, you can let XMLSpy enter it for you. Do this as follows: (i) Place the cursor at the point in the XPath expression where you want to enter the locator path; (ii) Place the cursor inside the node you want to target; (iii) In the toolbar, click the button Copy the XPath of the Current Selection. This enters the locator path of the selected node in the expression. The locator path will be an absolute path starting at the root node of the document.
XQuery and JSON evaluations
•For information about XQuery evaluations, see the section, XQuery Evaluation. (The XQ icons are for XQuery evaluation; the XQU icons are for XQuery Update executions.)
•For a description of querying JSON documents, see XQuery Expressions for JSON and JSON Transformations with XSLT/XQuery.
Results pane
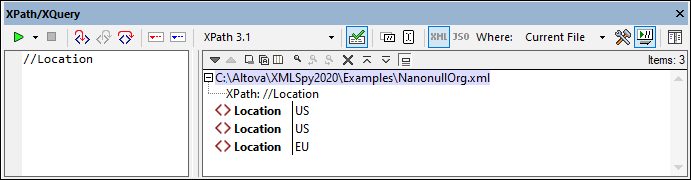
The Results pane is shown in the screenshot below, at right. Note that it has its own toolbar.
The Results pane has the following functionality:
•Toggle on the Show Header in Output icon if, in the output, you wish to show the location of the XML file and the XPath expression (as in the screenshot below).
•The result list consists of two columns: (i) a node name or a datatype; (ii) the content of the node.
•If the XPath expression returns nodes (such as elements or attributes), you can select whether the entire contents of the nodes should be shown as the value of the node. To do this, switch on the toggle Show Complete Result.
•When the result contains a node (including a text node)—as opposed to expression-generated literals—clicking that node in the Results pane highlights the corresponding node in the XML document in the Main Window.
•If the evaluation is carried out on multiple files (specified in the Where option), then the results of each file are listed separately under the path of that file (see screenshot below). If the evaluation mode is XML, then XML-conformant files are evaluated, other types are skipped. If the evaluation mode is JSON, then JSON-conformant files are evaluated, other types are skipped.

•If the results involve multiple files, clicking a filename in the results list opens the file in XMLSpy and makes it the active file.
•You can copy both columns of a result sub-line, or only the value column. To copy all columns, right-click a sub-line and toggle on Copying Includes All Columns. (Alternatively you can toggle the command on/off via its icon in the toolbar of the Results pane.) Then right-click the sub-line you want to copy and select either Copy Subline (for that subline) or Copy All (for all sublines).
Toolbar of the Results pane
The toolbar of the Results pane contains icons that provide navigation, search, and copy functionality. These icons, starting from the left, are described in the table below. The corresponding commands are also available in the context menu of result list items.
Icon | What it does |
Next, Previous | Selects, respectively, the next and previous item in the result list |
Copy the selected text line to the clipboard | Copies the value column of the selected result item to the clipboard. To copy all columns, toggle on the Copying includes all columns command (see below) |
Copy all messages to the clipboard | Copies the value column of all result items to the clipboard, including empty values. Each item is copied as a separate line |
Copying includes all columns | Switches between copying (i) all columns, or (ii) only the value column. The column separator is a single space |
Find | Opens a Find dialog to search for any string, including special characters, in the result list |
Find previous | Finds the previous occurrence of the term that was last entered in the Find dialog |
Find next | Finds the next occurrence of the term that was last entered in the Find dialog |
Expand with children | Expands the selected item and all its descendants |
Collapse with children | Collapses the selected item and all its descendants |
Clear | Clears the result list |
Display options
When you click the Show Options button (gear icon) at the top right of the XPath/XQuery a dialog appears in which you can specify display options of the Result pane. You can choose to display results as an expandable tree structure or as a serialized XML string (a node is shown as a text string, just as it is written in an XML document). Additionally you can choose to show attributes inline, which means that attributes and their values are shown on the same line as the element (additional to being shown in the tree structure of the node).