Project Basics
The subsections below will help you get started with a project. Procedures associated with projects can be broadly divided into (i) creating a project, (ii) organizing a project, and (iii) performing different actions. See information about these procedures in the subsections below.
New project
To create a new project, take the steps below:
1.Click the  button in the toolbar. Alternatively, go to the File menu and click New.
2.Select Project File and click OK.
3.Enter the project name in the Save Project As dialog box and click Save. The new project is now displayed in the Project window.
To close a project, go to the Project menu and click Close Project.
Project organization
Add a mapping to a project
If you want to add a currently open mapping to a project, do one of the following:
•Go to the Project menu and click Add Active File to Project.
•Right-click the relevant project in the Project window and select Add Active File to Project from the context menu.
To add existing mapping files to a project, do one of the following:
•Go to the Project menu and click Add Files to Project.
•Right-click the relevant project in the Project window and select Add Files to Project.
Tip: If you want to add multiple files, hold the Ctrl key while selecting the files in the Open dialog box.
Delete a file from a project
To remove a file or folder from a project, do one of the following:
•Choose the file you would like to delete in the Project window. Right-click the file and select Delete from the context menu.
•Select the relevant file in the Project window and press Delete.
MapForce project files have a .mfp extension. You can open existing MapForce projects in the same way as mappings: Go to the File menu and click Open. By default, when you run MapForce for the first time, you will see the MapForceExamples.mfp project in the Project window.
Project-related actions
Search a project
To search a project for files, follow the instruction below:
1.In the Project window, click the project or folder to be searched.
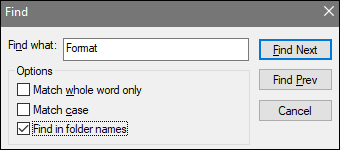
2.Press Ctrl + F. The Find dialog box allows you to define your search options. For example, if you want to include folder names in the search, select the Find in folder names option (see screenshot below).
Generate code for your project
In projects, you can generate code for (i) individual mappings, (ii) a specific folder, or (iii) the entire project.
To generate code for a mapping or folder in your project, right-click the relevant mapping or folder and select Generate Code or Generate code in. If you select Generate Code, the code will be generated in the language specified in the project settings. You can also choose to generate code in one of the languages available in your MapForce edition. For more information, see Code Generation.
To generate code for the entire project, go to the Project menu and select Generate Code for Entire Project. Alternatively, right-click the name of the project in the Project window and select Generate Code. The code will be generated in the language specified in the project settings. For the entire project, you can also select a language to generate code in in the Project menu or in the project's context menu. The choice of languages depends on your MapForce edition. For more information, see Code Generation.
Preview images
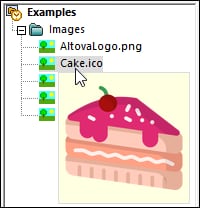
The Project window allows you to preview images of the following formats: .png, .jpeg, .gif, .bmp, .tiff, and .ico (see screenshot below). Double-clicking an image file will open it in an external application, which depends on file association in Windows.
Watch video tutorials and add Web links
Besides multiple sample files, the MapForceExamples project also contains links to various video tutorials on the Altova website. Double-clicking any link will open the corresponding page in your default Web browser.
You can also insert your own external links in any of the following ways:
•By right-clicking the project name or a folder of interest and selecting Create Web Link from the context menu.
•By selecting the project name or a folder of interest and then clicking Create Web Link in the Project menu.
Either method causes the Web Link Properties dialog to pop up. Type the link's name that will be visible in the interface and the URL of this resource. You also need to select an icon for your resource: as a general Web link or as a link to a video. You can always change the location of any link, by dragging the link to the desired location. You can also use the combination of the Ctrl + C and Ctrl + V keys to copy a link and paste it into the desired location.