Add EDI Components
This topic explains how to add an EDI document to your mapping and how to run EDI mappings. To add an EDI component, take the steps below:
1.Click the  toolbar button. Alternatively, go to the Insert menu and select EDI.
2.Select the relevant EDI collection in the Browse EDI Collections dialog box (see below). In our example, we have selected the EDIFACT collection. If the EDI collection you are looking for is not on the list of collections, click Download additional EDI collections, which will redirect you to the Altova website. If you have created a custom EDI collection, and it is not yet in the list of available collections, you can browse for it using the Add Custom EDI Collection button.
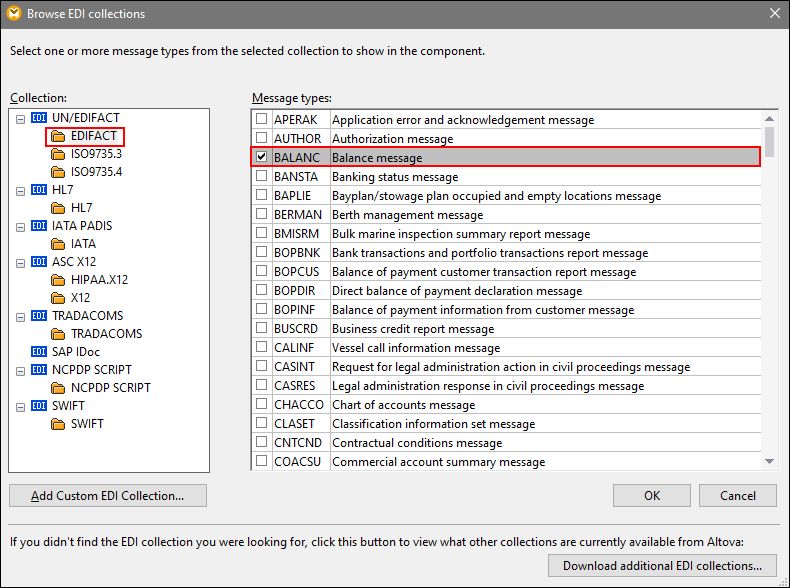
3.Select the check box next to the message type you would like to include and click OK. An EDI component can include multiple messages of the same standard and release. In our our example, we have selected the BALANC message (red rectangle above).
4.MapForce will ask you whether you would like to supply an instance file. You can select a local file, a global resource, or a file from a URL. For more information, see Add Components. If you want to read data from the EDI component, browse for an EDI file; otherwise, click Skip.
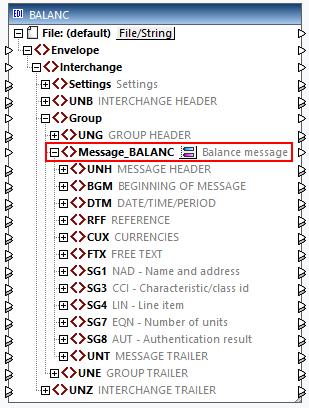
The component now appears in the mapping area and includes the BALANC message selected previously (see screenshot below). If you want to add additional messages or remove existing ones, click the  button next to the message.
XML-based EDI standards
You can add XML-based EDI standards to your mapping in the same way as XML components.
EDI settings
To configure the component settings, right-click the component title bar and select Properties from the context menu. For more information, see EDI Component Settings. If you work with XML-based EDI standards (e.g., HL7 Version 3), the XML component settings apply to them.
To configure the mapping settings for the entire mapping, right-click the mapping and select Mapping Settings from the context menu. For more information, see Mapping Settings.
Run EDI mappings
Once you have designed an EDI mapping, you can run it in the following ways:
•You can preview the result of the data transformation directly in MapForce, by clicking the Output pane. You can then save the output file to the desired location.
•You can run the mapping on a server machine (Windows and Linux) with MapForce Server, through an API call, or at the command line. For more information, see Compiling Mappings to MapForce Server Execution Files.
•You can deploy the mapping to a server machine (Windows and Linux) through HTTP (or HTTPS) where MapForce Server runs under FlowForce Server management. In such setups, you can run mappings as scheduled or on-demand jobs, or as Web services. For more information, see Deploying Mappings to FlowForce Server.
•For mappings that support C++, C#, or Java, you can generate program code from the mapping. The generated program code delivers the same result as if the mapping were previewed in MapForce; it can be run separately or be integrated into your existing code. For details, see Code Generator.
To access the code generation settings, go to Tools | Options and click the Generation tab. For more information, see Options.
Note about EDI codelists
For nodes whose data types have EDI codelists, you can create a Value-Map that will have all enumeration values pre-filled. This makes it easier to process and map enumeration values. For more information, see Value-Maps.
EDI sample mappings
The MapForceExamples folder contains designs that show how to map data to and from various EDI standards (see table below).
EDI Standard | Mapping sample |
|---|---|
ASC X12 | •X12_To_Xml_Order.mfd •Xml_To_X12_Order.mfd |
HIPAA X12 | •HIPAA_837D.mfd |
HL7 | •HL7_MultiMessageTypes.mfd •HL7V260_To_HL7V3.mfd |
IATA | •IATA_FlightInformationReport.mfd |
SAP IDoc | •IDOC_Order.mfd |
UN/EDIFACT | •EDI_Order.mfd •EDI_Order_DB.mfd •EDI_OrderReverse.mfd |