Running the Sample C# Solution
The sample Visual Studio solution available in the folder <ApplicationFolder>\Examples\ActiveX\C# illustrates how to consume the MapForce ActiveX controls. Before attempting to build and run this solution, note the following steps:
Step 1: Check the prerequisites
Visual Studio 2010 or later is required to open the sample solution. For the complete list of prerequisites, see Prerequisites.
Step 2: Copy the sample to a directory where you have write permissions
To avoid running Visual Studio as an Administrator, copy the source code to a directory where you have write permissions, instead of running it from the default location.
Step 3: Check and set all required control properties
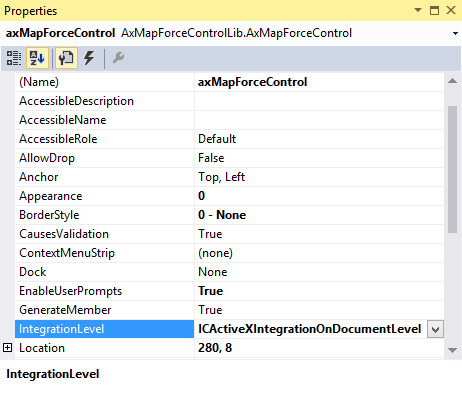
The sample application contains one instance of MapForceControlDocument and several instances of MapForceControlPlaceHolder controls. Double-check that the following properties of these controls are set as shown in the table below:
Control name | Property | Property value |
|---|---|---|
axMapForceControl | IntegrationLevel | ICActiveXIntegrationOnDocumentLevel |
axMapForceControlLibrary | PlaceholderWindowID | 0 |
axMapForceControlOutput | PlaceholderWindowID | 2 |
axMapForceControlPreview | PlaceholderWindowID | 1 |
Here is how you can view or set the properties of an ActiveX control:
1.Open the MDIMain.cs form in the designer window.
Note: On 64-bit Windows, it may be necessary to change the build configuration of the Visual Studio solution to "x86" before opening the designer window. If you need to build the sample as a 64-bit application, see Prerequisites.
2.Open the Document Outline window of Visual Studio (On the View menu, click Other Windows | Document Outline).
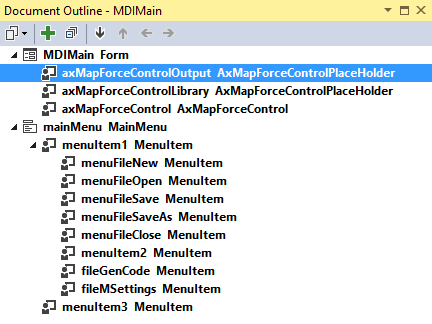
3.Click an ActiveX control in the Document Outline window, and edit its required property in the Properties window, for example:
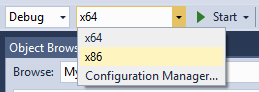
Step 4: Set the build platform
•Create a build platform configuration that matches the platform under which you want to build (x86, x64). Here is how you can create the build configuration:
a.Right-click the solution in Visual Studio, and select Configuration Manager.
b.Under Active solution platform, select New... and then select the x86 or x64 configuration (in this example, x86).

You are now ready to build and run the solution in Visual Studio. Remember to build using the configuration that matches your target platform (x86, x64); otherwise, runtime errors might occur.
On running the sample, the main MDI Frame window is displayed. Use File | Open to open a mapping file (for example, MarketingExpenses.mfd, which is in the MapForce examples folder). The file is loaded and displayed in a new document child window:
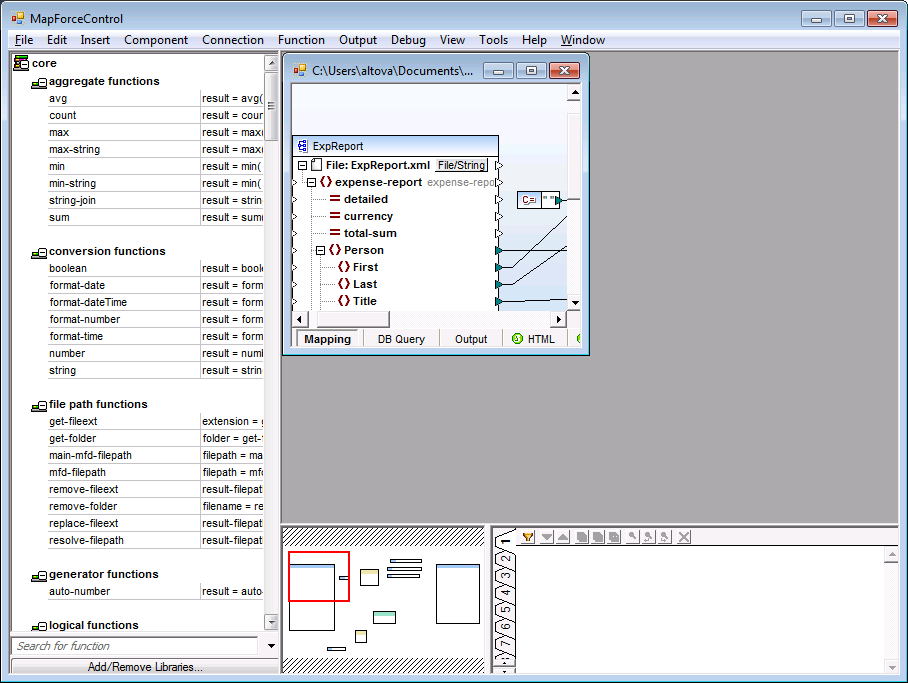
After you load the document, you can execute commands against the active document using the menu. Context menus are also available. You can also load additional documents. Save any modifications using the File | Save command.