Creating Data Entry Forms in RecordsManager

Altova RecordsManager makes it easy for administrators to define data entry forms for efficient management of user access and data entry.

No-code, visual design makes data entry form design a snap.

How does it work?

Defining data entry forms in RecordsManager is a completely visual process. It's easy to select fields, layout and styling options, to create tables, and to control how data is presented to the end user.

The following sequences demonstrate how easy it is to create forms for easy data entry in RecordsManager. Each animation shows the steps of designing the data entry form. In some cases, the resulting form is shown in the animation. Other times, you can view it on a separate tab.

Creating a simple data entry form:

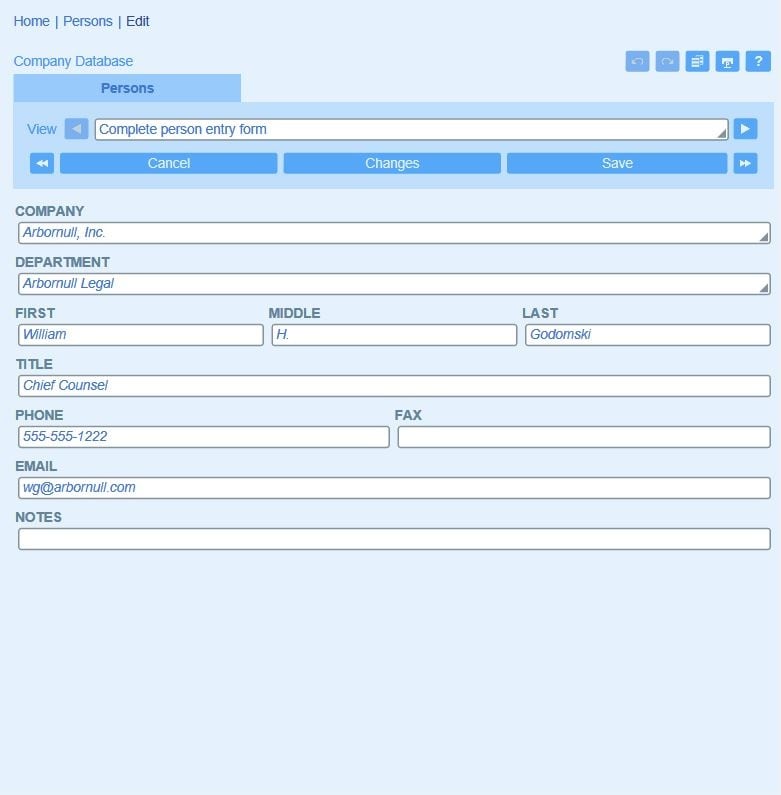
These forms are the cornerstone of data entry apps. Designing the form is as easy as selecting the fields you want to include as a starting point, then giving your form a name, and customizing additional settings.

You can design one or more entry forms for a data container and specify which users have access to each entry form. You may also designate a form to be read-only for all users or for specific user groups, so that record data can be viewed in detail but not edited. You can even designate read-only access on a per-field level.

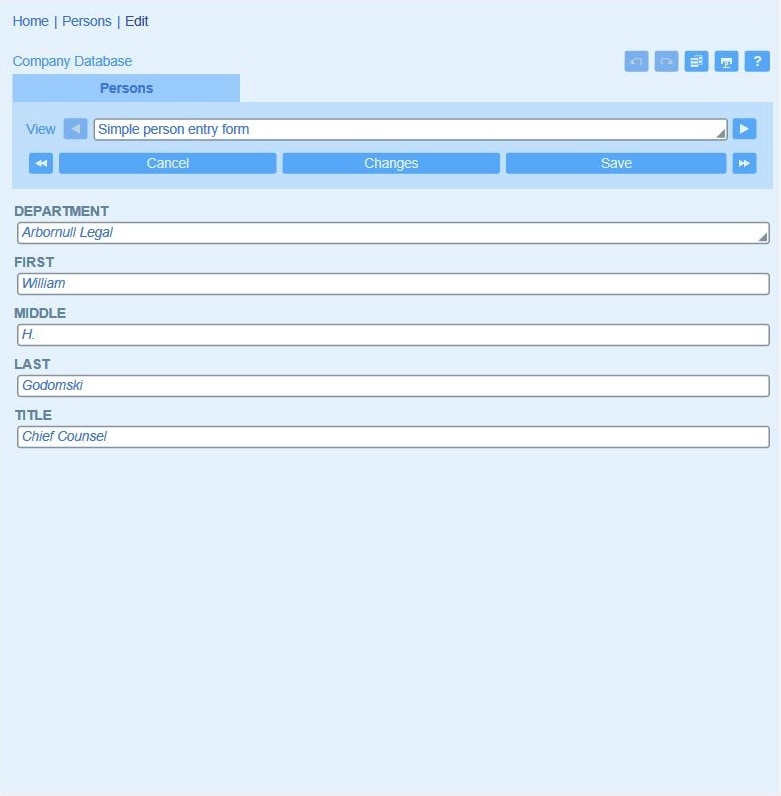
In this example a simple data entry form is created by selecting the desired data entry fields. The administrator names the form and then selects read/write access for various roles.

Defining a complex data entry form:

It's easy to design a more complex data entry form using the visual design approach in RecordsManager.

Data entry forms can use tables to efficiently display fields and allow for quick viewing and/or modification. A table contains multiple rows and columns, each of which contains either a data entry field for one of the container's fields, or a display item such as text, an image, or another nested table. Tables include numerous style and layout options to make your forms attractive and easy to navigate.

In this example, the administrator started with an existing form and then modified it to add tables and saved it with a new name.

In a hierarchical data relationship, for example between companies, departments, and persons, RecordsManager offers multiple options for selecting the correct parent record in an entry form for the child records. The default is a combo box of all the available parent records, which is a useful approach when there is only a handful of them, but can become unwieldy when a larger dataset is involved.

In this example we demonstrate editing the entry form to use a search function to select a parent record instead of the combo box, and we also add a button that lets the user view the entire parent record after it has been selected, so that they can make sure they entered the correct parent.

Creating templates to guide data entry

During data entry form creation, you can define data templates so that commonly used data will be prefilled when a user creates a new record. Users can always modify prefilled data if required. As the administrator, you can either enter template data directly or it can be defined via scripts, where XPath calculation allows for more flexibility.

In this example, the administrator creates a template for Arbornull employees that has the correct parent company selected and has part of the email address pre-filled. During data entry, the user will only need to enter the remaining information when selecting this template, speeding data entry and helping to ensure valid information is entered.

Defining style and layout

It's easy to design a form layout and apply styles for your data entry forms, as well as offer users easy data entry via check boxes, radio buttons, enhanced date controls, and more. As you can see in this example, individual fields can be made read-only or editable. When using tables, column widths can be manually set, or columns can be auto-sized to fit their contents.

Organizing forms with sections

You can divide long or complex forms into multiple sections to group related fields together and simplify the view. Users can expand each section as they work through a record.

When creating a section you can decide whether it will be initially open (i.e., expanded) to the user depending on whether it contains data or not. Sections can be expanded by default for new records, if desired.

Step by step data entry

Building on the previous example, you can choose to display sections one-by-one to help guide the user through data entry and/or review. Each subsequent section will be shown once the previous is completed for a cleaner, simplified view.

Use Scripting for Automation

RecordsManager includes a visual scripting editor that makes it easy to define app actions based on data entered by users. In reaction to app user behavior, scripts can be used to:

  • Update or modify other fields of a record
  • Trigger creation, modification, or deletion of child records
  • Execute an action, such as sending emails
  • Show the user a message (standard, warning, error)
  • Save records

Scripts are defined using if / then / else branches. For each case (true and false), the script will carry out, as appropriate, any of the actions available for that type of script (see the screenshot below).

Scripting in database apps using RecordsManager

The visual scripting editor makes it easy to define sophisticated functionality to react to user input in real-time and implement intelligent automation in your RecordsManager apps. Read more about using scripts to define app behavior.

What's Next

Learn about other types of forms supported by RecordsManager:

  • List forms: display the records of a data container in a layout you define
  • Report forms: help you design attractive reports of records in a specific data container
  • Export forms: allow you to define data fields available for users to export app data to XML and/or CSV
  • Reminder forms: let you define email reminders that will be sent to users from your app

Get Started with RecordsManager

RecordsManager is a free, pre-built MobileTogether solution that is available for you to start using when you install MobileTogether Designer. Use the link below to download and install the free Altova MobileTogether Designer to get started on your first RecordsManager app.