Example: Create CSV Report from Multiple Tables
This example illustrates how to join multiple database tables for the purpose of extracting data into a single report in CSV format. The database used in this example is called Nanonull.sqlite and is available at the following path: <Documents>\Altova\MapForce2026\MapForceExamples\Tutorial\. This database stores information about a fictitious business (which includes orders, products, users and their addresses). As is typically the case with relational databases, the information is normalized and spread across multiple tables. For example, the users table stores user personal data (which includes first name, last name, and email). The database also stores information about products ordered by users, in two different tables: orders (which includes the unique ID of the order, and the time when it took place) and orderedproducts (which includes a list of products ordered, and their quantity). Furthermore, the names of the products themselves is stored in a separate table called products.
The goal of the example is to produce a report based on data extracted from various tables, so as to make it clear who ordered certain products, when, and in which quantity. To achieve the mapping goal, follow the steps below:
1.On the Insert menu, click Database.
2.When prompted to select a database kind, click SQLite, and then click Next.
3.Browse for the Nanonull.sqlite database mentioned above, and click Connect.
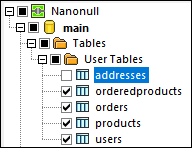
4.When prompted, select the tables orderedproducts, orders, products, and users, and click OK.
5.Add a Join component to the mapping and create four nodes/rows items by clicking the Add input (  ) button.
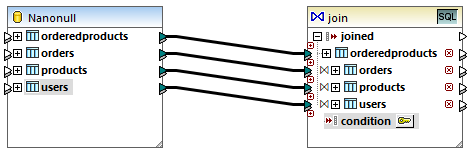
6.Connect the four tables from the database component to the corresponding input items of the Join component.
Note: In an alternative scenario, you could connect the table orderedproducts to the Join component, then the table orders (the one which is nested under it, not the one at the same level), and so on, so that all joined tables are nested under the same "root" table, see also Handling Database Relationships. The mapping result would be the same if you joined tables this way. The difference is that in this example the join conditions are created manually, whereas in the alternative scenario the join conditions would be created automatically by MapForce. For an example of joining tables without having to define join conditions manually, see Example: Join Tables in SQL Mode. Another mapping where all joined tables are under the same "root" table is available at the following path: <Documents>\Altova\MapForce2026\MapForceExamples\DB_Denormalize.mfd.
In this example, the tables connected to the Join component have the following order:
1.orderedproducts
2.orders
3.products
4.users
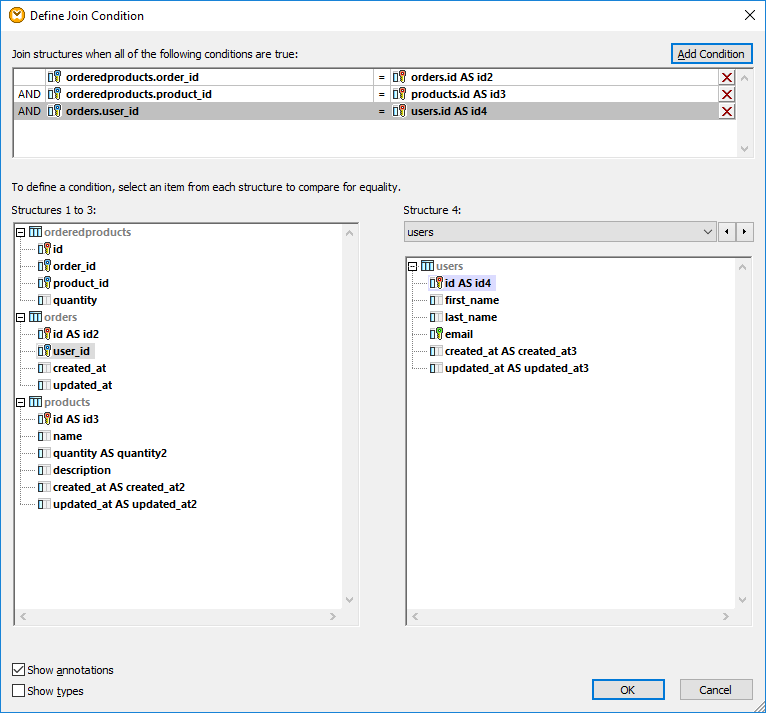
This order affects how the respective structures are displayed on the "Define Join Condition" dialog box, when you click the Define Join Condition (  ) button. Namely, the first table (orderedproducts) appears by default under Structure 1, and the table immediately after it (orders) appears under Structure 2.
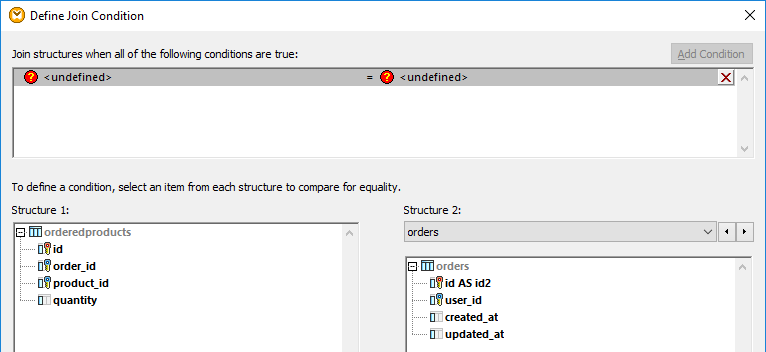
To define the first join condition, click the order_id item in the left pane and the id item in the right pane. Now the fields orderedproducts.order_id and orders.id. are paired:

So far, only two tables have been joined. To define join conditions which involve a third table, select the desired table from the drop-down list available above the right pane. The left pane displays in this case all tables that occur before it on the Join component. For example, if you select products on the right side, then the left side displays orderedproducts and orders (since these tables occur before products on the Join component). You can now pair fields of table products with fields of tables preceding it (in this case, orderedproducts.product_id and products.id).
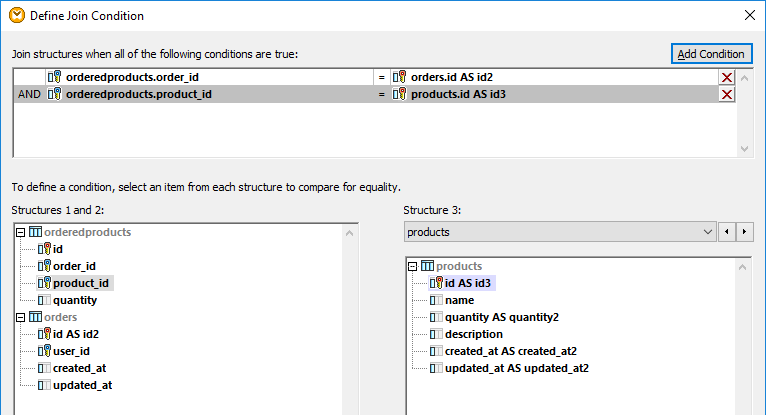
To join a fourth table (users), select the users table from the drop-down list. You can now pair the fields orders.user_id and users.id.
Now that all required join conditions have been defined, items of the Join component can be further mapped to a target component. To finish the mapping, add a CSV component (see CSV and Text Files), and connect items from the Join component to the target CSV component as illustrated below:
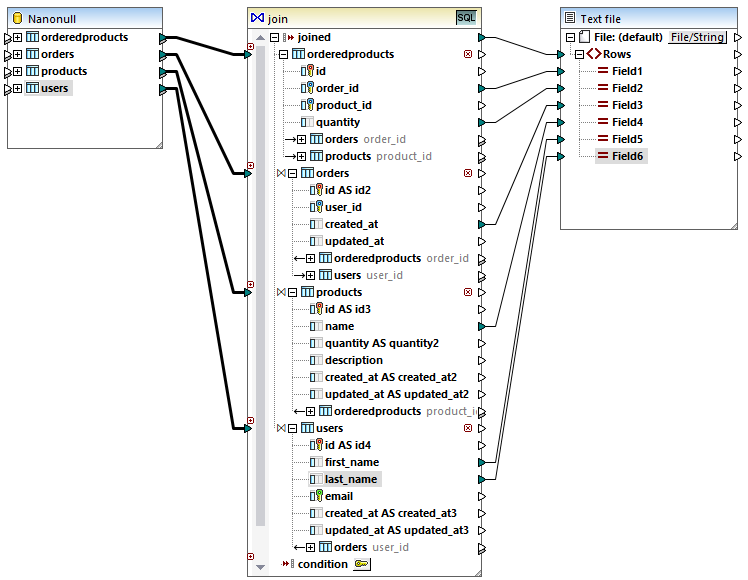
The mapping illustrated above produces a report (in CSV format) compiled from all four tables involved in the join, as follows:
•ID of the order (taken from the orderedproducts table)
•Quantity of ordered items (taken from the orderedproducts table)
•Time when the order took place (taken from the orders table)
•Name of the product ordered (taken from the products table)
•First name and last name of the user who ordered the product (taken from the users table).
All the tables in this example are joined using INNER JOIN mode. For information about changing the join mode to LEFT OUTER JOIN, see Changing the join mode.