VB.NET
Source code which illustrates integration of MapForceControl into a VB.NET application can be found in the folder <ApplicationFolder>\Examples\ActiveX\VB.NET of your MapForce installation. The solution consists of three windows, as follows:
1.MainWindow.vb - the main document window, which also includes a basic application menu.
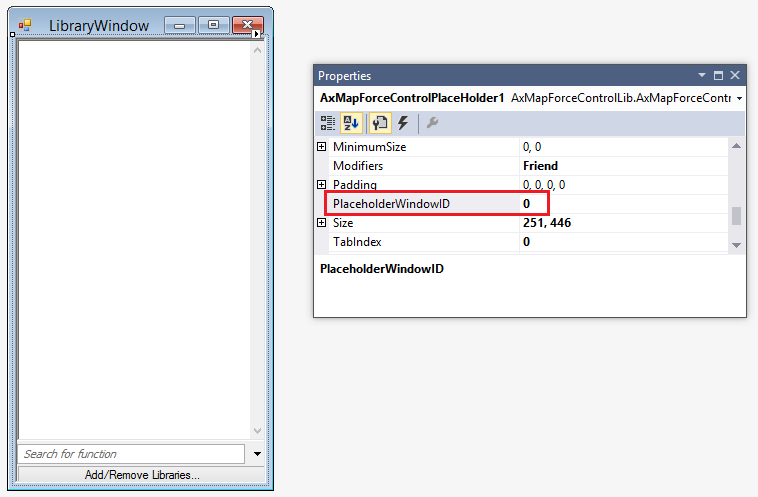
2.LibraryWindow.vb - the Library window. The contents of this window is populated by a Placeholder control which has the PlaceholderWindowID property set to 0 (this value instructs the control to display specifically the Library window).
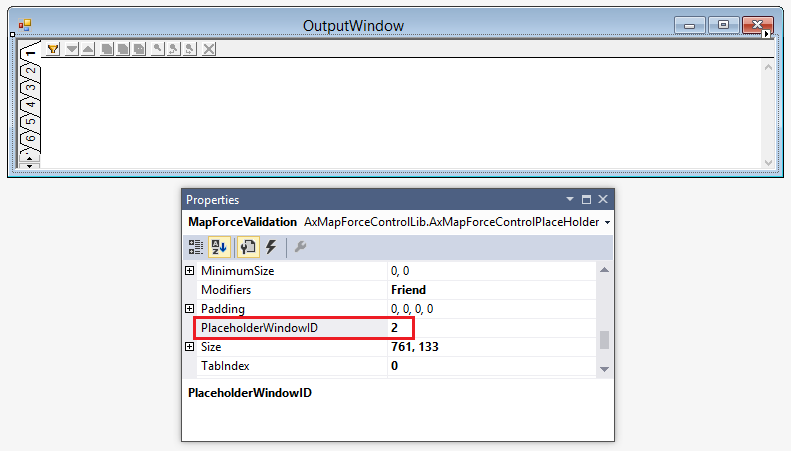
3.OutputWindow.vb - the Messages (Output) window. The contents of this window is populated by a Placeholder control which has the PlaceholderWindowID property set to 2 (this value instructs the control to display specifically the Output window).
Before attempting to build and run this solution, note the following steps:
Step 1: Check the prerequisites
For the list of prerequisites, see Prerequisites.
Step 2: Copy the sample to a directory where you have write permissions
To avoid running Visual Studio as an Administrator, copy the source code to a directory where you have write permissions, instead of running it from the default location.
Step 3: Set the build platform
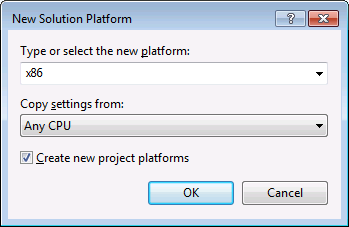
Create a build platform configuration that matches the platform under which you want to build (x86, x64). Here is how you can create the build configuration:
1.Right-click the solution in Visual Studio, and select Configuration Manager.
2.Under Active solution platform, select New... and then select the x86 or x64 configuration (in this example, x86).
You are now ready to build and run the solution in Visual Studio. Remember to build using the configuration that matches your target platform (x86, x64); otherwise, runtime errors might occur.