Sections of an Entry Form
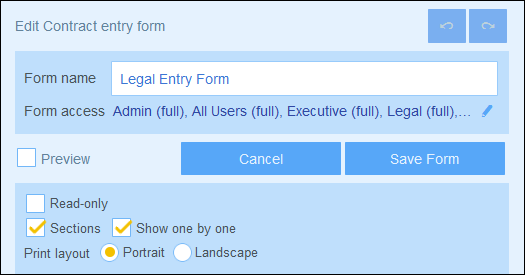
To create sections, first check the Sections option (see screenshot below). This creates a new section, named Unnamed Section, above the first row of the table. If you want to show each section one-by-one (instead of all together on one page), check the Show One by One option.
To add new sections, first click the Table editing icon (circled in red in the screenshot below). The table editing icons appear. To insert a new section above the current row, long-click the Add Row icon of either the current section or the current row (see screenshot below). To append a new section at the bottom of the table, long-click the Add Row icon of the last row of the table. Note that a simple click adds a row. You need a long-click to add a section; so keep the click depressed till a new section appears.
You can delete a section in one of two ways: (i) Click the section's Delete icon; but note that the first section cannot be deleted in this way; (ii) Uncheck the Sections option (see screenshot below, top left).

Section properties
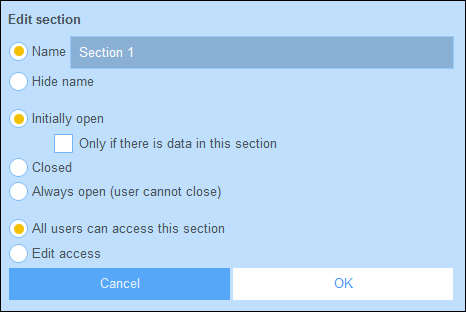
To access section properties, click the name of the section.
The screenshot below shows the Section Properties form of a section in an entry form where all sections are shown together (that is, not one-by-one). The following options can be set separately for each section:
•To show the section name or to hide it (and, in the latter case, also optionally hide the section line).
•Whether to show the section initially open or closed. If a section is closed, the user must open it (by clicking the section's Expand icon).
•Access to the section for individual roles. Whether a role has: (i) full (read and write) access; (ii) read-only access; or (iii) no access.
In entry forms where sections are shown one-by-one, a restricted set of properties may be set: (i) the name of the section; and (ii) access rights of different roles.