More Operations
To access the container operations described in this topic, do the following: In the Database Structure tab of the Configuration Page, expand the container by clicking its name (see screenshot below).

Then click More.
Add (parent/child container to current container)
Click More (see first screenshot of this topic). Depending on the current container, you can add a parent container (with the Extend Hierarchy button) and/or a child container (with the Add Child Data Container button); see screenshot below.
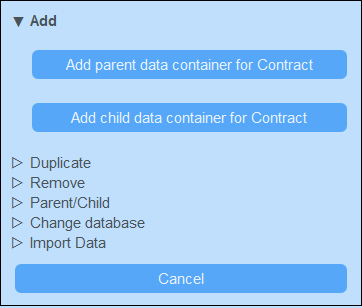
The procedure to create the parent or child container is the same as that for any new container.
Duplicate (current container)
Click More (see first screenshot of this topic). The Duplicate operation creates a duplicate of the current container with all fields, filters, and forms. The duplicate is created as a sibling of the current container. However, record data will not be copied.

Give the duplicate container a new name and click Continue. You can subsequently edit the newly created container in the usual way.
Remove (current container)
Click More (see first screenshot of this topic). The Remove operation removes the current container and all its records (see screenshot below). If the container contains child containers, these will not be removed, but will be connected to the parent of the current container.

Loose Link
Click More (see first screenshot of this topic). The Loose Link operation is available for all containers except top-level containers. In these cases, the Loose Link operation enables the link to the parent container to be converted to a loose link (see screenshot below). If the relationship is a loose link, records of this container will be created independently of the former parent, and will be linked to the former parent via forms when required.

For more information about hierarchies and links between containers, see the topic Database Structure.
Parent/Child
Click More (see first screenshot of this topic). The Parent/Child operation is available for top-level containers only (see screenshot below). A top-level container can be converted to a child container of another top-level container and moved to the corresponding position in the hierarchy.

For more information about hierarchies and links between containers, see the topic Database Structure.
Change Database
Click More (see first screenshot of this topic). The Change Database operation is available for top-level containers only (see screenshot below). A top-level container and its descendant containers can be organized into another existing database.It will be a sibling of the top-level container/s of the database to which it is moved.

For more information about hierarchies and links between containers, see the topic Database Structure.
Import Data
Click More (see first screenshot of this topic). The Import Data operation enables you to import data from an XML file that has a structure corresponding to that of the current container's hierarchy. Two types of import are possible:
•Import the records of a top-level container, including records of its descendant containers. Click Import <Container> and child records to do this.
•Update selected fields of the records of any container. The records to update are selected on the basis of the field/s you select as the key field/s. Click Update <Container> records with imported data to do this.

Import records of top-level container
After you create a container, you can import its records and the records of descendant containers from an XML file. The XML file must have a structure that matches the structure of the container and its descendants. After you click Import <Container> and child records, generate an XML Schema that defines the structure of the XML file by clicking Save XML Schema. The schema file will be downloaded to the Downloads folder of your client device.
Note the following points about the import:
•If a field has been defined as a required field of a container, then the element corresponding to this field must be present in the XML file. Otherwise, the import will fail.
•If a field has been defined as a optional field of the container, then the element corresponding to it is optional in the XML file as well.
•Child elements are optional. This means that you can import a top-level container only, or the top-level container plus descendant containers down to any desired depth.
•Date, time, and number fields must be in ISO format (respectively: 2020-12-31, 18:25:26, and 1234.56).
•File fields are imported from an element named <Files FileName="" />, and element content must be base64-encoded. The FileName attribute is optional.
•Image fields are imported from an element named <Images FileName="" />, and element content must be base64-encoded. The FileName attribute is optional.
•Reminder fields cannot be imported.
•Link-to fields are imported from an element named <Link-to />. It must contain the identity value of the referenced record. For example, if the record of a certain contract links to a department's Name field, then the XML file could have: <Link-to>Accounts</Link-to> in order to link this contract to the Accounts department.
Update records of a container
The records of a container can be updated with data from an XML file. The XML file must have a root element named Root that has child elements corresponding to the records of the container. For example, a database container named Person would have multiple Person records. The data in these records can be updated with data in an XML file that has a structure something like this. The child elements of the Person element in the XML file must correspond to the fields of the Person container.
<Root>
<Person>
<Department>Sales</Department>
<First>Jim</First>
<Last>Gridely</Last>
<Title>Executive</Title>
<Phone>123456789</Phone>
<Email>legal.01@redmaple.com</Email>
</Person>
...
<Person>
<Department>Accounts</Department>
<First>Jane</First>
<Last>Locke</Last>
<Title>Manager</Title>
<Phone>123789777</Phone>
<Email>accounts.04@altova.com</Email>
</Person>
</Root>
The data from the XML file that will be used for the update is selected in two steps:
1.Select the field/s of the record that will be used to uniquely identify the record in the XML file. You can choose any number of fields (from one field to all fields).
2.Select the fields of the record that you want to update. The field/s that were selected as the identifier field/s will not be changed. The data in fields that have not been selected for update can be either (i) kept unchanged, or (ii) removed.