Non-XML Databases
After a connection has been made to a non-XML database, the Insert Database Objects dialog appears. This dialog consists of two parts. In the upper Source pane, which contains a graphical representation of the tables in the DB, you select the tables required for the SPS. An XML Schema and XML data files will be generated by StyleVision on the basis of the tables selected. In the lower Preview pane of the Insert Database Objects dialog, you can preview the contents of the selected table.
The Source pane
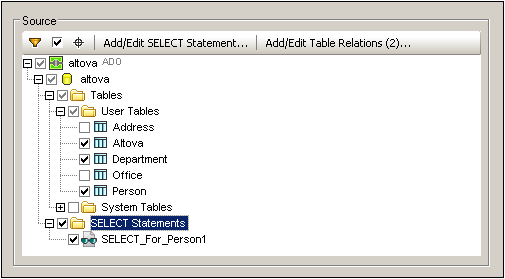
In the Source pane, the DB tables are displayed graphically (see screenshot below). Select the tables required for the SPS by checking the respective check boxes.
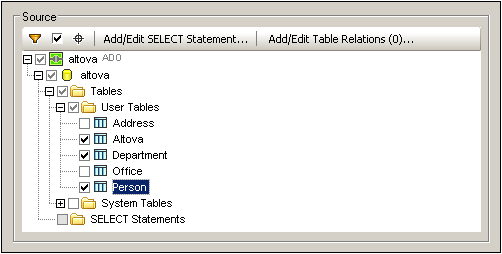
The toolbar of the Source pane (screenshot below) contains three icons, respectively, from left to right: Filter Folder Contents, Checked Objects Only, and Object Locator. The Checked Objects Only icon toggles the display between all tables and checked tables.
Filtering folder contents
To filter objects in the Source pane, do the following:
1.Click the Filter Folder Contents icon in the toolbar of the Source pane. The Filter icon appears next to the Tables folder.
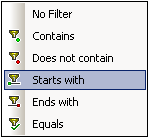
2.Click the Filter icon next to the Tables folder, and select the filtering option from the popup menu (screenshot below), for example, Starts with.
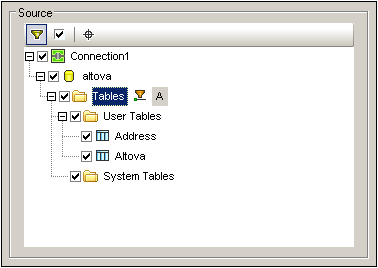
3.In the entry field that appears, enter the filter string (in the screenshot below, the filter string on the Tables folder is A). The filter is applied as you type.
The object locator
To find a specific database item by its name, you can use the Source pane's Object Locator. This works as follows:
1.In the toolbar of the Source pane, click the Object Locator icon. A combo box appears at the bottom of the Source pane.
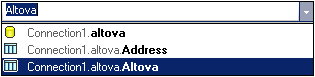
2.Enter the search string in the entry field of this list, for example Altova (screenshot below). Clicking the drop-down arrow displays all objects that contain the search string.
 |
| 3. | Click the object in the list to see it in the Source pane. |
Adding and editing SELECT statements for local views
You can create SELECT statements in SQL to create local views. When the schema is generated from a DB connection which has local views (or SELECT statements) defined for it, the schema that is generated for the DB will contain a table for each SELECT statement.
To create a SELECT statement, do the following:
1.Click the Add/Edit SELECT Statement tab. This pops up the Enter a SQL Select Statement dialog (screenshot below).
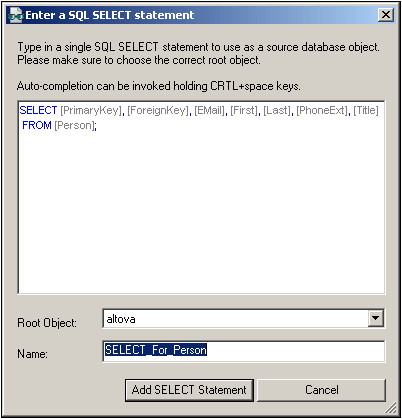
2.Enter the SELECT statement. If you connect to an Oracle or IBM DB2 database using JDBC, then the SELECT statement must have no final semicolon. If you wish to create a SELECT statement for an entire table, right-click the table in the Insert Database Objects dialog and select the context menu command Generate and Add a SELECT Statement.
3.Click Add Select Statement. The SELECT statement is added to the list of SELECT statements in the Insert Database Objects dialog (screenshot below).
Note: If you connect to an Oracle or IBM DB2 database using JDBC and use a SELECT statement with the Add/Remove Table command to retrieve data, then the SELECT statement must have no final semicolon.
When you click Finish in the Insert Database Objects dialog, a table is created for each SELECT statement (screenshot below).
Local relations between tables
You can create local relations between two tables, similar to the primary-key/foreign-key kind of relationship. The relation is local, in StyleVision, which means that the database itself does not have to be modified. The local relationship will be represented in the generated schema.
To create a local relation, do the following:
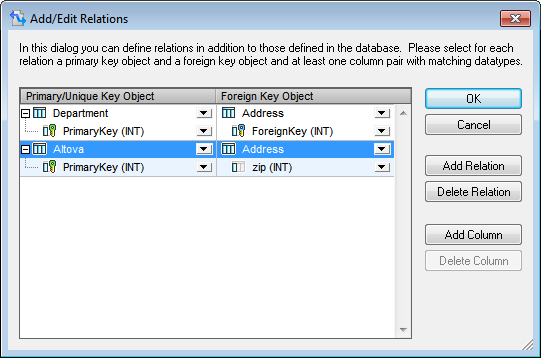
1.In the Insert Database Objects dialog, click the Add/Edit Relations tab. This pops up the Add/Edit Table Relations dialog (see screenshot below).
2.Click the Add Relation button, and in the Primary/Unique Key column, click the dropdown button of the Select Table combo box (screenshot below). Select a table for the Foreign Key column also. The relationship that will be generated eventually will select rows in which the selected Primary/Unique Key column matches the selected Foreign Key column.
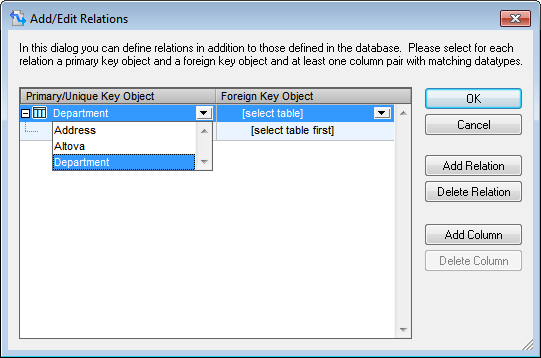
3.Select the Primary/Unique Key table column that must match the Foreign Key table column, and then select the Foreign Key column. Once again, use the combo boxes in the respective columns (see screenshot below). Notice that if there is a type mismatch, an error sign will be displayed.
4.Add more local relations, if required, by repeating steps 2 and 3 above.
5.Click OK to complete the relation. When the schema is generated, it will reflect the newly created relations.
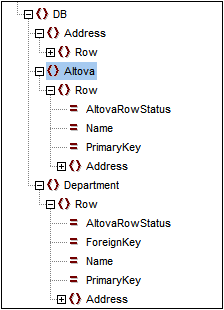
Look at the two screenshots above and see how, in the generated schema, Altova and Department each contain Address. Those Department rows with PrimaryKey values equal to the ForeignKey value of the Address row will be output. And those Altova rows with PrimaryKey values equal to the zip value of the Address row will be output.
Note: Local relations between SQL SELECT statements are not supported.
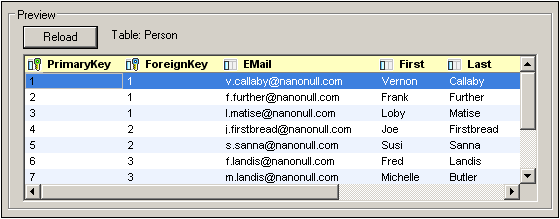
Previews and the Preview pane
To preview the structure and contents of a table, select the table in the Source pane and then click the Preview button or Reload button—according to which of the two is displayed—in the Preview pane (screenshot below). The contents of the table are displayed in a table format in the Preview pane (screenshot below).
Generating the XML Schema and Working XML File from the DB
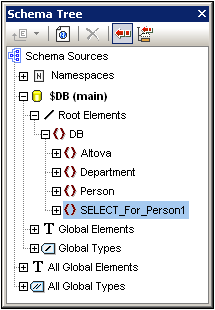
After you have selected the tables for which you wish to use in the SPS, click Finish to generate and load the XML Schema. An XML Schema with a structure corresponding to that of the DB with the selected tables is displayed in the Schema Tree Window. A Working XML File having a structure corresponding to that defined in the generated schema and containing data from the selected tables is also generated and is used for the output previews.
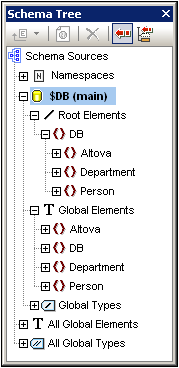
Note that all the selected DB tables are created in the XML Schema as children of the DB document element and as items in the Global Elements list. For a complete description of the structure of the generated XML schema, see The DB Schema and DB XML files. Note that the XML Schema generated from the DB will not be altered by any DB Filter that may be built subsequently.
After you have connected to the DB and generated the XML Schema, you can use the full range of StyleVision features to design an SPS for the DB.