Adding Tables Using Design Editor
The Design Editor provides the means to add tables to databases using a graphical user interface. Use of the Design Editor requires no knowledge of SQL syntax. To illustrate this, we will now add to the database a new table that stores zoo visitor statistics. We will call this table tblVisitorStatistics. The table will consist of the following columns:
•StatisticID: int; not null; primary key
•StatisticDate: datetime; not null;
•VisitorCount: int; not null
To add the table to the database using the Design Editor:
1.Open the "ZooDB" project created previously and double-click the  ZooDBConnect data source to connect to it.
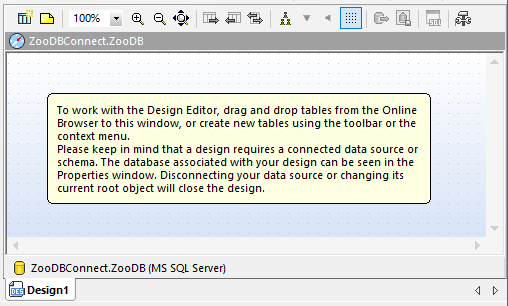
2.Click the Design Editor ![]() toolbar button or press Ctrl + D. A new Design window, called Design1, is opened with the connection name and database name visible in the Status bar.
toolbar button or press Ctrl + D. A new Design window, called Design1, is opened with the connection name and database name visible in the Status bar.
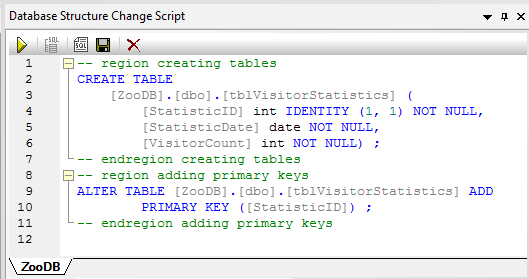
3.Click the New Table ![]() button. A new table appears in the Design Editor window. A dialog box appears at this point informing that a structure change script has been created. The generated SQL statements appear in the Database Structure Change Script window, as shown below.
button. A new table appears in the Design Editor window. A dialog box appears at this point informing that a structure change script has been created. The generated SQL statements appear in the Database Structure Change Script window, as shown below.
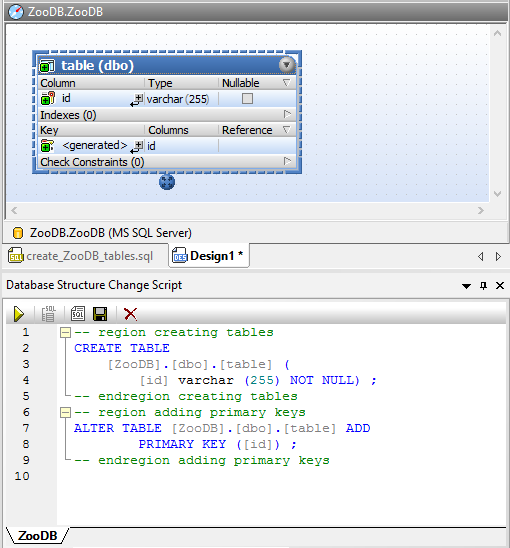
4.Double-click the table name, "table (dbo)", and enter "tblVisitorStatistics". Press Enter.
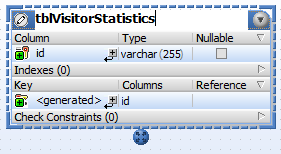
5.In the table design, double-click the "id" column. Change the column name to "StatisticID" and press Enter.
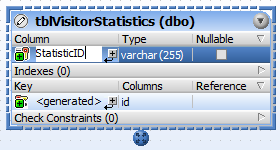
6.Likewise, double-click "varchar(255), replace it with "int", and press Enter. At this stage, the table has one column, and we want to add two more.
7.Click the plus icon ![]() next to column "StatisticID". A column is added and selected for editing. Type "StatisticDate", press Tab, enter type as "date", and press Enter.
next to column "StatisticID". A column is added and selected for editing. Type "StatisticDate", press Tab, enter type as "date", and press Enter.
8.Right-click into the table design and choose Insert new | Column from the context menu. Change the column name to "VisitorCount" and press Enter. Using the same technique as for previous columns, change the data type of the "VisitorCount" column to "int".
9.Right-click the title bar of the Columns section and select the Identity option in the context menu. Then select the Identity check box for the "StatisticID" column.
At this stage, the table design should look as follows:
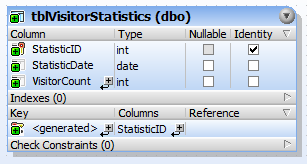
Notice that a primary key having the name <generated> has been generated automatically for the first column in the table. This indicates that the new column will have a primary key with a name automatically assigned by the database, when you run the database update script. If you prefer primary keys not to be generated automatically, you can change this behavior from Tools | Options | Design Editor | Automatically create new primary key for new tables.
Optionally, if you want to change the name of the primary key, replace the text <generated> with a descriptive primary key name. In this case, however, you will need to ensure that the name is not already used in the database.
You are now ready to execute the database script that will actually add the table to the database. In the Database Structure Change Script window, click the Execute Change Script  button to commit the changes to the database.