Run SQL Scripts
In the previous part of this tutorial, you have created a table by using context menu commands in the Online Browser. An alternative way to interact with your database is by means of SQL (Structured Query Language) scripts. SQL scripts can be used to create the structure of the database, perform various operations against the database (for example, populate it with data), and also change or delete the database structure. Below, you will learn how to run some sample SQL scripts against the demo database you created so far.
Let's first create the structure of all the tables in the database, as follows:
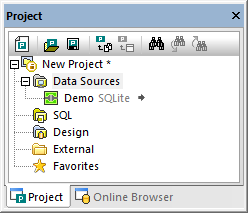
1.Connect to your demo SQLite database created so far.
2.On the File menu, click Open | Open File, and browse for the NanonullCreateTables.sql file from the C:\Users\<username>\Documents\Altova\DatabaseSpy2026\DatabaseSpyExamples\Tutorial folder.
The scripts now opens inside the SQL Editor in the main pane.
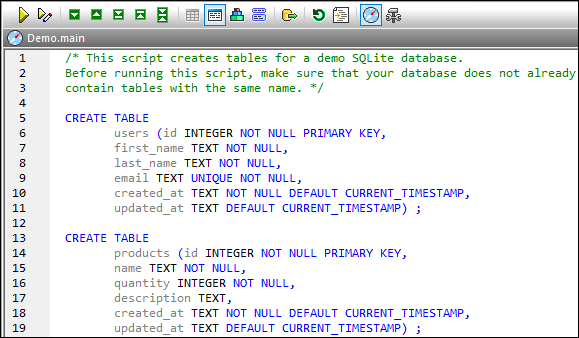
SQL Editor
The SQL Editor is the area where you can view, edit, and execute SQL statements. The demo script illustrated above will create a few tables in the database.
Note: A new SQL Editor window is automatically associated with the data source that is active in the Online Browser or Project Window. The active data source is displayed at all times in the Execution Target Bar. That is, all commands issued from SQL Editor will affect this particular data source only. If there are multiple data sources, the SQL Editor belongs to the one which was last clicked before you opened the SQL Editor. Any subsequent SQL Editor windows that you open will inherit the currently active data source.
To run the SQL script against the database, do one of the following:
•Click Execute  in the toolbar at the top of SQL Editor.
•On the SQL Editor menu, click Execute.
•Press F5.
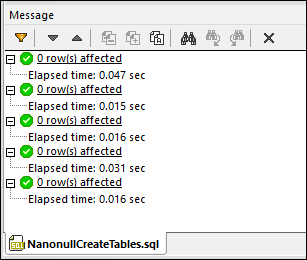
DatabaseSpy runs the script and informs you about the execution result in the Message window, for example:
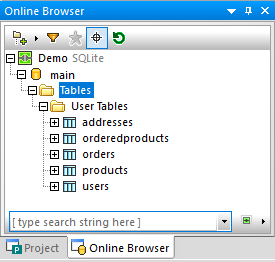
Now click the Online Browser tab in the Project window, and then click Refresh  . You will notice that several tables have been added to the database.
So far, you have created the database structure; however, the tables are empty. To quickly view the number of rows in each table, click the "count" link which appears when you move the mouse over any table in the Online Browser.
You can populate tables with some data as follows:
1.On the File menu, click Open | Open File, and browse for the NanonullPopulateTables.sql file from the C:\Users\<username>\Documents\Altova\DatabaseSpy2026\DatabaseSpyExamples\Tutorial folder.
2.Click Execute .
If you go back to Online Browser now and check the count of rows in each table, you will notice that the count of rows has changed.
Let's now automatically generate a new script which retrieves some data from the database:
•In the Online Browser, locate a table, right-click it, and select Show in new SQL Editor | SELECT from the context menu.
An SQL statement is automatically generated based on the structure of the selected table, and displayed in the SQL Editor window. Click Execute to run the generated script and view the table data in a read-only grid. Click Execute for data editing  if you intend to modify data after retrieving it.
You can also create a SQL script manually, and add it to the current DatabaseSpy project, for example:
1.Open a new SQL Editor window. This can be done in one of the following ways:
oOn the File menu, click New | SQL Editor.
oClick the SQL Editor toolbar button.
oPress Ctrl+ N.
2.Type your script contents, for example: SELECT * FROM users;
3.Click inside the SQL Editor to make the current script active.
4.In the Project window, right-click the "SQL" folder and select Add Active File to Project from the context menu. When prompted to save the file, choose a suitable location for it (for example, the same folder as the DatabaseSpy project file).
Existing SQL scripts created outside DatabaseSpy can also be added to the project, as follows:
1.Make the Project window active.
2.Right-click on a folder inside the Project window, select Add Files to Project, and browse for the existing SQL scripts.
The "SQL" folder from the Project window is meant to help you easily group and access all SQL scripts pertaining to the project. However, there is no restriction that any SQL script must be specifically stored inside this folder. You can create additional folders or subfolders and relocate the scripts as necessary. To achieve this, use the commands available in the Project Window.
Note: Should you need to delete all the tables from the demo database, a third script called NanonullDropTables.sql is available in the C:\Users\<username>\Documents\Altova\DatabaseSpy2026\DatabaseSpyExamples\Tutorial folder for this purpose.