Example: Update a Database from the Model
This example shows you how to update the structure of a database by means of scripts generated by UModel. The database used in this example is a local Access database available at the following path: C:\Users\<username>\Documents\Altova\UModel2026\UModelExamples\Tutorial\altova.mdb. In this example, we will add a new table to the database in UModel, and then generate a SQL script that updates the structure of the underlying Access database.
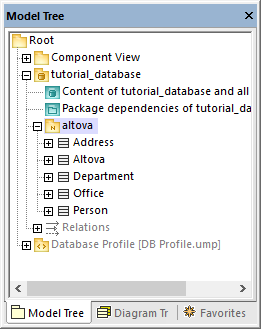
To proceed with this example, first import the database into the model, as shown in Importing SQL Databases into UModel. As illustrated below, after import, your project will include the following:
•A code engineering component responsible for code generation in both directions (from model to database, and vice versa). To view the code engineering component, expand the "Component View".
•A package that represents the structure of the imported database (for example, each database table is a class).
•The Database Profile required to work with database modeling projects.
Add a table
Let's now add a new table to the database in the model.
1.Double-click the "Content of tutorial_database..." diagram.
2.Right-click inside the diagram and select New | Table from the context menu.
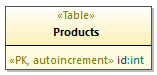
3.Enter a table name, for example, "Products".

4.Click the table and press F7 to add a new property (this will become a table column in the database).
5.Type <<PK, autoincrement>> id:int inside the property body.
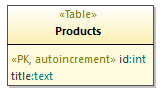
6.Using the same steps as above, add a new column "title" of type "text".
Prepare the model for forward engineering
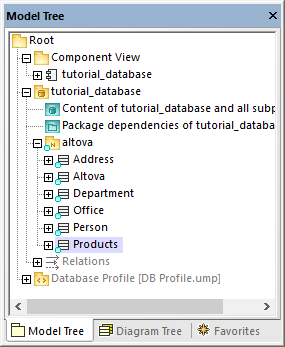
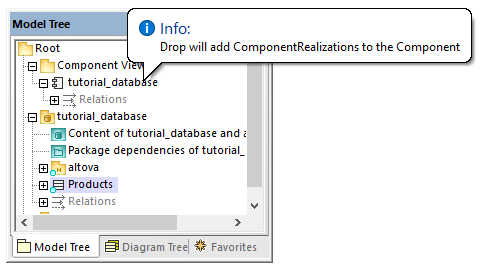
Before a table can be forward engineered from model to the database, it must belong to the correct namespace. To do this, in the Model Tree window, make sure that the class "Products" is under the "tutorial_database" namespace. If it is not, simply drag and drop it onto the "tutorial_database" namespace. Your model should now look as follows:
As explained in Configuring Round-Trip Engineering for Databases, it is good practice to validate the project syntax before attempting to update the database. If you press F11 to check the project syntax at this time, a warning appears in the Messages window that table "Products" has no realization to a component.
You can quickly create a realization to a component as follows:
•In the Model Tree window, drag the class "Products" onto the "tutorial_database" component.
Generate the SQL script
If the project has no more errors or warnings when you press F11, you can proceed to generating the database script:
1.On the Project menu, click Overwrite Program Code from UModel Project. ("Program Code" in the context of databases means the database itself)
2.In the dialog box below, you can choose between merging the changes to the database, or overwriting the database with the changes. For the scope of this example, we will select Overwrite Code according to Model. Otherwise, depending on the case, you may want to choose Merge Model into Code. For more information, see Code Synchronization Settings.
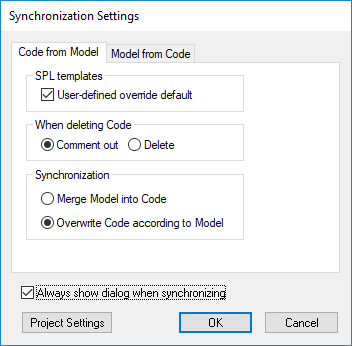
3.Click OK. A database script is generated with the changes you made to the model.
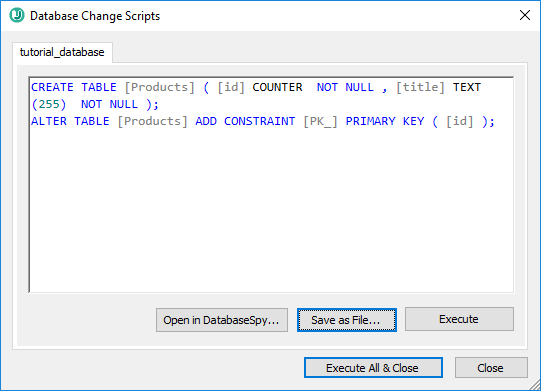
At this stage, you have the following options:
•Open the script in Altova DatabaseSpy for review or execution. For more information about DatabaseSpy, see https://www.altova.com/databasespy.
•Save the script to a file for storage or later execution.
•Click Execute and actually run the script against the database. Always take this action only if you fully understand the consequences (namely, the fact that the database will be updated with immediate effect).