Use a Job as Step of Another Job
This example shows you how to use a previously defined job as a step of another job. Since this example requires a previously created job, you should complete the Creating a Job from a MapForce Mapping example before completing this example.
As you may recall from the Creating a Job from a MapForce Mapping example, the GeneratePurchaseOrder job generates an XML file in a temporary folder every time when it runs. This example shows you how to do the following:
1.Create a job that copies the file generated by the mapping to another directory. We will call this job CopyOutput.
2.Modify the GeneratePurchaseOrder job to include the CopyOutput job as an additional execution step.
Prerequisites
•Required licenses: MapForce Enterprise or Professional edition, MapForce Server or MapForce Server Advanced Edition, and FlowForce Server
•The FlowForce Web Server and FlowForce Server services must be listening at the configured network address and port
•You have a FlowForce Server user account with permissions to one of the containers (by default, the /public container is accessible to any authenticated user).
•The mapping job created in this example copies files from one directory to another. Therefore, on the operating system where FlowForce Server runs, ensure that both directories exist and that you have rights to create files in both directories. This example uses the C:\FlowForceExamples\Mapping and C:\FlowForceExamples\Archive directories.
•Complete the steps described in the Creating a Job from a MapForce Mapping example.
Creating the job
1.Click Configuration, and then navigate to the /public/Examples container. The public/Examples container should already exist if you followed the previous examples; otherwise, create it using the Create | Create Container command.
2.Click Create, and then select Create Job.
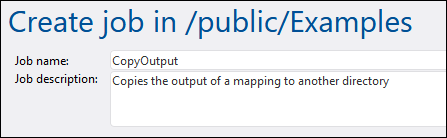
3.Enter the name of the job (in this example, "CopyOutput").
4.Under "Execution steps", add the first execution step, with the following settings:
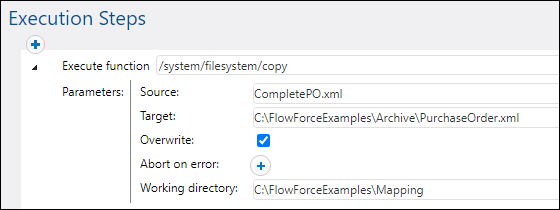
Execute function | Browse for the /system/filesystem/copy function. |
Source | CompletePO.xml
We used a relative path because the Working Directory parameter is set, see below. |
Target | This must be an existing file or directory path on the operating system where FlowForce Server runs. In this example, we would like to rename the file when it is copied, so we'll add the file name to the path, as follows:
C:\FlowForceExamples\Archive\PurchaseOrder.xml |
Overwrite | Select this check box. This instructs FlowForce Server to overwrite any file with the same name found at the destination path. |
Abort on error | Leave this parameter as is.
Optional parameter. This parameter determines the outcome of a job in which an error has occurred. If the Abort on error parameter is true, job execution will be terminated. If the Abort on error parameter is false, FlowForce Server will ignore errors and continue job execution. The default value is true. |
Working directory | FlowForce will look for all relative file paths in this directory. Set it to:
C:\FlowForceExamples\Mapping |
5.Under "Credentials", select an existing credential record or specify a local credential. For more information, see Credentials.
6.Click Save.
As you may have noticed, the job we just created does not have any trigger. We did not define any trigger because we will call this job from another job.
Adding the "CopyOutput" job as a step of another job
1.Open the GeneratePurchaseOrder from the /public/Examples container.
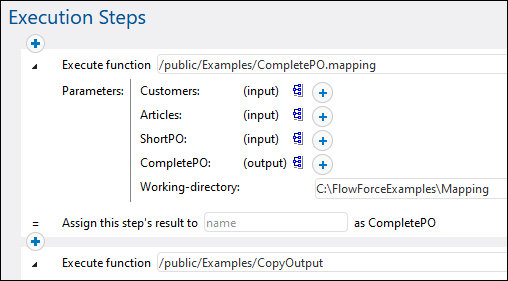
2.Under "Execution Steps", click new Execution step to add a new step after the existing one.
3.Next to "Execute function", browse for the CopyOutput job created earlier. The execution steps should now look as follows:
4.Update the time trigger, and then click Save.
5.At the time entered in the trigger, FlowForce Server executes the job and copies the CompletePO.xml file to the specified directory and renames it to PurchaseOrder.xml. To see whether the job executed successfully, refer to the job log.