Create a Job from a StyleVision Transformation
This example shows you how to create a FlowForce Server job from a StyleVision transformation. The job will consist of three steps, namely:
1.The first step will execute the StyleVision transformation.
2.Because the transformation returns a list of multiple streams, the second step will access one of the several files created by the transformation, using a FlowForce Server expression.
3.The third step will copy the file to an archive folder.
Prerequisites
•Required licenses: StyleVision Enterprise or Professional edition, StyleVision Server, FlowForce Server
•The FlowForce Web Server and FlowForce Server services must be listening at the configured network address and port
•You have a FlowForce Server user account with permissions to one of the containers (by default, the /public container used in this example is accessible to any authenticated user).
•The job created in this example copies files from one directory to another. Therefore, on the operating system where FlowForce Server runs, ensure that both directories exist and that you have rights to create files in both directories. This example uses the following directories:
oC:\FlowForceExamples\GenerateHtml — this is the job's working directory where all processing happens and relative paths are resolved.
oC:\FlowForceExamples\Archive — the destination directory to which the HTML file produced by the job will be copied.
Demo files used
The StyleVision Power Stylesheet (.sps) file used in this example processes an XML file and produces output in multiple formats, including HTML. It is called AutoCalc.sps, and is available in the StyleVision "Examples" project, under Examples > Basics > AutoCalc.sps. To open the StyleVision examples project in StyleVision, click Examples on the Project menu.
Deploying the StyleVision transformation to FlowForce Server
First, let's deploy the demo .sps file from StyleVision to FlowForce Server. Deploying an .sps file means that StyleVision organizes the resources used by the transformation into an object and passes it through HTTP (or HTTPS if configured) to FlowForce Server. Once the transformation is deployed to FlowForce Server, you will create a server job from it.
To deploy the StyleVision transformation:
1.Open the AutoCalc.sps file in StyleVision.
2.On the File menu, click Deploy to FlowForce.... If this option is disabled, make sure the Design tab is currently selected. When prompted to save the transformation as PXF file, leave the default settings as is, and click OK.
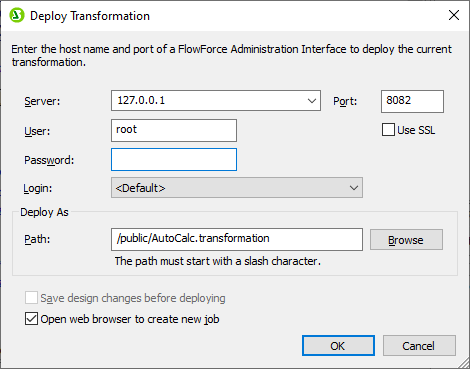
3.In the Server and Port text boxes, enter the server name and port of the Web administration interface (for example, 127.0.0.1 and 8082, if the FlowForce Web Server service is listening on the same machine at the default port). Change these values if you have configured a different address and port, see Defining the Network Settings.
4.In the User and Password text boxes, enter your FlowForce Server user name and password.
5.Select either Directly from the Login drop-down list, or leave the <Default> option as is.
If Directory Service integration is enabled, enter your domain user name and password, and then select your domain name from the Login drop-down list. For more information, see Changing the Directory Service Settings |
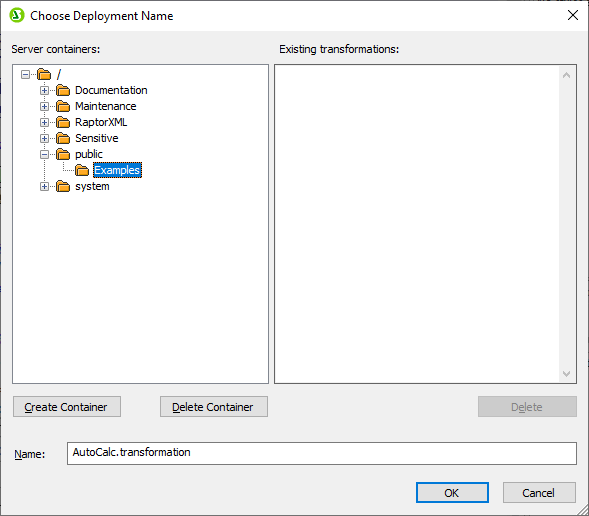
6.The Path text box displays the default path where the transformation will be deployed. For consistency with other examples, click Browse and change the path to /public/Examples/AutoCalc.transformation. The /public/Examples container must already exist if you followed the previous examples; otherwise, you can create it by clicking Create Container in the dialog box below.
7.Click OK, and select the Open web browser to create new job check box on the "Deploy Transformation" dialog box.
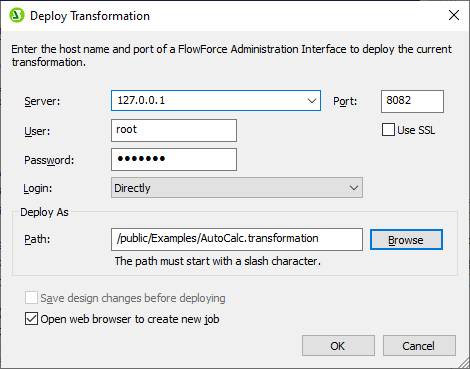
8.Click OK to deploy the transformation.
When deployment finishes, the FlowForce Server Administration Interface opens in your web browser, and a partially prefilled job page is displayed. The transformation function itself is saved at the container path specified earlier. This concludes the deployment part.
Creating the job
After you have deployed the .sps file to FlowForce Server as described above, the browser displays a partially filled job page. The first execution step is created automatically with some prefilled parameters.

You can also create the job by opening the function's page (/public/Examples/AutoCalc.transformation), and then clicking Create job.
To configure the job:
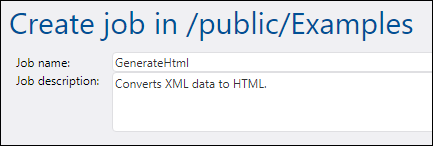
1.Change the default job name from "AutoCalc.transformaton.job" to something more descriptive, for example, "GenerateHtml". This is an optional step, but it may be necessary if the name is already used by some other job in the same container.
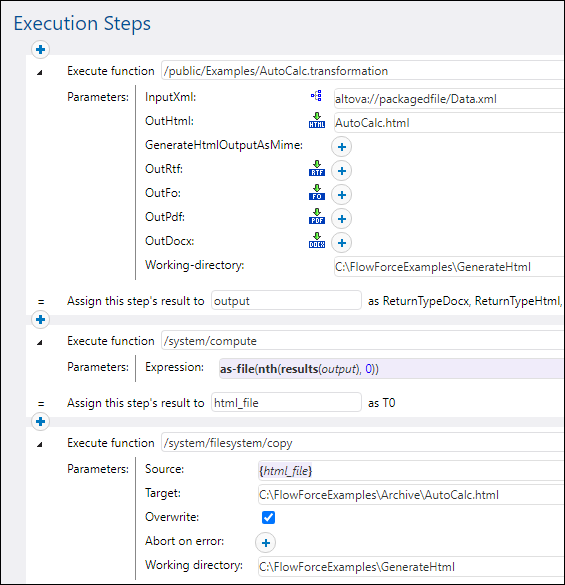
2.Fill in the first execution step created by default as follows:
Execute function | This field points to the StyleVision transformation function deployed earlier; leave it as is. |
Parameters | The InputXml field contains an XML file that is pre-packaged into the job (Data.xml). For the scope of this example, you can leave this option as is. For information about changing input instances, see Running Mappings and Transformations as Jobs.
To declare the AutoCalc.html as output file, click the
The option GenerateHtmlOutputAsMime is not set in this example. This option is typically necessary to prepare the HTML body of an e-mail message sent with FlowForce Server. For more information, see the send-mime function.
The options OutRtf, OutFo, OutPdf, OutDocx declare transformation outputs in the respective formats (RTF, FO, PDF, Docx). These outputs are not used in the current example, so they can be left unchanged.
In the Working-directory box, enter the path to a directory where FlowForce Server must save the job output. This example uses C:\FlowForceExamples\GenerateHtml as working directory. |
Assign this step's result to | Enter output. This explicitly gives the name "output" to the result returned by the first execution step. We will need to refer to this result subsequently. |
 button next to
3.Click new Execution step and configure it as follows:
Execute function | Browse for the /system/compute function. | |
Expression | Enter the following FlowForce Server expression:
This expression instructs FlowForce Server to do the following:
1.Call the expression function results to get the list returned by output declared previously. 2.Pass this list to function nth to get the first item in the list. Since the list index is zero-based, we are using 0 as second argument of function nth. 3.Pass the value to the as-file function to declare it as a file. | |
Assign this step's result to | Enter html_file. This instructs FlowForce Server that the result returned by the step has the name html_file. We will need to refer to this result subsequently. |
4.Click new Execution step and configure the step as follows:
Execute function | Browse for the /system/filesystem/copy function. |
Source | Click |
Target | C:\FlowForceExamples\Archive\AutoCalc.html |
Overwrite | Select the Overwrite check box. |
Working directory | C:\FlowForceExamples\GenerateHtml |
 , and then select
At this stage, the "Execution Steps" section of the job page should look as follows:
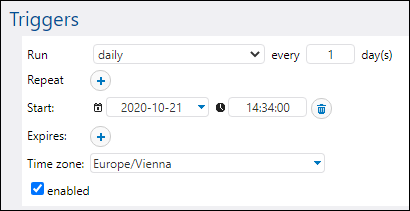
5.Under "Triggers", click new Timer.
6.Next to "Run", set the timer to run Daily every 1 days. Next to "Start", select a date and time when the job must start, for example:
9.Under "Credentials", select an existing credential record or specify a local credential. For details, see Credentials.
10.Click Save.
Running the job
At the time and date specified in the trigger, FlowForce Server executes the StyleVision transformation job. If the job executes successfully, the AutoCalc.html file becomes available in the C:\FlowForceExamples\Archive directory. To see whether the job executed successfully, refer to the job log.