Including Types Using Only XMLSpy
In the previous sections, you have created include, import and redefine relationships in SchemaAgent, and then worked with the included, imported or redefined types in XMLSpy. In this section, you will create include relationships using only XMLSpy, as a client to SchemaAgent LocalServer.
The following schema examples will be used:
•company1.xsd: This schema is structured to contain information about a company and its employees.
•company2.xsd: This schema is structured to contain information about the products of a company.
The goal is to include the address and employee components from company1.xsd in company2.xsd. Both schemas are in the SchemaAgentExamples\Tutorial\include2 folder.
To make the components to be included into global complex types:
1.Open company1.xsd in XMLSpy.
2.Make sure that you are connected to the SchemaAgent LocalServer.
3.In XMLSpy, click the Display Diagram  icon for the root element company1 to display its content model.
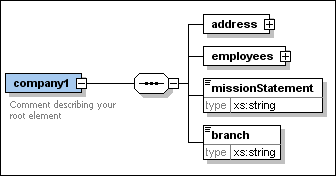
4.Right-click the address element and select Make Global | Complex type from the context menu. A new global complex type called addressType is created.
5.Click the "+" icon to expand the employees element.
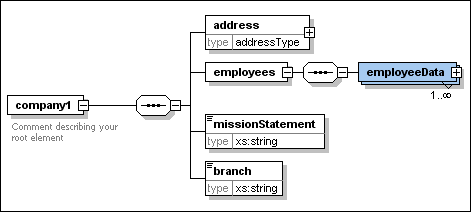
6.In the same way, make the employeeData element into a global complex type. This results in a type called employeeDataType.
7.Save the file.
To include global complex types in schemas using XMLSpy:
1.Open the target schema company2.xsd in XMLSpy.
2.Make sure that you are connected to the SchemaAgent LocalServer.
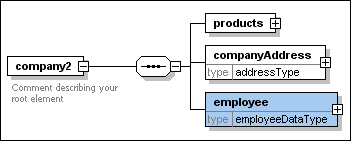
3.In XMLSpy, click the Display Diagram icon for the root element company2 to display its content model.
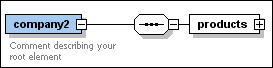
4.Right-click the sequence element and select Add child | Element from the context menu.
5.Enter "companyAddress" as the name for this element.
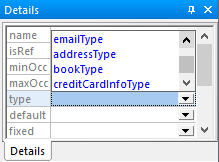
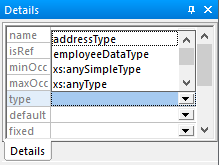
6.With this element still selected, in the Details entry helper, select addressType from the type drop-down list. The type "addressType" is in blue because it is on the SchemaAgent search path.
7.A dialog box opens where you can select which type of relationship you want to have between the two schemas.
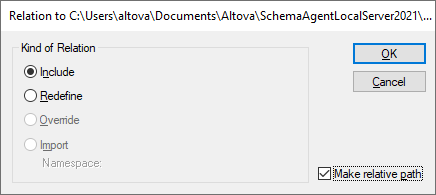
8.Select Include and confirm with OK. This inserts an include statement into the company2.xsd schema.
9.Repeat steps 4 to 65 to create a further element with the name "employee" and of type employeeDataType. Notice that, when you select employeeDataType from the type drop-down list in the Details entry helper, it is in black, because there is now an include relationship between the schemas.
10. Save the file.
You have now included two types from the schema company1.xsd in the schema company2.xsd.
To view the include statement that has been inserted:
•Click the Display All Globals  icon.
icon.
