Toolbars
The Toolbars tab enables you to activate or deactivate specific toolbars, as well as create your own specialized ones.
SchemaAgent Client toolbars contain symbols for the most frequently used menu commands. For each symbol you get a brief "tool tip" explanation when the mouse cursor is directly over the item and the status bar shows a more detailed description of the command.
You can drag the toolbars from their standard position to any location on the screen, where they appear as a floating window. Alternatively, you can also dock them to the left or right edge of the main window.
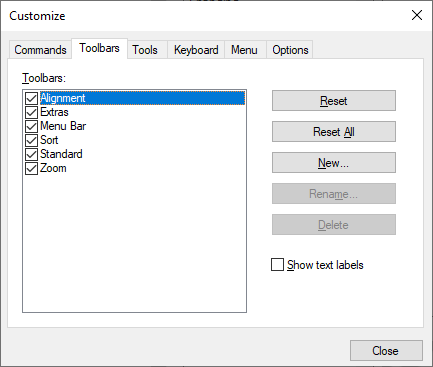
Select the Show text labels option to display explanatory text below toolbar icons. You can select or clear this option for each toolbar individually.
To activate or deactivate a toolbar:
•Click or clear the check box corresponding to the specific toolbar.
To create a new toolbar:
1.Click the New... button, and give the toolbar a name in the dialog box that appears.
2.Drag commands to the toolbar in the Commands tab of the Customize dialog box.
To reset the Menu Bar:
1.Click the Menu Bar entry.
2.Click the Reset button, to reset the menu commands to the state they were in when SchemaAgent Client was installed.
To reset all toolbar and menu commands:
1.Click the Reset All button to reset all the toolbar commands to the state they were when the program was installed. A dialog box appears stating that all toolbars and menus will be reset.
2.Click Yes to confirm the reset.
To change a toolbar name:
•Click the Rename... button to edit the name of the toolbar.
This option is available only for user-defined toolbars.
To delete a toolbar:
1.Select the toolbar you want to delete in the Toolbars list box.
2.Click the Delete button. A message box appears, asking if you really want to delete the toolbar.
3.Click Yes to confirm the deletion.
This option is available only for user-defined toolbars.