Configuring a Search Path
In this section, you will configure a path to the folder that contains the files used in this tutorial. SchemaAgent Client displays the search paths in the Hierarchical and Flat tabs of the Explorer window.
To configure a search path to the Tutorial folder:
1.In the Explorer window of SchemaAgent Client, click the Configure Paths tab.
2.Right-click any existing search paths added by default during installation, and select Delete Search Path from the context menu.
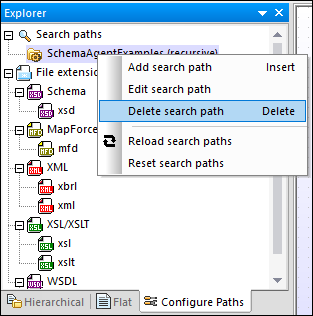
3.Right-click anywhere in the Explorer window and select Add search path from the context menu. Alternatively, select the Search paths entry in the Explorer window and press the Insert key. The Add/Edit search path dialog box opens.
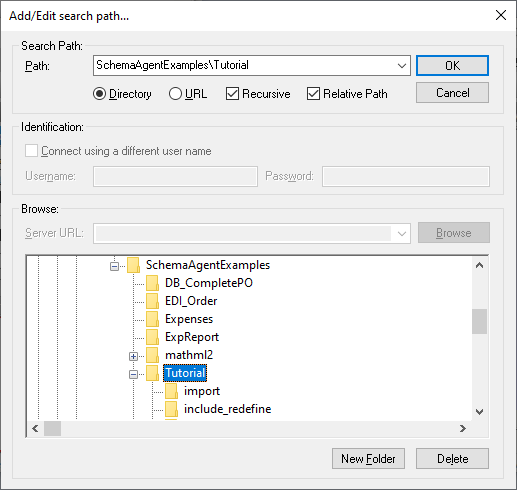
4.Choose Directory and select the Recursive check box to have the sub-folders displayed as well.
5.Using the directory tree from the lower part of the dialog box, navigate to the following directory: Documents\Altova\SchemaAgent LocalServer2026\SchemaAgentExamples\Tutorial.
6.Optionally, if your paths are very long, select the Relative Path check box.
7.Click OK. The search path appears in the Explorer window.
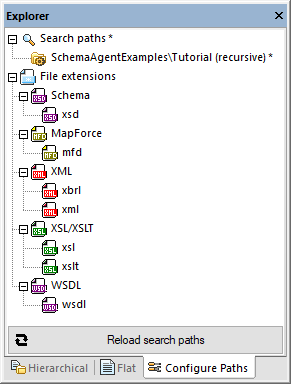
8.Click the Reload search paths button. When the operation completes, the asterisk next to "Search paths" disappears, which indicates that the new search path is now saved.