Connecting to a Server
In order to use SchemaAgent Client, you must connect the application to a server first. When you start SchemaAgent Client, the ![]() icon is displayed in the upper right corner of the application and the Connect to SchemaAgent Server dialog box pops up.
icon is displayed in the upper right corner of the application and the Connect to SchemaAgent Server dialog box pops up.
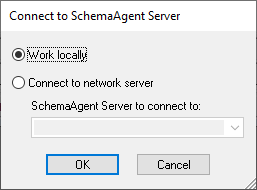
You have two options to use SchemaAgent Client:
•Work locally: This will start a standalone LocalServer on your PC which you can configure from within SchemaAgent Client
•Connect to network server: This will connect to a network-based SchemaAgent Server which must already be running and allows for several users being connected. To configure SchemaAgent Server, you have to open the server application and this configuration is available to all connected clients.
If a SchemaAgent server connection already exists, you have to close this connection before making a new connection.
To connect to a server:
1.Select the menu option Tools | Connect to Server or click the Connect to Server ![]() toolbar button. The Connect to SchemaAgent Server dialog box opens.
toolbar button. The Connect to SchemaAgent Server dialog box opens.
2.Do one of the following:
•Select Work locally to start and connect to the standalone LocalServer. Once the local server starts, you can configure search paths from the Configure Paths tab in the Explorer window.
•Select Connect to network server and choose a SchemaAgent Server to connect to from the drop-down list. After a successful connection is made, the search paths defined on the server are displayed in the Explorer window.
3.Click OK.
To close a connection:
•Click the SchemaAgent server ![]() icon in the system tray (at the bottom right of your screen) and select the Shutdown command.
icon in the system tray (at the bottom right of your screen) and select the Shutdown command.