Example: Generating SOAP Web Services (Java)
This example illustrates how to generate a SOAP Web service with MapForce. You will generate Java program code from a sample MapForce project available at the following path: <Documents>\Altova\MapForce2023\MapForceExamples\Tutorial\Query Person database.mfp. This project implements a SOAP Web service that exposes two operations: getPerson and putPerson. This Web service communicates in the background with an SQLite database to retrieve or add person details, respectively, through the operations above. For an example of how to create such projects in MapForce, see Creating Web Service Projects from WSDL Files.
This example requires Java 7 and Apache Ant to compile the generated Java code. The .aar file will be deployed to a running Apache Tomcat server with Axis2 installed.
For simplicity, this example uses a basic Web server configuration and should not be taken as prescriptive. In a production environment, you may need to use a different approach as demanded by the specifics of your Web server, the security policies in your organization, and other factors.
To call the SOAP Web service, this example makes use of XMLSpy Enterprise Edition. If you do not have XMLSpy, you will need a SOAP client to test the Web service, or, alternatively, write program code that can call the Web service.
Step 1: Prepare the query.wsdl file
This example Web service originates from the following WSDL file: <Documents>\Altova\MapForce2023\MapForceExamples\Tutorial\query.wsdl. By default, the query.wsdl file defines the service details for C# and Java in two separate sections, one of which is commented out. Therefore, before generating Java code, locate the following section in the query.wsdl file and make sure that it is commented out:
<!--service name="WS2DB"> |
Also, make sure that the following section (only applicable to Java) is NOT commented out:
<service name="WS2DB"> |
Step 2: Generate Java code and build it
Run MapForce and open the "Query Person database.mfp" project from the folder <Documents>\Altova\MapForce2023\MapForceExamples\Tutorial\. Right-click the project in the Project window, and select Generate code in | Java. MapForce generates program code and displays the outcome in the Messages window:

By default, code will be generated in a subdirectory called "output", relative to the project's directory. For the scope of this tutorial, we will leave the default settings as is. However, if you want to change the output directory, see Setting the Code Generation Settings.
To build the Java code, run Ant at the command line in the same directory as the build.xml file.

As a result, an Axis Archive (.aar) file called Query_Person_database.aar is generated in the output directory.
Before you can call Ant from any directory as illustrated above, it must be installed and configured correctly. Here is a quick summary (for more details, check the Ant manual from http://ant.apache.org):
•The PATH environment variable must include the path to the "bin" subdirectory of Ant root directory. •The ANT_HOME environment variable must be set to the directory where Ant is installed. •The AXIS2_HOME environment variable must be set to the directory where the standard distribution of Axis2 is installed. •The JAVA_HOME environment variable must be set to the directory where Java JDK is installed. •Check that Ant is running by typing "ant" at the command line. The message "Buildfile: build.xml does not exist!" means that Ant is configured and is looking for a build file. |
Step 3: Deploy the Web service to Axis 2
In this example, the web service is uploaded to Tomcat from the Axis2 administration page. The latter can be installed and deployed to a running Tomcat server as follows (for more details, refer to Axis2 documentation):
1.Download the Axis2 WAR (Web Archive) distribution from http://axis.apache.org/axis2/java/core/download.html. 2.Unpack the downloaded package to a local directory. 3.Copy the axis2.war file to Tomcat's directory %CATALINA_HOME%\webapps. 4.Check that Axis2 is running, by opening: http://localhost:8080/axis2 |
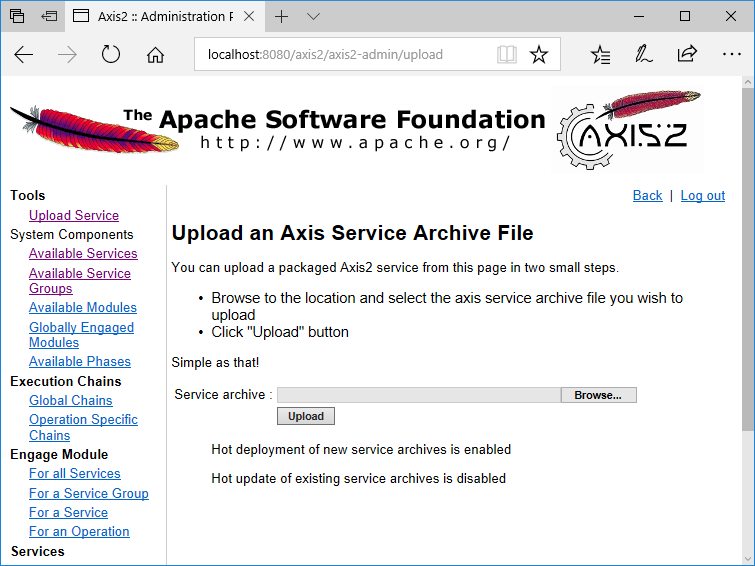
Open the Axis2 Web administration page and upload the .aar file generated in the previous step.
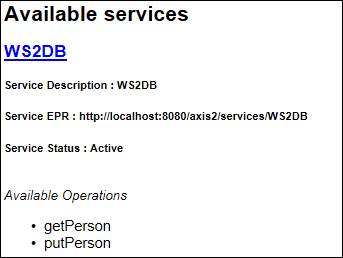
A new Web service called "WS2DB" should now be available and active in the Axis2 administration page.
Calling the Web service
If you followed the steps above literally, then the WSDL of the Web service is available at http://localhost:8080/axis2/services/WS2DB?wsdl. To call the Web service we just deployed, we will use XMLSpy, although you can use, of course, other SOAP clients as well.
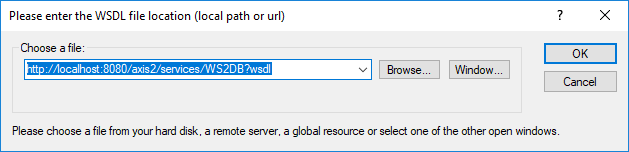
Run XMLSpy Enterprise Edition. On the SOAP menu, click Create New SOAP Request. When prompted, enter the WSDL of the Web service (in this example, http://localhost:8080/axis2/services/WS2DB?wsdl).
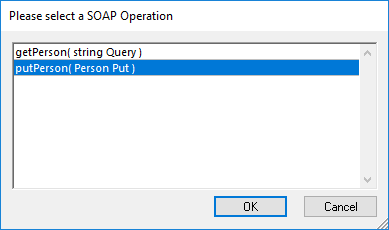
Click OK. When prompted to select a SOAP Operation, select putPerson.
XMLSpy generates a sample request like the one below.
<?xml version="1.0" encoding="UTF-8"?> |
Replace "String" with the person details you want to supply as input to the Web service. For the scope of this example, you could use a request like the one below:
<?xml version="1.0" encoding="UTF-8"?> |
You can now send the request above to the server. On the SOAP menu, click Send Request to Server. The SOAP Request Settings dialog box opens.
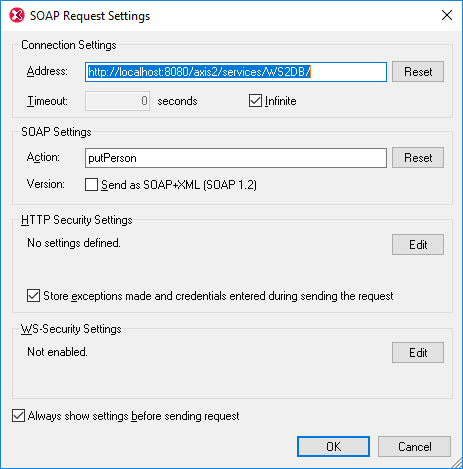
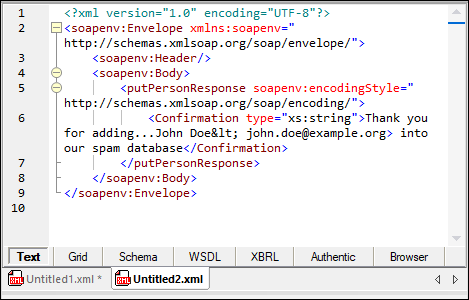
Click OK. XMLSpy initiates the call, and returns the response in the editor. The image below illustrates a successful response.
Using the same approach as described above, you can also call the getPerson operation exposed by this Web service. For step-by-step instructions, see "Calling the Web Service" section in the C# tutorial. Only the WSDL URL is different in the C# tutorial; all other instructions for calling the Web service are identical.