New
Placing the cursor over the New command pops out a submenu (screenshot below) that enables you to create a new SPS document of one of different types:
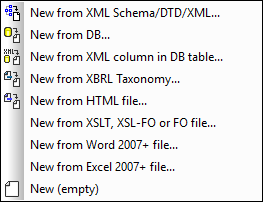
•A new SPS file based on an XML Schema or DTD or XML Schema generated from an XML file (New from XML Schema / DTD / XML). The selected schema is added to the Design Overview sidebar and a graphical tree representation is added to the schema tree (in the Schema Tree sidebar). In Design View, the SPS is created with an empty main template. A new SPS can also be created from a file (schema or XML) via a URL or global resource (see below).
•A new SPS file based on an XML Schema generated from a DB you select (New from DB or New from XML Column in DB Table). The connection process is described in the section Connecting to a DB and Setting up the SPS. The SPS is created in Design View with an empty main template.
•A new SPS file based on an XBRL taxonomy.
•A new SPS based on a user-defined schema you create node-by-node from an HTML file (New from HTML File). The user-defined schema is added to the Design Overview sidebar and Schema Tree sidebar. In the schema tree, it will have a single document element (root element), and the HTML file is loaded in Design View.
•An SPS can be created from an XSLT-for-HTML or an XSLT-for-FO or an FO file. Template structure and styling in the XSLT will be created in the SPS. You can then modify the SPS components and add content and formatting to the SPS. See New from XSLT for details.
•A new SPS that contains the content of a MS Word document as the design's static text.
•A new SPS that contains the content of a MS Excel document as the design's static text.
•A new empty SPS (New (empty)). No schema is added to either the Design Overview sidebar or the schema tree. An empty main template will be created in Design View.
Note: A global resource can be used to locate a file or DB resource.
Selecting the type of design
After you have selected (XSD and XML) sources files, if required, the Create New Design dialog appears.
The Create New Design dialog (screenshot below) prompts you to select either: (i) a free-flowing document design, or (ii) a form-based document design (in which components are positioned absolutely, as in a layout program).
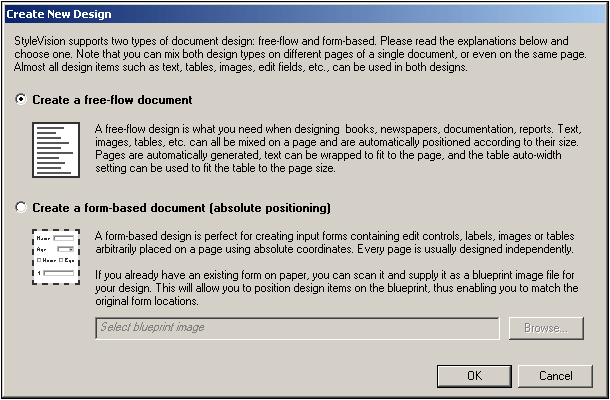
In a free-flowing document design, document content is laid out to fit the output media object or viewer (paper or screen). Items in the document content can only be placed relative to each other, and not absolutely. This kind of design is suited for documents such as reports, articles, and books.
In a form-based document, a single Layout Container is created, in which design components can be positioned absolutely. The dimensions of the Layout Container are user-defined, and Layout Boxes can be positioned absolutely within the Layout Container and document content can be placed within individual Layout Boxes. If you wish the design of your SPS to replicate a specific form-based design, you can use an image of the original form as a blueprint image. The blueprint image can then be included as the background image of the Layout Container. The blueprint image is used to help you design your form; it will not be included in the output.
Selecting files via URLs and Global Resources
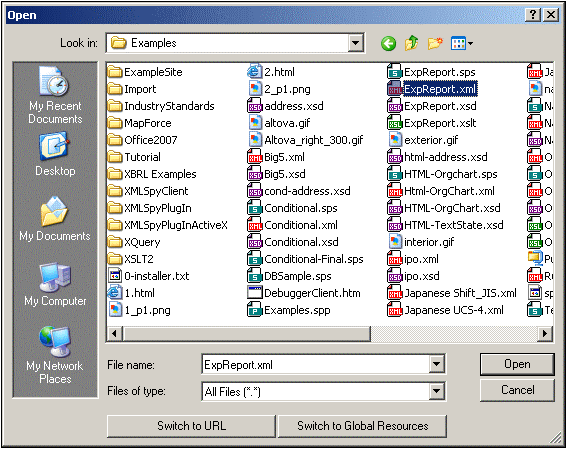
In several File Open and File Save dialogs, you can choose to select the required file or save a file via a URL or a global resource (see screenshot below). Select the Switch to URL or Switch to Global Resource to go to one of these selection processes.
Selecting files via URLs
To select a file via a URL, do the following:
| 1. | Click the Switch to URL command. This switches to the URL mode of the Open dialog (screenshot below). |
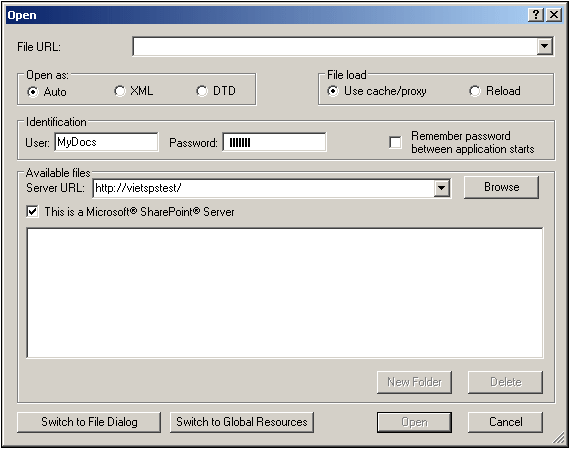
| 2. | Enter the URL you want to access, in the Server URL field (screenshot above). If the server is a Microsoft® SharePoint® Server, check the Microsoft® SharePoint® Server check box. See the Microsoft® SharePoint® Server Notes below for further information about working with files on this type of server. |
| 3. | If the server is password protected, enter your User-ID and password in the User and Password fields. |
| 4. | Click Browse to view and navigate the directory structure of the server. |
| 5. | In the folder tree, browse for the file you want to load and click it. |
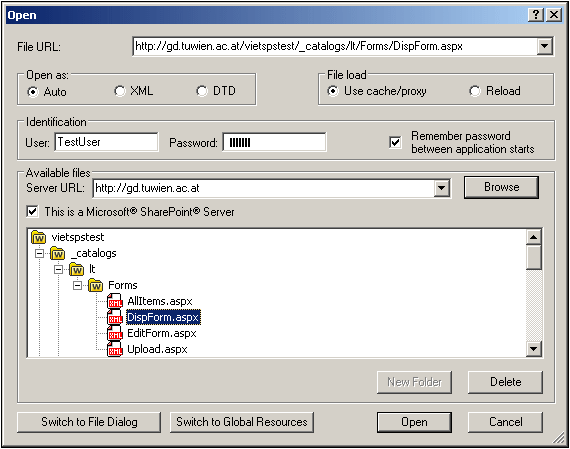 |
The file URL appears in the File URL field (screenshot above). The Open button only becomes active at this point.
| 6. | Click the Open button to load the file. The file you open appears in the main window. |
Note: The Browse function is only available on servers which support WebDAV and on Microsoft SharePoint Servers. The supported protocols are FTP, HTTP, and HTTPS.
Note: To give you more control over the loading process, you can choose to load the file through the local cache or a proxy server (which considerably speeds up the process if the file has been loaded before). Alternatively, you may want to reload the file if you are working, say, with an electronic publishing or database system; select the Reload option in this case
Microsoft® SharePoint® Server Notes
Note the following points about files on Microsoft® SharePoint® Servers:
•In the directory structure that appears in the Available Files pane (screenshot below), file icons have symbols that indicate the check-in/check-out status of files.
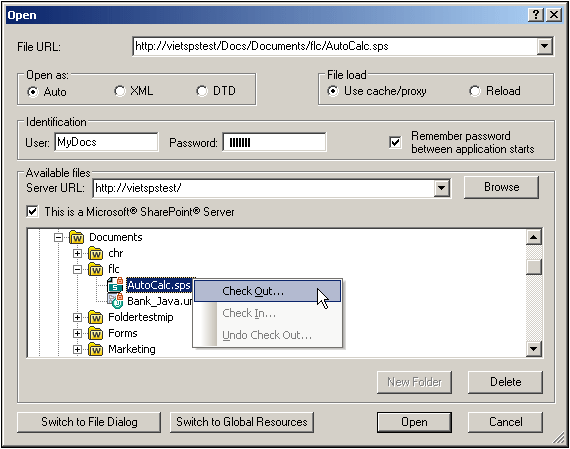
Right-clicking a file pops up a context menu containing commands available for that file (screenshot above).
•The various file icons are shown below:
Checked in. Available for check-out. | |
Checked out by another user. Not available for check-out. | |
Checked out locally. Can be edited and checked-in. |
•After you check out a file, you can edit it in your Altova application and save it using File | Save (Ctrl+S).
•You can check-in the edited file via the context menu in the Open URL dialog (see screenshot above), or via the context menu that pops up when you click the file tab in the Main Window of your application (screenshot below).
•When a file is checked out by another user, it is not available for check out.
•When a file is checked out locally by you, you can undo the check-out with the Undo Check-Out command in the context menu. This has the effect of returning the file unchanged to the server.
•If you check out a file in one Altova application, you cannot check it out in another Altova application. The file is considered to be already checked out to you. The available commands at this point in any Altova application supporting Microsoft® SharePoint® Server will be: Check In and Undo Check Out.
Opening and saving files via Global Resources
To open or save a file via a global resources, click Switch to Global Resource. This pops up a dialog in which you can select the global resource. These dialogs are described in the section, Using Global Resources. For a general description of Global Resources, see the Global Resources section in this documentation.