XBRL Taxonomy
An XBRL taxonomy can be used as a schema source in the following ways:
•A new SPS file can be created with an XBRL taxonomy as its schema source via the File | New | New from XBRL Taxonomy.
•In the Design Overview sidebar, clicking the Add Schema Source link pops up a menu in which you select the option Add XBRL Taxonomy. The taxonomy can be added to an empty SPS file (that is, one with no schema source) or to one already containing one or more schema sources.
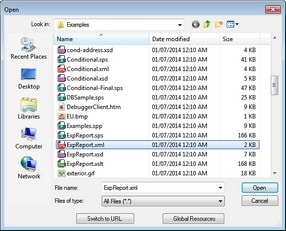
On clicking either of these two commands, a file open dialog pops up, in which you can browse for the XBRL taxonomy. The taxonomy can also be selected via a URL or a global resource; how to do this is described below. Select the taxonomy and click Open. A dialog appears asking whether you wish to assign a Working XBRL file to the schema source. Browse for the file or global resource, or select Skip to not assign a Working XBRL File. (You will need a Working XBRL File in order to preview your output in the Output Views.)
The XBRL taxonomy will be loaded and will be available in the Schema Tree sidebar for dragging into the design. The Working XBRL file will be loaded and will provide the data for output previews.
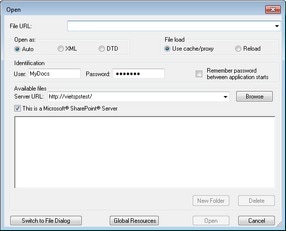
In several File Open and File Save dialogs, you can choose to select the required file or save a file via a URL or a global resource (see screenshot below). Click Switch to URL or Global Resource to go to one of these selection processes.
Selecting files via URLsTo select a file via a URL (either for opening or saving), do the following:
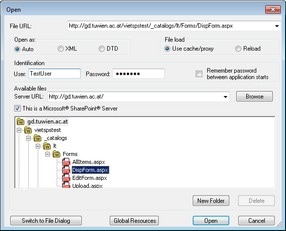
1.Click the Switch to URL command. This switches to the URL mode of the Open or Save dialog (the screenshot below shows the Open dialog). 2.Enter the URL you want to access in the Server URL field (screenshot above). If the server is a Microsoft® SharePoint® Server, check the Microsoft® SharePoint® Server check box. See the Microsoft® SharePoint® Server Notes below for further information about working with files on this type of server. 3.If the server is password protected, enter your User-ID and password in the User and Password fields. 4.Click Browse to view and navigate the directory structure of the server. 5.In the folder tree, browse for the file you want to load and click it. The file URL appears in the File URL field (see screenshot above). The Open or Save button only becomes active at this point. 6.Click Open to load the file or Save to save it.
Note the following:
•The Browse function is only available on servers which support WebDAV and on Microsoft SharePoint Servers. The supported protocols are FTP, HTTP, and HTTPS. •To give you more control over the loading process when opening a file, you can choose to load the file through the local cache or a proxy server (which considerably speeds up the process if the file has been loaded before). Alternatively, you may want to reload the file if you are working, say, with an electronic publishing or database system; select the Reload option in this case. .
|
Note the following points about files on Microsoft® SharePoint® Servers:
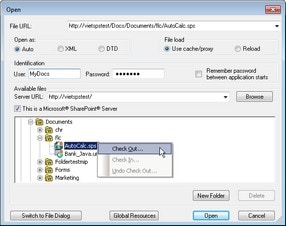
•In the directory structure that appears in the Available Files pane (screenshot below), file icons have symbols that indicate the check-in/check-out status of files. Right-clicking a file pops up a context menu containing commands available for that file (screenshot above).
•The various file icons are shown below:
•After you check out a file, you can edit it in your Altova application and save it using File | Save (Ctrl+S). •You can check-in the edited file via the context menu in the Open URL dialog (see screenshot above), or via the context menu that pops up when you right-click the file tab in the Main Window of your application (screenshot below). •When a file is checked out by another user, it is not available for check out. •When a file is checked out locally by you, you can undo the check-out with the Undo Check-Out command in the context menu. This has the effect of returning the file unchanged to the server. •If you check out a file in one Altova application, you cannot check it out in another Altova application. The file is considered to be already checked out to you. The available commands at this point in any Altova application supporting Microsoft® SharePoint® Server will be: Check In and Undo Check Out.
|
To open or save a file via a global resources, click Global Resource. This pops up a dialog in which you can select the global resource. These dialogs are described in the section, Using Global Resources. For a general description of Global Resources, see the Global Resources section in this documentation. |


