Component Diagrams
This tutorial section illustrates the following tasks:
•Create realization dependencies between classes and components
•Change the appearance of lines used in the diagram
•Add usage dependencies to an interface
•Use "ball-and-socket" interface notation
To proceed, run UModel and open the BankView-start.ump project (see also Opening the Tutorial Project). The project includes several predefined object diagrams which will be used to illustrate the tasks above. It is assumed you have already followed the tutorial section Creating Derived Classes to create the class SavingsAccount.
Creating realization dependencies between classes and components
In the Diagram Tree window, expand "Component Diagrams", and double-click the "BankView realization" diagram icon. This diagram already contains the BankView component and several classes connected to it with dependencies of type "ComponentRealization". The text "from bankview" inside each class indicates the name of the package where the class belongs.
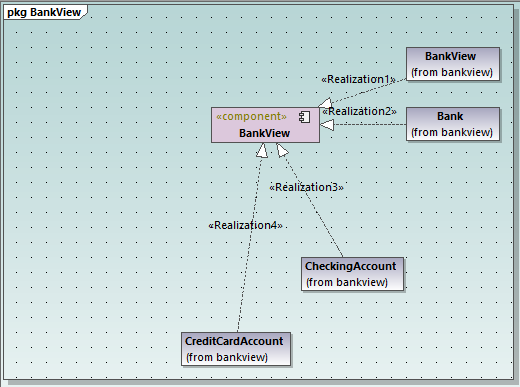
"BankView realization" diagram
Let's now add a new class to the diagram and also create a realization dependency between the new class and the BankView component.
1.In the Model Tree window, locate the SavingsAccount class in the bankview package. If this class is missing, follow the tutorial section Creating Derived Classes to create it first.
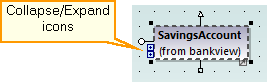
2.Drag the SavingsAccount class from the Model Tree into the diagram.
By default, the class is displayed with all compartments expanded. Click the collapse/expand icons to the left of the class to show or hide properties and operations.
To create a realization dependency between the class and the component, do one of the following:
•Click the Realization ![]() toolbar button and drag from the SavingsAccount class to the BankView component.
toolbar button and drag from the SavingsAccount class to the BankView component.
•Move the cursor over the "ComponentRealization" handle of the class and drag to the BankView component.
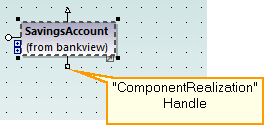
The realization dependency between SavingsAccount and BankView has now been created.
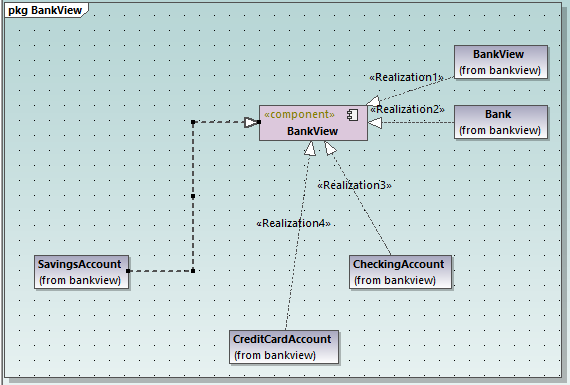
To give a name to the new dependency line (for example, "Realization5"), first select the line, and then start typing its name directly. Alternatively, select the line, and then edit the Name property in the Properties window.
Changing the appearance of diagram lines
Let's now change the line appearance from "curved" to "direct line", as follows:
1.Select the line created previously (that is, the one between SavingsAccount and BankView).
2.Click the Direct Line ![]() toolbar button.
toolbar button.
Adding usage dependencies to an interface
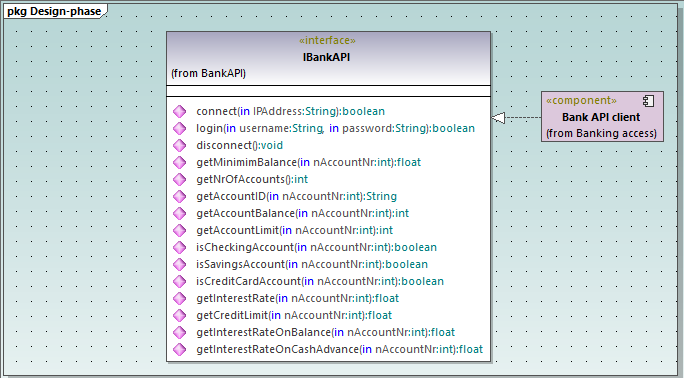
1.In the Model Tree window, navigate to Root | Design-phase and double-click the icon next to the "Overview" diagram. The "Overview" component diagram is opened and displays the currently defined system dependencies between components and interfaces.
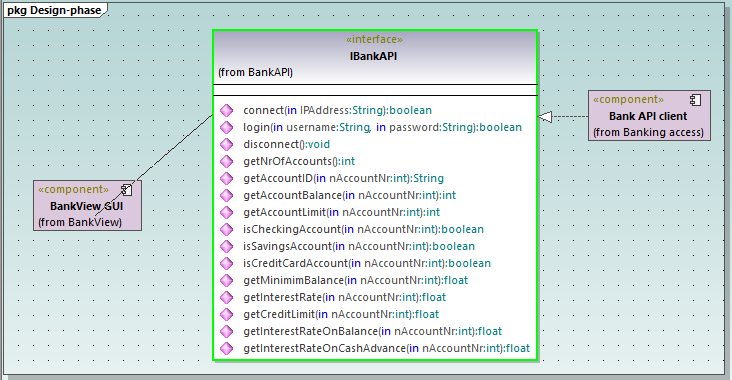
2.In the Model Tree window, navigate to Root | Component View | BankView and drag the BankView GUI package into the diagram.
3.Also drag the BankView package into the diagram.
4.Click the Usage ![]() toolbar button and drag from the BankView GUI package to the IBankAPI Interface.
toolbar button and drag from the BankView GUI package to the IBankAPI Interface.
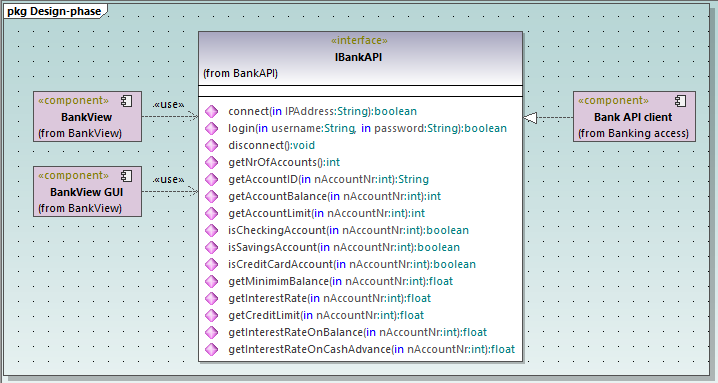
5.Repeat the previous step for the package BankView.
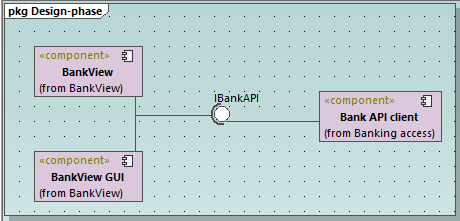
As illustrated below, both packages now have a usage dependency to the interface. Namely, the IBankAPI interface is required by the packages BankView and BankView GUI. As for the package Bank API Client, it provides the interface.
Using "ball-and-socket" notation
Optionally, it is possible to convert the current diagram notation to "ball-and-socket" style notation, as follows:
•Select the interface, and then click the Toggle Interface Notation button in its lower-right corner.
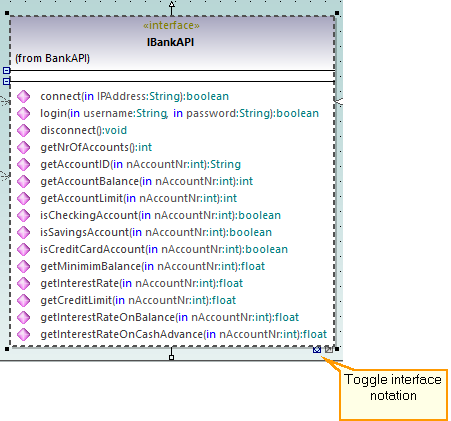
The diagram has now changed to "ball-and-socket" notation.
To switch back to the previous notation style, select the interface, and then click the Toggle interface notation button again.