Constraining Elements
Constraints can be defined for most model elements in UModel. Note that constraints are not checked by the syntax checker, because they are not part of the code generation process.
To constrain an element (from the Model Tree):
1.Right-click the element you want to constrain, and select New Element | Constraints | Constraint.
2.Enter the name of constraint and press Enter.
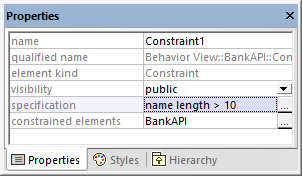
3.Type the constraint text in the "specification" field of the Properties window (for example, name length > 10).
To constrain an element (from a diagram):
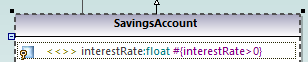
1.Double-click the specific element to be able to edit it.
1.Type "#", and then type the constraint text inside curly braces, for example, #{interestRate >=0}.
To assign constraints to multiple modeling elements:
1.Select a constraint in the Model Tree window.
2.Right-click the "constrained elements" property the Properties window, and select Add element to constrained elements.
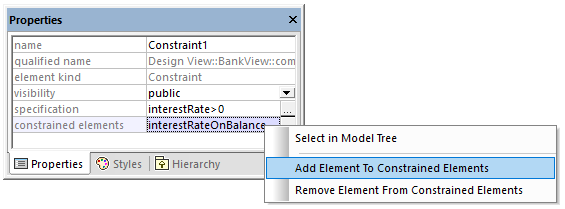
3.Select the specific element you want to assign the current constraint to. Hold down the Ctrl key to select multiple elements.
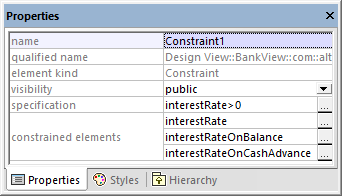
The "constrained elements" field contains the names of the modeling elements it has been assigned to. For example, in the image above, Constraint1 has been assigned to the following properties: interestRate, interestRateOnBalance, interestRateOnCashAdvance.