Steps and Tips to Migrate a Windows MobileTogether Server to Linux
The MobileTogether app development framework includes MobileTogether Server, the back-end hub that powers your mobile and desktop apps. Available for Windows, Linux, and Mac OS, MobileTogether Server acts as a gateway between end-users and back-end data sources such as databases.
Migrating an existing Windows MobileTogether Server to an Ubuntu box is easy when no database connections are required. But, if you have database connections, MobileTogether Designer can do all the heavy lifting for you.
As an IT administrator who works with physical and virtual hardware as well as desktop and server software, it has made life easier to create many scripts to help manage repetitive tasks. Though I'm more of a 'citizen developer' with no formal developer training, using MobileTogether Designer to migrate a server with database connections was fast and easy. Below is a look at how I was able to save my company the cost of a Windows server license by moving solutions to an Ubuntu platform.
Let's start with how quick it is to migrate solutions without database connections, and then we will move into how easy MobileTogether Designer makes migrating solutions with database connections.
To start off, back up your Windows box by following the MobileTogether Server manual. The on-line manual can be found here:
https://manual.altova.com/MobileTogether/mobiletogetherserver/
The manual suggests starting the backup process by stopping the Altova MobileTogether Server service, then copying the following files and directories, located here in Windows. C:\\ProgramData\Altova\MobileTogetherServer
[caption id="attachment_3791" align="alignnone" width="686"]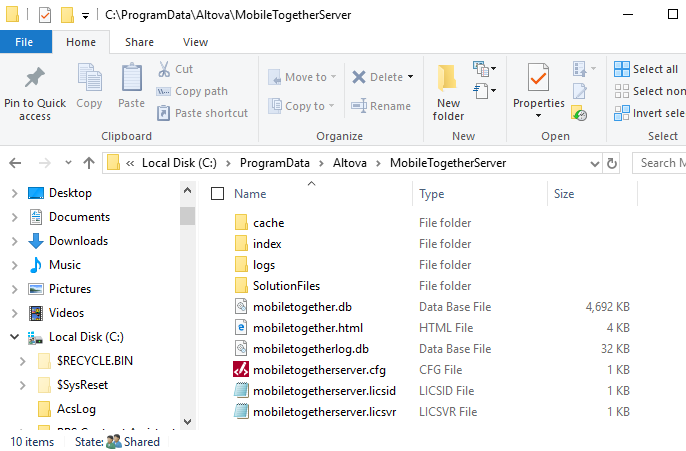 MobileTogetherServer, Windows default file path[/caption]
The copied files include four folders called, "cache", "index", "logs", "solution files" and all the files in the root directory. Then restart the MobileTogether server service.
All the backed up data should now be copied to a folder on your workstation.
Now, install the same version of the MobileTogether Server software that was on the Windows box to the new Ubuntu box.
Before restoring the MobileTogether files, verify that the new server is licensed, default passwords are changed, and the Mobile client and Administrator ports are configured. Once those tasks are completed, restore the backed-up files and folders to the new Linux server.
For the files\folders restore process, stop the MobileTogether Server service (for Ubuntu at the command prompt use the command "sudo service MobileTogether stop") and then restore the MobileTogether server files.
Hint - To copy the files to the new Ubuntu server, use a free terminal emulator and SSH to the server to restore the files and folders. The terminal emulator's functionality allows you to drag and drop the backed-up files to the MobileTogether directory. Be sure to review the file, folder permissions, and user permissions when coping the files to the appropriate location(s). The default directory location path in Ubuntu for the MobileTogether Server files is located here:
/var/opt/Altova/MobileTogetherServer/
[caption id="attachment_3790" align="alignnone" width="700"]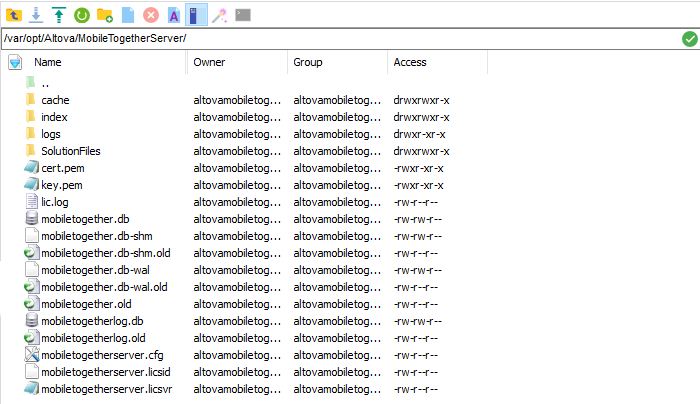 MobileTogetherServer, Linux default file path[/caption]
Next, restart the MobileTogether Server service and test to confirm the solutions are working as expected. At this point the migration is completed except for the solutions with database connections.
Before we get started with the database connections, let's talk about a few system prerequisites:
The workstation I used to configure the JDBC connections and the MobileTogether Server (in my case Ubuntu) both required the installation of Java and its environment variables set.
The workstation is a Windows 10 box with Java 8 installed. The Java Windows Environment Variables for "CLASSPATH", "JAVA_HOME" and "Path" are set like the ones below:
[caption id="attachment_3785" align="alignnone" width="492"] Java Windows Environment Variables[/caption]
The server is an Ubuntu 16.04 LTS. I installed the server on a VM host, using Hyper-V Manager, and assigned the server two processors and sixteen gigabytes of RAM. The latest version of MobileTogether Server software was installed, along with the Java default runtime environment.
To install Java on an Ubuntu System, run the following command: sudo apt-get install default-jre. The Java environment variables in Ubuntu for "Classpath", "Java_home" are set like the ones below:
[caption id="attachment_3784" align="alignnone" width="459"] Java Ubuntu Environment Variables[/caption]
Now with the prerequisites out of the way we are ready to change the database connection type in our solution(s) from ODBC to JDBC. The database connection change is made in a few simple steps within MobileTogether Designer.
Step 1 - In the MobileTogether Designer, open the solution.
Step 2 - From the Page Sources pane, right click on the database connections ($DB!) and selected "choose database source" from the dropdown menu.
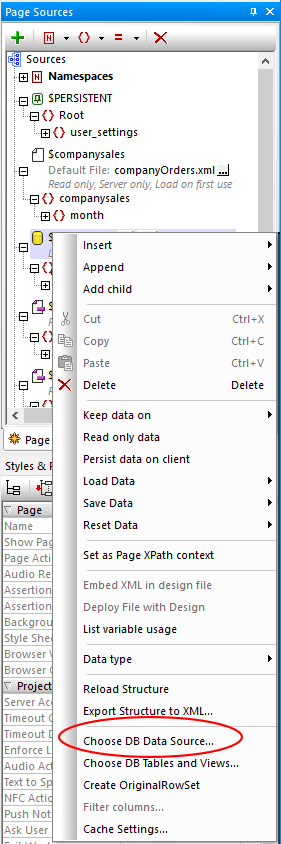
Step 3 - The wizard will prompt you for the type of connection required. Please note, for connecting to a SQL DB, only JDBC connections are supported in a Linux environment.
Select JDBC Connections.
[caption id="attachment_3786" align="alignnone" width="592"]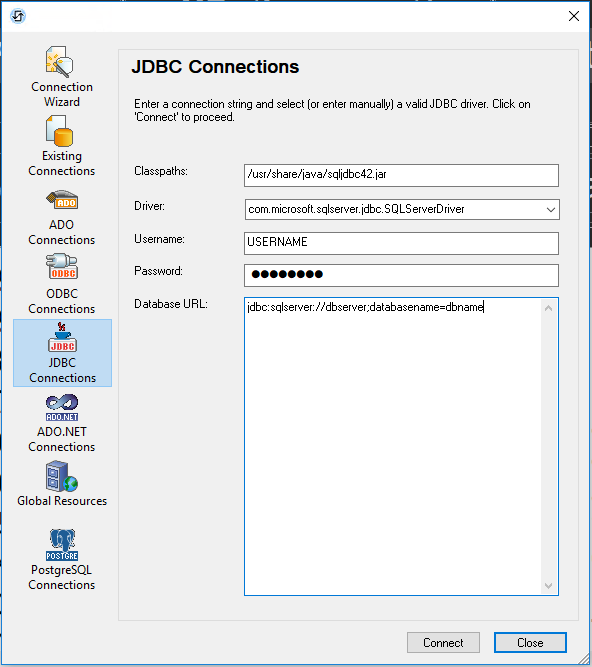 JDBC Connection[/caption]
Since the solution already has a SQL DB connection from the Windows server, MobileTogether Designer automatically populates the required fields, (Classpaths, Driver, Username, Password, Database URL) for the java\jdbc connection. Then click connect and save the new solutionname.mtd file.
Here is a visual of the connection string edited from Windows to Ubuntu:
With the JDBC drivers in place, MobileTogether Designer changed the connection string for the Ubuntu solution to this:
Step 4 - Before deploying the solution to the server, try out the solution first, using the built-in Simulator feature in MobileTogether Designer. Click on the "Project" tab and then select "Simulate Workflow".
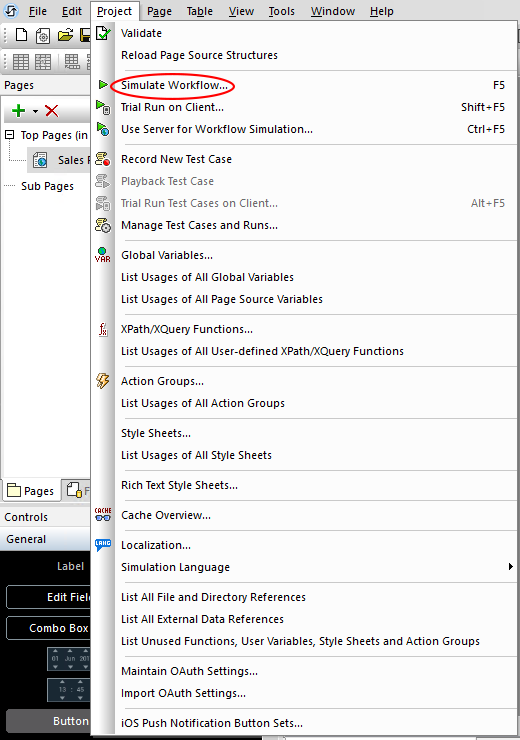
If the solution is functioning correctly, it will appear as it would appear on any mobile or desktop device.
[caption id="attachment_3788" align="alignnone" width="525"]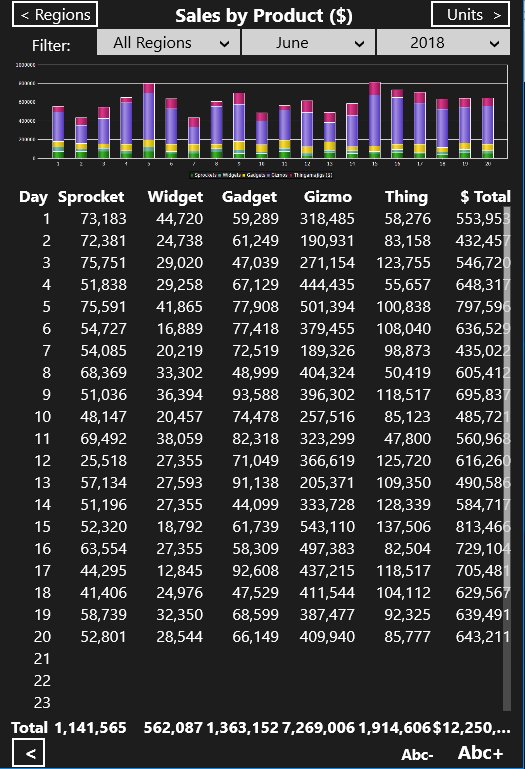 MobileTogether Client Solution[/caption]
Step 5 - Deploy the solution file to the new Linux server. That's it!
The process can be made even easier by creating a “Global Database Resource” in MobileTogether Designer. A Global Database Resource can be used for migrating solutions from multiple databases from the same database server source.
MobileTogether Designer, a RMAD (rapid mobile app development) tool, made for an easy migration. The designer has the built-in ability to connect to different types of data sources with very little intervention. In fact, it made this novice coder appear like a seasoned programmer. In the process, I was able to reduce the cost of our server licensing needs.
If you haven't already, download the Altova MobileTogether Designer here: https://www.altova.com/mobiletogether/download