Customize
The customize command lets you customize StyleVision to suit your personal needs.
Commands tab
The Commands tab of the Customize dialog allows you to place individual commands in the menu bar and the toolbar.
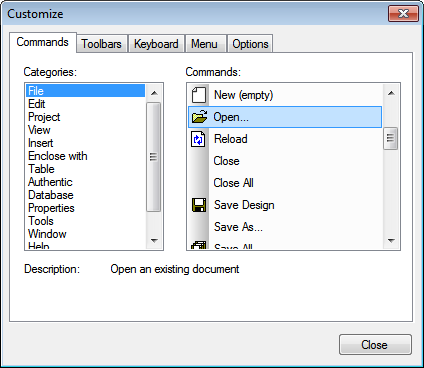
To add a command to the menu bar or toolbar, select the command in the Commands pane of the Commands tab, and drag it to the menu bar or toolbar. When the cursor is placed over a valid position an I-beam appears, and the command can be dropped at this location. If the location is invalid, a check mark appears. When you drop the command it is created as an icon if the command already has an associated icon; otherwise the command is created as text. After adding a command to the menu bar or toolbar, you can edit its appearance by right-clicking it and then selecting the required action.
To delete a menu bar or toolbar item, with the Customize dialog open, right-click the item to be deleted, and select Delete.
Note:
•The customization described above applies to the application, and applies whether a document is open in StyleVision or not.
•To reset menus and toolbars to the state they were in when StyleVision was installed, go to the Toolbars tab and click the appropriate Reset button.
Toolbars tab
The Toolbars tab allows you to activate or deactivate specific toolbars, to show text labels for toolbar items, and to reset the menu bar and toolbars to their installation state.
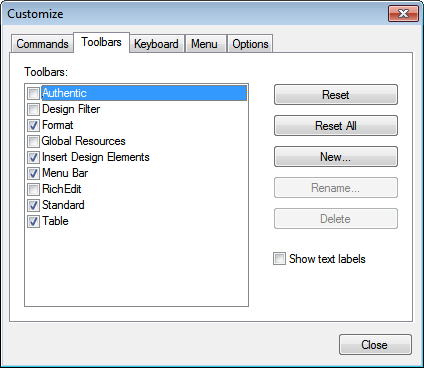
The StyleVision interface displays a fixed menu bar and several optional toolbars (Authentic, Design Filter, Format, Standard, Table, and Table of Contents).
Each toolbar can be divided into groups of commands. Commands can be added to a toolbar via the Commands tab. A toolbar can be dragged from its docked position to any location on the screen. Double-clicking a toolbar's (maximized or minimized) title bar docks and undocks the toolbar.
In the Toolbars tab of the Customize dialog, you can toggle a toolbar on and off by clicking in its checkbox. When a toolbar is selected (in the Toolbars tab), you can cause the text labels of that toolbar's items to be displayed by clicking the Show text labels check box. You can also reset a selected toolbar to the state it was in when StyleVision was installed by clicking the Reset button. You can reset all toolbars and the menu bar by clicking the Reset All button.
Note about Menu Bar
Commands can be added to, and items deleted from, the menu bar: see Commands above. To reset the menu bar to the state it was in when StyleVision was installed, select Menu Bar in the Toolbars tab of the Customize dialog, and click the Reset button. (Clicking the Reset All button will reset the toolbars as well.)
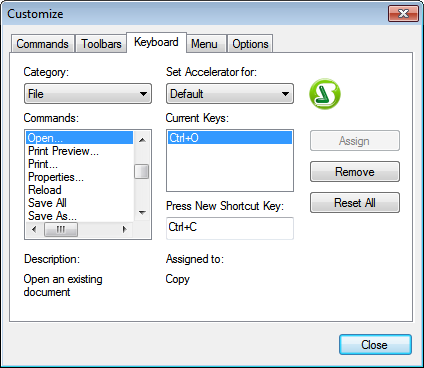
Keyboard tab
The Keyboard tab allows you to define (or change) keyboard shortcuts for any StyleVision command.
To assign a shortcut to a command
1.Select the category in which the command is by using the Category combo box.
2.Select the command you want to assign a shortcut to in the Commands list box.
3.Click in the Press New Shortcut Key input field, and press the shortcut keys that are to activate the command. The shortcut immediately appears in the Press New Shortcut Key input field. If this shortcut has already been assigned to a command, then that command is displayed below the input field. (For example, in the screenshot above, Ctrl+C has already been assigned to the Copy command and cannot be assigned to the Open File command.) To clear the New Shortcut Key input field, press any of the control keys, Ctrl, Alt, or Shift.
4.Click the Assign button to permanently assign the shortcut. The shortcut now appears in the Current Keys list box.
To de-assign (or delete) a shortcut
1.Select the command for which the shortcut is to be deleted.
2.Click the shortcut you want to delete in the Current Keys list box.
3.Click the Remove button (which has now become active).
To reset all keyboard assignments
1.Click the Reset All button to go back to the original, installation-time shortcuts. A dialog box appears prompting you to confirm whether you want to reset all keyboard assignments.
2.Click Yes if you want to reset all keyboard assignments.
Set accelerator for
Currently no function is available.
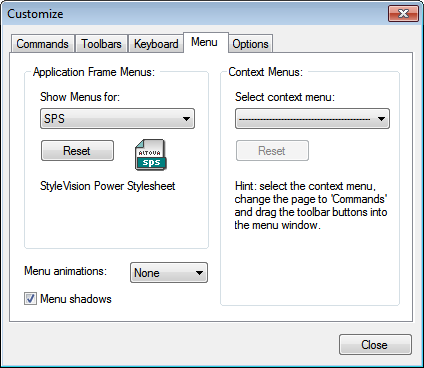
Menu tab
The Menu tab allows you to customize the main menu bar as well as the context menus (right-click menus). There are two types of main menu bar: Default (which appears when no document is open), and SPS (which appears when an SPS document is open).
To customize a menu
1.Select the menu bar you want to customize (SPS menu in the screenshot above).
2.Click the Commands tab, and drag the commands to the menu bar of your choice.
To delete commands from a menu
1.In the Application Frame Menus pane, select either Default (which shows available menus when no document is open) or SPS (which shows available menus when one or more documents are open).
2.With the Customize dialog open, select (i) the menu you want to delete from the application's menu bar, or (ii) the command you want to delete from one of these menus.
3.Either (i) drag the menu from the menu bar or the menu command from the menu, or (ii) right-click the menu or menu command and select Delete.
To reset either of the menu bars
1.Select the menu entry you want to reset in the combo box of the Application Frame Menus pane.
2.Click the Reset button just below the menu name. A prompt appears asking if you are sure you want to reset the menu bar.
To customize a context menu (a right-click menu)
1.Select the context menu from the combo box.
2.Click the Commands tab and drag the commands to the context menu that is now open.
To delete commands from a context menu
1.Click right on the command or icon representing the command.
2.Select the Delete option from the popup menu or drag the command away from the context menu and drop it as soon as the check mark icon appears below the mouse pointer.
To reset a context menu
1.Select the context menu from the combo box, and
2.Click the Reset button just below the context menu name. A prompt appears asking if you are sure you want to reset the context menu.
To close a context menu window
•Click on the Close icon at the top right of the title bar, or
•Click the Close button of the Customize dialog box.
Menu animations
The menu animation option specifies the way a menu is displayed when a menu is clicked. Select an option from the drop-down list of menu animations.
Menu shadows
If you wish to have menus displayed with a shadow around it, select this option. All menus will then have a shadow.
Options tab
The Options tab allows you to customize additional features of the toolbar.
Screen Tips for toolbar items will be displayed if the Show Screen Tips option is checked. The Screen Tips option has a sub-option for whether shortcuts (where available) are displayed in the Screen Tips or not.