Signing the Authentic XML Document
The Authentic XML document can be signed in two ways:
•Automatically when the Authentic XML document is saved. For this method to be used, the SPS designer must activate the Sign Automatically on Save option in the Configure XML Signature dialog.
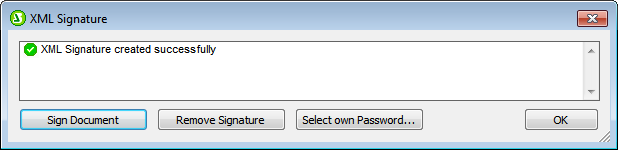
•Manually via the Sign Document button in the XML Signature dialog (see screenshot below). This dialog is accessed by clicking the XML Signature toolbar icon or the Authentic | XML Signature menu command. This way of (manually) signing the XML document is described below.
Manually signing the Authentic XML document
In addition to automatic signing on save—a feature which the SPS designer enables via the SPS—the Authentic View user can sign the document manually.
The signature will be generated in accordance with the signature settings that are current at the time of signing. All of the signature settings except the certificate/password must be specified by the SPS designer in the Configure XML Signature and XML Signature Settings dialogs. The certificate/password can be specified by the SPS designer or by the Authentic View user. The following possibilities are available:
•The SPS designer specifies the certificate/password. The own certificate option is not available to the Authentic View user. See SPS only below for details.
•The SPS designer specifies the certificate/password. The own certificate option is available to the Authentic View user. See SPS + Authentic View user below for details.
SPS only
The SPS designer specifies the certificate/password. The Authentic View user is not given the option of selecting an own certificate/password (done by deactivating this option in the Configure XML Signature dialog). The Authentic View user signs the document using the SPS-specified certificate/password. There are two possibilities:
•If a certificate has been specified (as opposed to a password), then the Authentic View user must have access to the private-public-key certificate that has been specified. The private key of the certificate will be used to generate the signature.
•If a password has been specified in the signature settings, this password is used directly when signing. The Authentic View will not be asked for it when signing.
Note: Either the certificate or the password option must be set as the Authentication method in the XML Signature Settings dialog. However, no value needs to be set for the selected method. For example, the Password option can be selected but no password need be set. In this case, the Authentic View user must set a password when signing the document. Similarly, if the certificate method were selected but no certificate were specified, then the Authentic View user would need to specify a certificate for generating the signature.
SPS + Authentic View user
The SPS designer specifies the certificate/password. The Authentic View user may select an own certificate/password (this option is enabled in the Configure XML Signature dialog). The Authentic View user can now choose whether to use the certificate/password specified in the SPS file (the default certificate/password) or to use an own certificate/password. The own certificate/password is saved in memory and will be used for the current session only. When the SPS file or XML file is closed, the signature setting reverts to the default certificate/password.
To use an own certificate/password, the Authentic View user must do the following:
1.Click the XML Signature toolbar icon or the Authentic | XML Signature menu command to pop up the XML Signature dialog (screenshot below).
2.Click the Select Own Certificate or Select Own Password button. (Which of these buttons appears depends on which of the two options (certificate or password) was selected in the XML Signature Settings dialog.)
3.Either browse for the certificate file or enter the password you want.
4.The Authentic View user can either sign the document right away (by clicking Sign Document) and/or click OK to finish.
On clicking OK, the user-defined certificate/password setting is saved to memory and will be used for the current session.