Inserting Static Content
Static content is content you enter or insert directly in the design—as opposed to content that comes from the XML source. A variety of static components can be placed in an SPS design. In this part of the tutorial, you will learn how to insert the following static components:
•Text
Inserting a static image
The static image to insert is in the (My) Documents folder: C:\Documents and Settings\<username>\My Documents\Altova\StyleVision2026\StyleVisionExamples\Tutorial\QuickStart\NewsItems.BMP. It will be used as the header of the document. To insert this image at the head of the document, do the following:
1.Place the cursor between the start-tags of newsitems and newsitem (screenshot below).
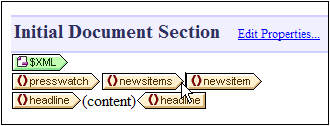
Notice that the cursor is within the newsitems element but outside the newsitem element. It will therefore be inserted in the output once, at the start of processing of the newsitems element (because there is only one newsitems element defined in the schema).
2.Right-click, and select Insert | Image. The Insert Image dialog pops up (screenshot below).
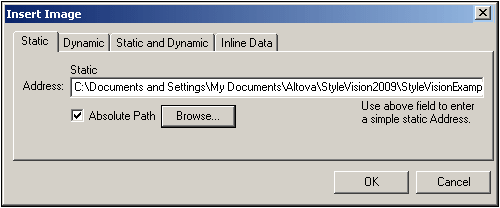
| 3. | In the Static tab, click the Absolute Path check box, then browse for the file NewsItems.BMP and select it. |
| 4. | Click OK to finish. |
The HTML preview will look something like this:

Inserting horizontal lines
The first horizontal line you will insert is between the document header and document body. Do this as follows:
1.Place the cursor immediately after the recently inserted static image.
2.Right-click, and select Insert | Horizontal Line. A horizontal line is inserted.
Set properties for the line as follows:
1.With the line selected in Design View, in the Properties sidebar, select the line component (in the Properties For column) and then the HTML group of properties.
2.Assign color and size properties for the line.
3.With the line selected in Design View, in the Styles sidebar, select the line component and then the box group of properties. Define a margin-bottom property of 12pt.
4.Check the output in HTML Preview.
Now insert a horizontal line at the end of each news item. To do this the cursor would have to be placed immediately before the end-tag of the newsitem element. This will cause the line to be output at the end of each newsitem element. You can change the thickness of the line by setting the line's size property to a number with no unit (in the Properties sidebar, select line, and set a value of, say 3).
Inserting static text
You have already added static text to your design. When you pressed the Enter key to obtain new lines (in the section Inserting Dynamic Content (from XML Source)), whitespace (static text) was added. In this section, you will add a few static text characters to your design.
The SPS you have designed up to this point will produce output which looks something like this:

Notice that in the output of the dateline element, the contents of the date element and place/@city and place/@country attributes are run together without spacing. You can add the spacing as static text. In the design, place the cursor after the date element and enter a colon and a space. Next, enter a comma and space after the @city attribute (screenshot below)

This part of the output will now look like this:

Notice the colon, spacing and comma in the dateline output. All of these text items are static text items that were inserted directly in the design.
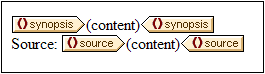
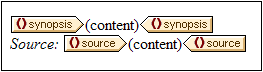
You will now add one more item of static text. In the design, type in the string "Source: " just before the start-tag of the source element (screenshot below).
Formatting static text
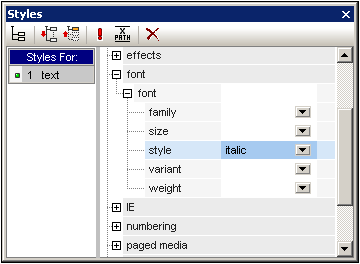
To format static text, highlight the text to be formatted and specify local style properties. In the design, highlight the text "Source:" that you just typed. In the Styles sidebar (screenshot below), notice that the 1 text component is selected. Now expand the font group of properties as shown in the screenshot below, and, for the font-style property, select the italic option from the dropdown menu.
The static text (that is, the string "Source:") will be give an italic style in the design, and will look like this:
The output will look like this in HTML Preview:

If you think there is too little vertical space between the source item and the horizontal line separating two newsitem elements, then, in the design, insert a blank line between the source and the horizontal line (by pressing Enter).
After you are done, save the file.
In this section you have learned how to insert static content and format it. In the next section you will learn more about how design components can be formatted using CSS principles and properties.