Evaluator
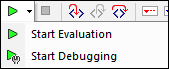
Select Evaluation Mode by selecting Start Evaluation in the Start Evaluation/Debugging dropdown menu (see screenshot below).
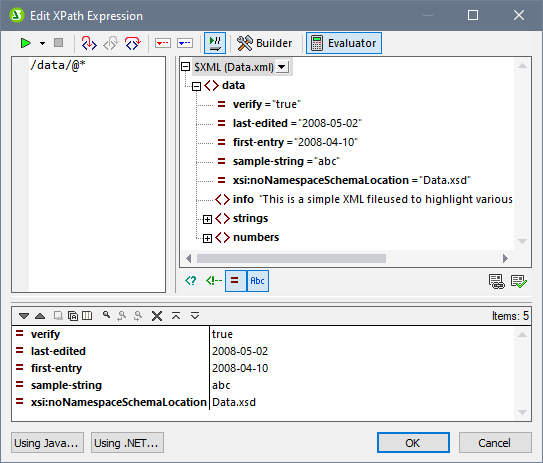
In Evaluation Mode, click the Evaluator button (see screenshot below). The evaluator has the following panes (see screenshot below): (i) an Expression pane (top left); (ii) a Sources pane (top right); (iii) a Results pane (bottom).
The XPath expression and its evaluation
The XPath expression is entered in the Expression pane. The results of the evaluation are displayed in the Results pane (see screenshot above).
Note the following points:
•In order for an expression to be evaluated against an XML file, that file must be assigned as the Working XML file of one of the sources of the SPS.
•Results can be displayed even as you type the expression (select the Evaluate on Typing icon in the toolbar), or they can be displayed when you click the toolbar button Start Evaluation/Debugging (F5) (located at top left of the toolbar).
•To enter the XPath locator expression of a node in a source tree, double-click that node in the Sources pane.
•In the Sources pane, you can switch on/off the display of: (i) processing instructions, (ii) comments, (iii) attributes, and (iv) elements. Do this via the buttons below the Sources pane.
•The context node is that of the design component within which the expression is being created. To set another node as the context node of the expression: (i) select the node in the Sources pane, and (ii) click Set Evaluation Context (located below the Sources pane). To save this context node for the expression, click the toggle command button Remember Evaluation Context (located below the Sources pane). Note, however, that the actual context node for the expression will be the context node of the current design component, and this is the context node that will be used at runtime.
•You can use the functions of the Java and .NET programming languages in the XPath expression. The buttons Using Java and Using .NET at the bottom of the dialog display info boxes with explanations about how to use Java and .NET extension functions in XPath expressions. For more information about this, see the Extension Functions section of this documentation.
•To create the expression over multiple lines (for easier readability), use the Return key.
•To increase/decrease the size of text in the expression field, click in the expression field, then press Ctrl and turn the scroll wheel. Note that this also applies in the Results pane.
•Instead of manually entering the locator path expression of a node, you can do the following: (i) Place the cursor at the point in the XPath expression where you want to enter the locator path; (ii) In the Sources tree, double-click the node you want to target. This enters the locator path of the selected node in the expression. The locator path will be an absolute path starting at the root node of the document.
Results pane
The Results pane is shown in the screenshot below, at bottom. Note that it has its own toolbar.
The Results pane has the following functionality:
•The result list consists of two columns: (i) a node name or a datatype; (ii) the content of the node.
•If the XPath expression returns nodes (such as elements or attributes), you can select whether the entire contents of the nodes should be shown as the value of the node. To do this, switch on the toggle Show Complete Result.
•When the result contains a node (including a text node)—as opposed to expression-generated literals—clicking that node in the Results pane highlights the corresponding node in the XML document in the Sources tree.
•You can copy both columns of a result sub-line, or only the value column. To copy all columns, right-click a sub-line and toggle on Copying Includes All Columns. (Alternatively you can toggle the command on/off via its icon in the toolbar of the Results pane.) Then right-click the sub-line you want to copy and select either Copy Subline (for that subline) or Copy All (for all sublines).
Toolbar of the Results pane
The toolbar of the Results pane contains icons that provide navigation, search, and copy functionality. These icons, starting from the left, are described in the table below. The corresponding commands are also available in the context menu of result list items.
Icon | What it does |
Next, Previous | Selects, respectively, the next and previous item in the result list |
Copy the selected text line to the clipboard | Copies the value column of the selected result item to the clipboard. To copy all columns, toggle on the Copying includes all columns command (see below) |
Copy all messages to the clipboard | Copies the value column of all result items to the clipboard, including empty values. Each item is copied as a separate line |
Copying includes all columns | Switches between copying (i) all columns, or (ii) only the value column. The column separator is a single space |
Find | Opens a Find dialog to search for any string, including special characters, in the result list |
Find previous | Finds the previous occurrence of the term that was last entered in the Find dialog |
Find next | Finds the next occurrence of the term that was last entered in the Find dialog |
Expand with children | Expands the selected item and all its descendants |
Collapse with children | Collapses the selected item and all its descendants |
Clear | Clears the result list |