Add Error Handling to a Job
This example illustrates how to add error handling to a job. The job used in this example lists the contents of a directory and will be invoked from the browser, as a Web service. You will learn how to configure FlowForce Server to handle the job outcome as follows:
•If the job execution is successful, display the job's output in the browser
•If the job fails to execute due to any reason, send an email notification to a named recipient.
•Whenever the job execution finishes, regardless of the execution status, log the job internal ID to a file on the local system.
In FlowForce Server terms, in this example you create a protected block with two error handling conditions: "On Error" and "Always" (each will handle one of the scenarios mentioned above).
Prerequisites
•Required licenses: FlowForce Server
•The FlowForce Web Server and FlowForce Server services must be listening at the configured network address and port
•The FlowForce Server mail settings must be configured, see Setting the Mail Parameters
•You need a FlowForce Server user account with permissions to one of the containers (by default, the /public container is accessible to any authenticated user).
•The job created in this example writes output to the disk. Therefore, on the operating system where FlowForce Server is installed, you need read and write access to some directory. This example uses C:\FlowForceExamples\ErrorHandling.
Tips
•Although this example uses Windows paths and commands, you can still test it on other operating systems, if you adapt the paths and the commands accordingly.
Creating the job
1.On the computer where FlowForce Server runs, create a directory that will be the job's working directory. This example uses C:\FlowForceExamples\ErrorHandling.
2.Log in to the FlowForce Server Web administration interface and go to the /public/Examples container. The public/Examples container should already exist if you followed the previous examples; otherwise, create it using the Create | Create Container command.
3.Click Create Job and enter a name for the job you are creating, for example "ListDirectory". The job's description is optional.
4.Under "Job Input Parameters", click the  button, and add a parameter of type "string". At job runtime, the parameter will provide the path of the directory to list. In this example, the name of the parameter is "inputDir"; it will be used in subsequent steps.
5.Under "Execution Steps", click new error/success handling step.
6.Under "Execute with error/success handling", click the button, and choose to add a new execution step, with the following settings:
Execute function | Browse for the /system/shell/commandline function. |
Command | Enter the following shell command:
dir {inputDir}
Where inputDir is the name of the parameter created previously. The name is enclosed within curly braces because, at job runtime, its content will be replaced dynamically with the parameter value. |
Abort on error | Leave this option as is. For more information, see the description of the /system/shell/commandline function. |
Working directory | Enter the path to the working directory created previously, for example C:\FlowForceExamples\ErrorHandling |
7.Under the "On error" condition, click the button and choose to add a new execution step, with the following settings:
Execute function | Browse for the /system/mail/send function. | ||
From | Enter the email address of the sender, for example flowforce@localhost. Leave this field empty if you have configured the mail settings from the administration page. | ||
To | Enter your email address. | ||
Subject | Enter the subject of the notification email as follows:
The part between curly braces is a FlowForce expression which calls the instance-id function to get the unique ID of the current (failed) job instance. | ||
Message body | Type the following:
The parts between curly braces are two FlowForce expressions. These expressions get the erroneous output and convert it to a string that will be the body of the email:
•The failed-step function returns the result of the failing step. This is an abstract FlowForce type that, in order to become more useful, must be supplied as an argument to the exitcode, stderr , or error-message functions, see below. •The exitcode function gets the actual exit code of the error from the result, as a number, assuming that there is an exit code. •The stderr function gets the standard error output of the error from the result, as a stream, assuming that there is standard error output. •The error-message function gets the text of the FlowForce error message as it appears in the log. It may also return an empty string if there is no error or if it is not technically possible to retrieve the error text. •The string function converts the numeric exit code to a string (this must be done because the body of the email is of string type). •The content function converts the error output from a stream to a string.
|
8.Click new error/success handler, and then select Always.
9.Under the "Always" condition, click the button and choose to add a new execution step, with the following settings:
Execute function | Browse for the | |
|---|---|---|
Command | Enter the following shell command:
On Windows, this command writes the job ID to a file called JobLog.txt. If the file contains data, the new text will be added after the existing data. | |
Working directory | Enter the path of the directory created previously (C:\FlowForceExamples\ErrorHandling).
This directory will be used to resolve the path to the JobLog.txt file. |
At this stage, the job should look as follows (provided you did not use different paths or shell commands).

10.To turn the job into a Web service, select the Make this job available via HTTP... check box and enter the name of the Web service, for example:

Take notice of the service name; you will need it to call the Web service.
11.Under "Credentials", select an existing credential record or specify a local credential.
12.Click Save.
Running the job
At this stage, you have completed the job configuration. Because this job is exposed as a Web service, you can run it in any of the following ways:
•Go to the Home page and click Show all active triggers and services. Next, click the job's URL displayed in the Info column.
•Enter http://127.0.0.1:4646/service/ListDirectoryService in the browser's address bar. Note that this URL works only if the FlowForce Server service listens at the default host address and port name. If you have defined other host and port settings on the Setup page, change the address accordingly.
•If you set the optional Host name field of FlowForce Server on the Setup page, you can execute the web service call directly from the job configuration page, by clicking the  button adjacent to the Make this job available via HTTP check box. The button is not displayed otherwise.
If you are asked for credentials when you access the Web service, supply the same credentials you use to log on to FlowForce Server.
Important Supplying your FlowForce Server user credentials for HTTP authentication is only for testing purposes. For production, it is recommended to create a new FlowForce user, grant the Service - Use permission to this user on the container where the job is, and then access the Web service with the corresponding user account. To disable HTTP authentication and make the Web service public, grant the Service - Use permission to the user Anonymous. For details, see How Permissions Work. |
Since this job takes parameters, you will be prompted to supply a parameter value when you access the Web service from the browser.
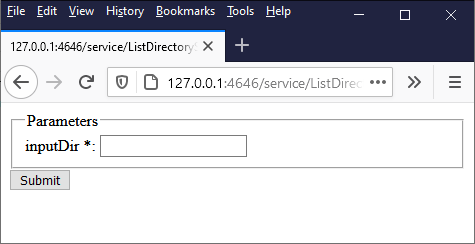
If you enter a valid directory path like C:\, for example, the job is executed, and the outcome is displayed in the browser.
Also, each time when you run the job, the ID of the job instance is appended to the contents of the JobLog.txt file, according to the "Always" condition configured previously.
To test the "On Error" condition, change the "inputDir" parameter to some deliberately incorrect value (for example, a path that does not exist). If this case, the browser will display an error and FlowForce Server will send an email to the address specified in the recipient field of the "On Error" handler. For example, the e-mail could look as follows:
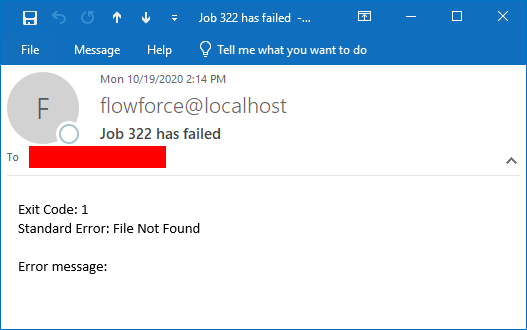
As stated previously, the error functions used in this example are not guaranteed to return a value for each and every possible job configuration. Therefore, the level of detail provided by the e-mail depends on your job configuration and the kind of error encountered, and it should not be expected that the Exit Code, Standard Error, and Error message e-mail fields always contain text. The most authoritative reference for the cause of the error is the FlowForce Server log. |