Example: Customizing Icons and Styles
This example shows you how to customize the appearance of a class in UModel with the help of stereotypes. After following this example, you will learn how to add custom icons to elements and change the style of all elements that use the same stereotype.
The class that will be customized in this example is in the StereotypesDemo.ump project, available at the following path: C:\Users\<username>\Documents\Altova\UModel2026\UModelExamples\Tutorial. This is a simple demo project which includes a custom profile under which we will create the stereotype. For an example that shows you how to create profiles and stereotypes from scratch, see Example: Creating and Applying Stereotypes.
Let's first create the stereotype to be used for styling:
1.Open the StereotypesDemo.ump project.
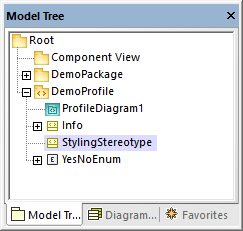
2.Right-click the "DemoProfile" profile in the model tree, and select New Element | Stereotype from the context menu.
3.Rename the stereotype to "StylingStereotype".
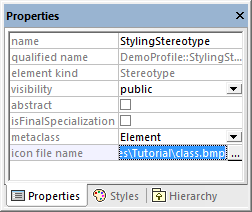
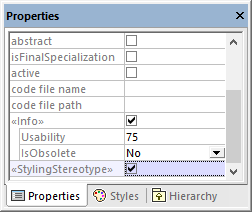
To add a custom image to the stereotype, click the stereotype, and then click the Ellipsis  button next to icon file name property in the Properties window. Select the following sample image: C:\Users\<username>\Documents\Altova\UModel2026\UModelExamples\Tutorial\class.bmp.
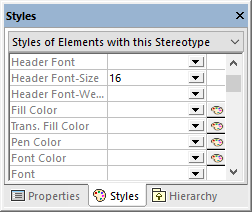
Next, click the Styles tab of the Properties window. Select Styles of Elements with this Stereotype from the top list, and change the Header Font Size property to "16".
Finally, apply the stereotype to a class.
1.Open the class diagram "ClassDiagram1". You will find this diagram under the "DemoPackage" in the Model Tree view.
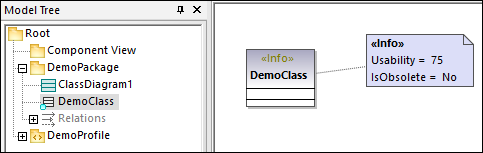
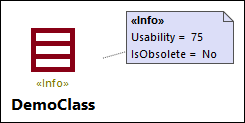
2.Click the "DemoClass" class, and then select the «StylingStereotype» check box in the Properties window.
The appearance of the class on the diagram is now changed according to the applied stereotype:
Remarks
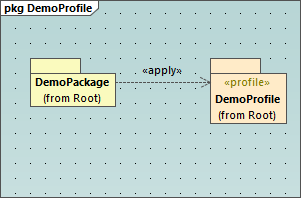
The demo project contains a profile diagram, "ProfileDiagram1". In this diagram, notice that the "DemoProfile" is applied to the "DemoPackage" with a ProfileApplication  relationship. This makes the stereotype available to the package, see also Creating and Applying Custom Profiles.
You have now learned how to change the appearance of elements using stereotypes. You can use the same technique in other projects. Just keep in mind that the profile where you create the stereotype must be applied to the target package, as shown above.