Inserting Elements from the Model into a Diagram
Elements present in the model can be inserted into a diagram either individually or as a group. To select multiple elements from the Model Tree window, hold down the Ctrl key while clicking each item. There are two ways to insert elements into a diagram: drag left, and drag right.
•Drag left (holding down the left mouse button and releasing it in the diagram) inserts elements immediately at the cursor position. In this case, any associations, dependencies etc. that exist between the currently inserted elements and the new one, are automatically displayed.
•Drag right (holding down the right mouse button and releasing it in the diagram) opens a context menu from which you can select the specific associations, generalizations you want to display.
For example, let's suppose that you want to create a new class diagram from a class that already exists in the model. To illustrate this scenario, open the sample project Bank_MultiLanguage.ump available at the following path: C:\Users\<username>\Documents\Altova\UModel2025\UModelExamples. Assuming that you want to replicate the "Account Hierarchy" diagram in a new class diagram, do the following:
1.Right-click the bankview package and select New Diagram | Class Diagram.
2.Locate the abstract Account class in the model tree, and use drag right to place it in the new diagram. For this example, we would like to display the class together with its derived classes. To achieve this, select Insert with Generalization Hierarchy (specific) from the context menu.
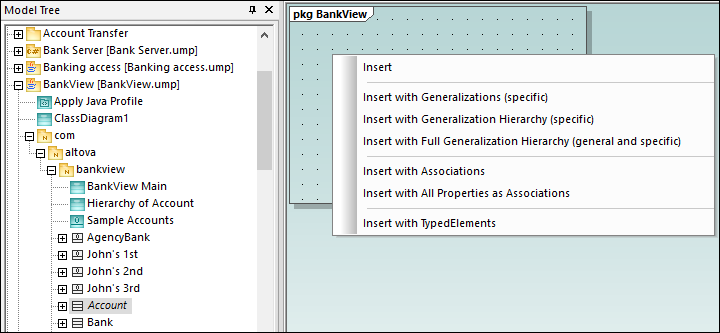
3.Select or clear the check boxes for specific items you want to appear in the diagram.
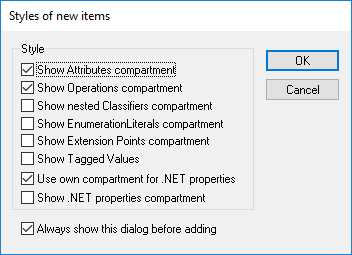
4.Click OK. The Account class, together with its three subclasses, is inserted into the diagram. The Generalization arrows are also automatically displayed. To automatically arrange the classes inside the diagram, run the menu command Layout | Autolayout All | Hierarchic.
If you had selected the Insert command instead of Insert with Generalization Hierarchy (specific), the class would have been added to the diagram without any derived classes. Note that you can still display the generalization hierarchy later, as follows:
•Right-click the Account class in the diagram and select Show | Generalization hierarchy from the context menu. As a result, the derived classes are inserted into the diagram as well.