Build and Run the Plug-In
After you have followed the steps above, build the solution with Visual Studio (on the Build menu, click Build Solution).
Important notes •Building the plug-in requires access to registry; therefore, make sure to run Visual Studio as administrator. •If you have a 64-bit operating system and are using a 32-bit installation of UModel, add the x86 platform in the solution's Configuration Manager and build the sample using this configuration. To access Configuration Manager, run the menu command Build | Configuration Manager. •In Solution Explorer, click the referenced library (UModelPlugInLib). Find the Embed Interop Types property in the Properties window and make sure that this property is set to False. |
After building your C# project, you can add the plug-in to UModel and test it as follows:
1.Start UModel (or restart it if applicable; this ensures that the plug-in information is read correctly from the registry).
2.On the Tools menu, click Customize.
3.On the Plug-Ins tab, click Add Plug-In..., and select the plug-in .dll file (in this example, HelloWorldPlugIn.dll):
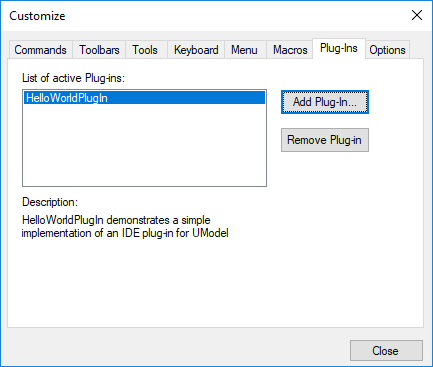
Note: If you get an error with text similar to "Could not find an implementation of the UModel plug-in interface in type library", make sure that the Embed Interop Types property is set to False for UModelPlugInLib library, as described in Add Reference to UModel Plug-In Library.
The Edit menu of UModel now contains a new menu command called Hello world. Run this command to display a dialog box with the "Hello, World!" message.