Example: Import a C# Project
This example illustrates how to import into UModel a sample C# solution created with Visual Studio. The source solution is available as a .zip archive at the following path: C:\Users\<username>\Documents\Altova\UModel2026\UModelExamples\Tutorial\Anagram_CSharp.zip. It is not necessary to compile the solution with Visual Studio before importing it; however, make sure to unzip the Anagram_CSharp.zip archive to a folder of your choice before proceeding to the steps below.
Our goal in this example is to reverse engineer the C# solution and create a UModel project from it. As we import code, we will opt to generate class and package diagrams automatically.
Step 1: Create a new project
It is possible to import source code either into existing or new UModel projects. For the scope of this example, we will be importing code into a new UModel project.
•On the File menu, click New (Alternatively, press Ctrl + N or click the New toolbar button).
Step 2: Include the C# language types
The source project was written in C# with Visual Studio 2015, so we will include a built-in UModel project that contains the C# 6.0 language types (since the C# language version corresponding to Visual Studio 2015 is 6.0). Earlier versions of C# are also likely to work with our C# example solution.
1.On the Project menu, click Include Subproject.
2.Click the C# tab.
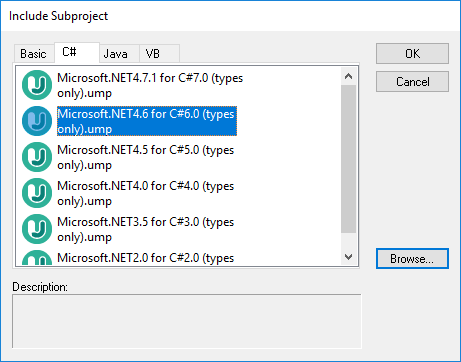
3.Select the project Microsoft .NET 4.6 for C# 6.0 (types only).ump, and click OK.
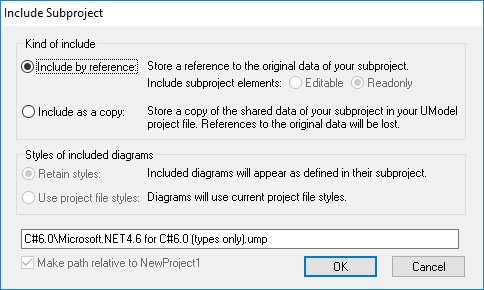
4.When prompted to select the kind of include (by reference or as a copy), leave the default option as is.
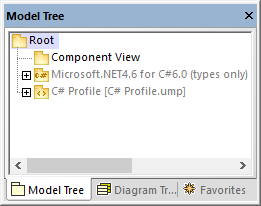
As a result, both the C# language types and the C# language profile are included and visible in the Model Tree:
Step 3: Import the C# solution
1.On the Project menu, click Import Source Project.
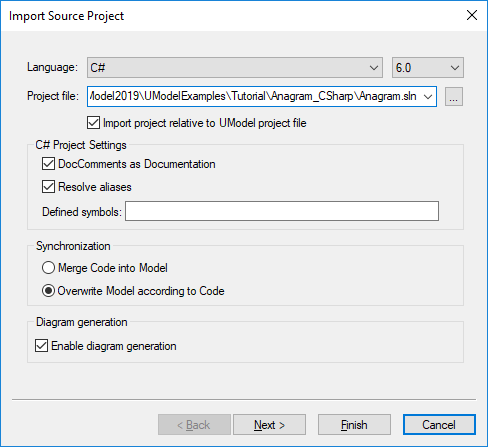
2.Select C# 6.0 as language.
3.Click Browse ![]() next to Project file and browse for the solution .sln file.
next to Project file and browse for the solution .sln file.
4.Select the DocComments as Documentation check box (this will import the code comments found on operations or properties into the model).
5.Since we are importing code into a new UModel project, select the option Overwrite Model according to Code (the other option Merge Code into Model is preferable when you import into an existing project).
6.Click Next.
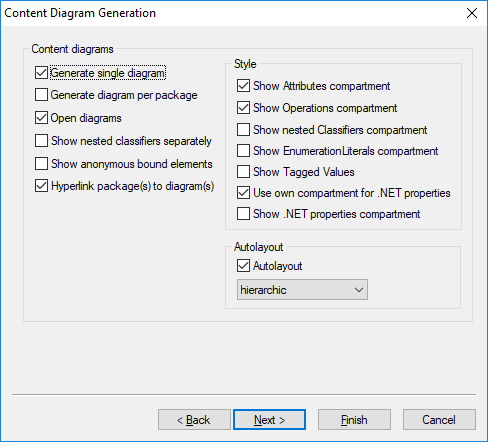
7.Select the diagram generation options as shown below, and click Next. (These options are applicable to Class diagrams generated automatically on code import.)
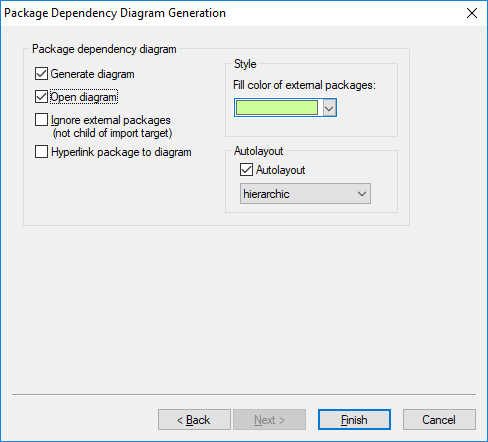
8.Select the diagram generation options as shown below, and click Finish. (These options are applicable to Package diagrams generated automatically on code import.)
9.Enter a name and select a destination folder for the new UModel project, and click Save (by default, this dialog box displays the same folder as the solution you are importing).

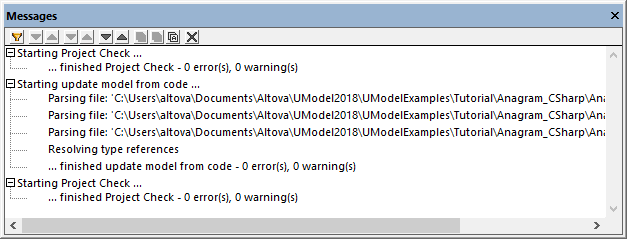
The progress of the reverse engineering operation is shown in the Messages window.
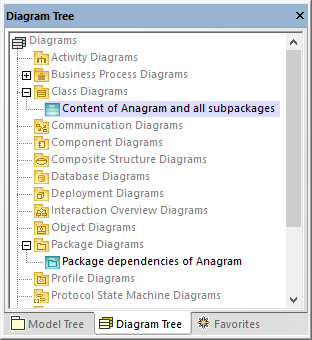
Also, when code import completes, all generated diagrams are opened automatically since this option was selected before code generation. All generated diagrams are available in the Diagram Tree:
Since we opted to generate documentation from the source code, the imported documentation is visible in the Documentation window if you click, for example, the Create operation of the Anagram class:
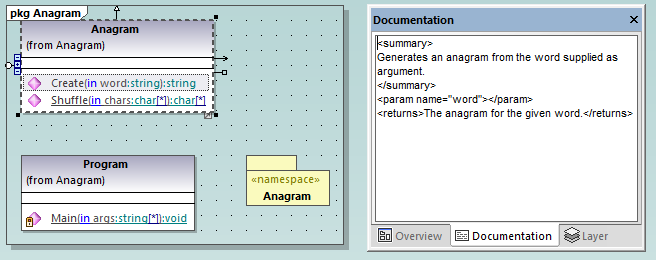
Note: The documentation is added only if the option DocComments as Documentation was selected while importing the C# solution (see "Step 3: Import the C# Solution" above).