Tables in Design View
The main components of static and dynamic SPS tables are as shown in the screenshots below with the table markup (Table | View Table Markup) switched on.
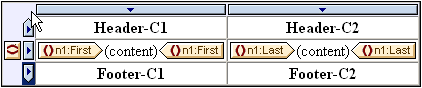
The screenshot above shows a simple table that grows top-down and that has a header and footer.
•A column is indicated with a rectangle containing a downward-pointing arrowhead. Column indicators are located at the top of columns. To select an entire column—say, to assign a formatting property to that entire column—click the column indicator of that column.
•A row is indicated with a rectangle containing a rightward-pointing arrow. Click a row indicator to select that entire row.
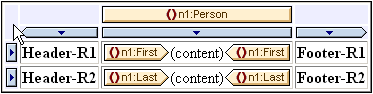
•In tables that grow top-down (screenshot above), headers and footers are indicated with icons pointing up and down, respectively. In tables that grow left-right, headers and footers are indicated with icons pointing left and right, respectively (screenshot below).
•To select the entire table, click in the top left corner of the table (in the screenshots above and below, the location where the arrow cursor points).
•When any table row or column is selected, it is highlighted with a dark blue background. In the screenshot above, the footer is selected.
•In tables that grow top-down, the element for which the table has been created is shown at the extreme left, outside the column-row grid (screenshot above). In tables that grow left-right, the element for which the table has been created is shown at the top, outside the column-row grid (screenshot below).
After a column or row or table has been selected, styles and/or properties can be set for the selection in the Styles and Properties Windows.
Drag-and-drop functionality
The columns and rows of an SPS table (static or dynamic) can be dragged to alternative locations within the same table and dropped there.
Enclosing and removing templates on rows and columns
A row or column can be enclosed with a template by right-clicking the row or column indicator and, from the context menu that pops up (screenshot below), selecting Enclose With | Template or Enclose With | User-Defined Template. In the next step, you can select a node from the schema tree or enter an XPath expression for a User-Defined Template. A template will be created around the row or column.

A template that is around a row or column can also be removed while leaving the row or column itself intact. To do this, select the template tag and press the Delete key.
The enclosing with, and removing, templates feature is useful if you wish to remove a template without removing the contents of a row or column, and then, if required, enclosing the row or column with another template. Enclosing with a User-Defined Template also allows the use of interesting template-match results within the row or column (via Auto-Calculations, for example).