.NET Interface
The .NET interface is built as a wrapper around the RaptorXML Server COM interface. It is provided as a primary interop assembly signed by Altova; it uses the namespace Altova.RaptorXMLServer.
Adding the RaptorXML DLL as a reference to a Visual Studio .NET project
In order to use RaptorXML Server in your .NET project, add a reference to the RaptorXML DLL (Altova.RaptorXMLServer.dll) in your project. Your RaptorXML Server installation contains a signed DLL file, named Altova.RaptorXMLServer.dll. This DLL file will automatically be added to the global assembly cache (GAC) when RaptorXML Server is installed using the RaptorXML Server installer. The GAC is typically in the folder: C:\WINDOWS\assembly.
To add the RaptorXML DLL as a reference in a .NET project, do the following:
1.With the .NET project open, click Project | Add Reference. The Add Reference dialog (screenshot below) pops up.
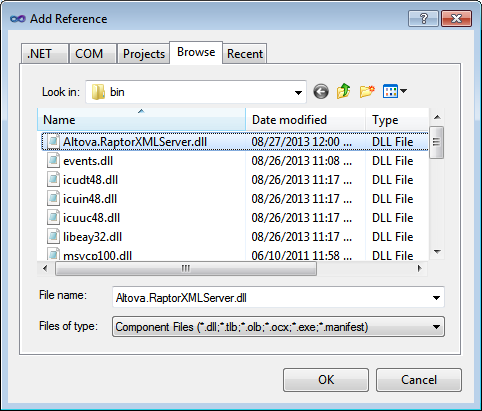
2.In the Browse tab, go to the folder: <RaptorXML application folder>/bin, select the RaptorXML DLL Altova.RaptorXMLServer.dll, and click OK.
3.Select the command View | Object Browser to see the objects of the RaptorXML API.
Once the Altova.RaptorXMLServer.dll is available to the .NET interface and RaptorXML has been registered as a COM server object, RaptorXML functionality will be available in your .NET project.
Note: RaptorXML will automatically be registered as a COM server object during installation. There is no need for a manual registration.
Note: If you receive an access error, check that permissions are correctly set. Go to Component Services and give permissions to the same account that runs the application pool containing RaptorXML.
Code examples
A C# example and a Visual Basic .NET example showing how the RaptorXML API can be used via its .NET interface are listed in the following topics. The files corresponding to these listings are available in the examples/serverAPI folder of the RaptorXML application folder.