Batch Convert XBRL to Excel
The Batch Conversion command in the Excel ribbon enables you to convert multiple XBRL instance files to Excel format. The result would be the same as if you imported multiple XBRL instance files and then saved them to Excel format. The main advantage is that the conversion is processed as a batch. To perform a batch conversion, add all the required files to a batch as follows:
1.Click the add-in tab in the Excel ribbon.
2.Click the Batch Conversion button.
3.Click Add Files. Alternatively, right-click the grid and select Add Files from the context menu.
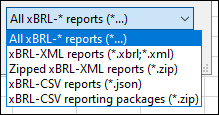
The formats available for batch conversion are shown in the screenshot below:
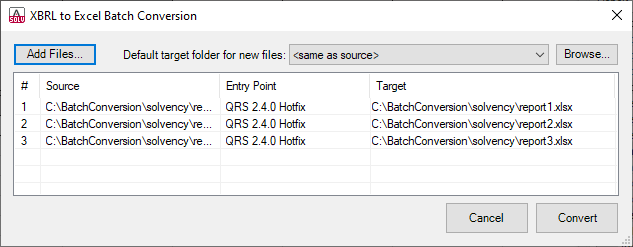
Additional options in the Batch Conversion dialog box
The conversion dialog box allows you to perform the following additional tasks:
1.To add files from additional source locations to the same batch, click Add Files.
2.Whenever you add new files to the batch, their default target folder is the same as the source folder. If you want to assign a specific target folder to all new files by default, select the relevant folder from the list called Default target folder for new files. To add new entries to the list, click Browse and choose a folder. By default, the Default target folder for new files option affects new files that you add to the batch. However, if you change this option, and if the files already exist in the batch (in the grid), you will be informed that the change will affect all the new files added to the batch. Click Yes if the target folder of existing files should also be changed.
3.You can choose to save all converted files to the same target folder or set a different target folder for each file. To change the target folder of specific files, select the relevant files in the grid, right-click the grid, and select Set target folder from the context menu.
4.You can rename the target files. First, select the files in the grid. Then right-click the grid and select Rename from the context menu (or press F2). You can change both the file name and the file path. However, if you change the path, make sure that it exists.
5.To remove files from the batch, select them, right-click the grid, and select Remove from the context menu (or press the Del key).
Select multiple files
To select multiple files from the grid, use the standard Windows key combinations, for example:
•While holding the Ctrl key pressed, click to select the files of interest.
•Click an empty area in the dialog box and drag the cursor over the files that you want to select (rectangular selection).
•Press Ctrl+A to select all the files in the grid.
Once the batch is ready, click Convert to process all the files in it.
Validation report
The outcome of the conversion is reported in the Validation Report window (see screenshot below). For more information about validation messages, see Validate Data.
